Struggling to launch a new mouthwash line? The bottle's material, design, and production process can seem overwhelming, potentially delaying your product and increasing costs.
Choose PET for its clarity, safety, and cost-effectiveness. The right bottle design, combined with a suitable bottle blowing machine, ensures a premium look and efficient production. This guide covers everything from bottle design to selecting the right equipment for a successful launch.
As consumer interest in personal care grows, many brands are expanding into the mouthwash market. I've seen this firsthand. The bottle is the first thing a customer sees and holds, making it a critical part of the product experience. A successful launch depends on getting the packaging right from the very beginning. Let's break down the entire process step-by-step to help you make the best choices for your brand.
Why is PET the Ideal Material for Your Mouthwash Bottles?
Worried your bottle material won't protect your mouthwash formula? Choosing the wrong plastic can lead to chemical reactions, leaks, or a cheap appearance, which can damage your brand's reputation.
PET (Polyethylene Terephthalate) is perfect for mouthwash. Its excellent chemical stability works well with formulas containing alcohol or antibacterial agents. Plus, its high clarity and lightweight nature offer a premium feel over HDPE and more safety than glass.
When a client comes to me for a new project, the first question is always about the material. For mouthwash, I almost always recommend PET. It provides the perfect balance of aesthetics, performance, and cost. Let's dive deeper into why this material is the industry standard.
Superior Clarity and Brand Perception
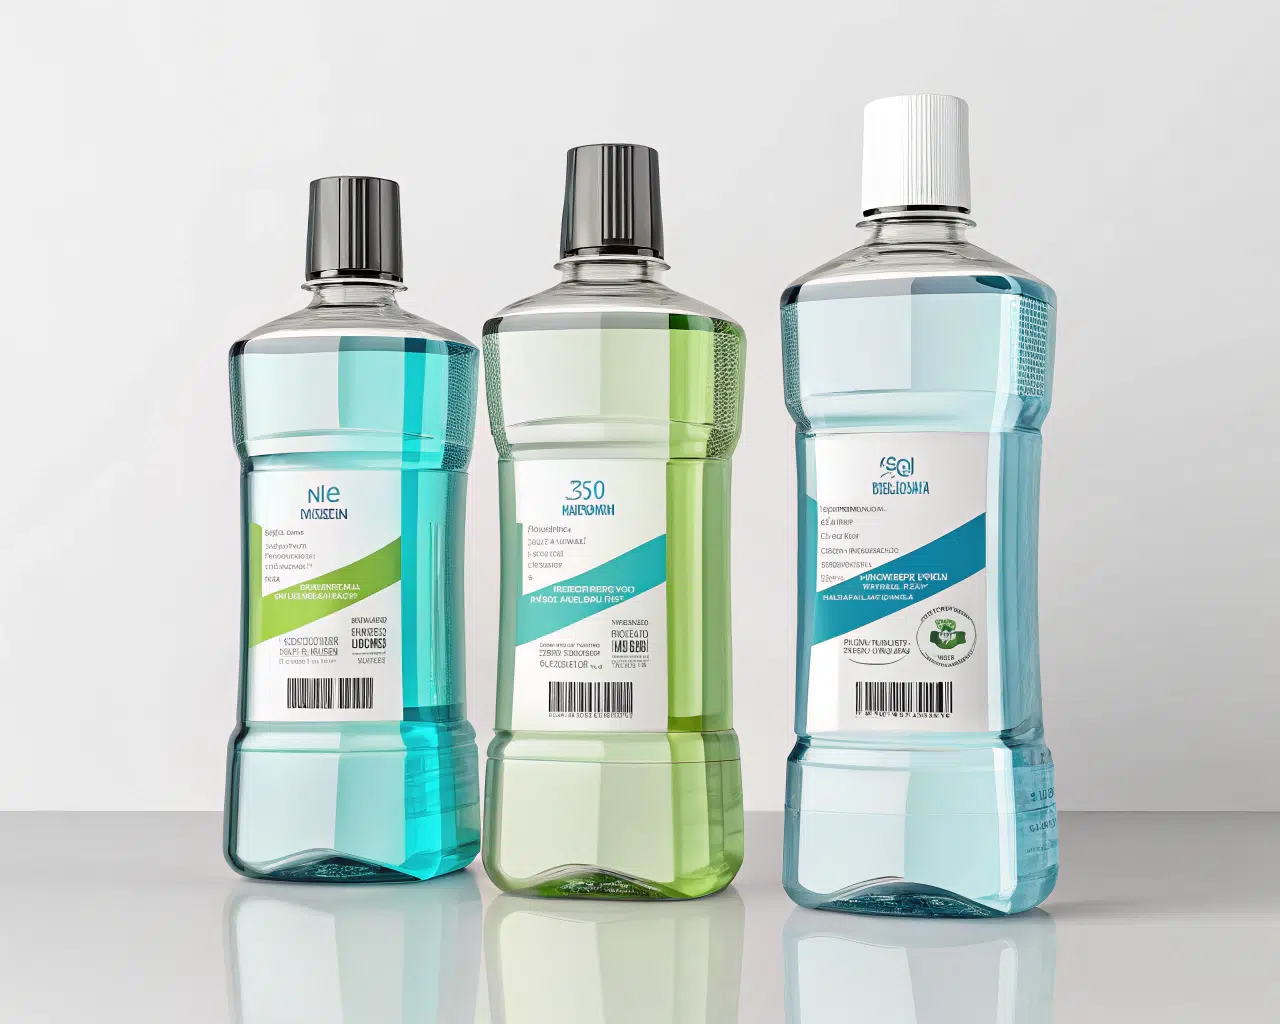
The look of your product on the shelf is its first handshake with the customer. PET is crystal clear, similar to glass. This transparency showcases the color and quality of the mouthwash inside, which builds trust. A bright blue or green liquid looks much more appealing in a clear container. Compared to HDPE, which is naturally milky or opaque, PET gives a much more premium and clean impression. This visual quality elevates your brand and helps it stand out in a crowded aisle. It looks professional and hygienic, which is exactly what you want for an oral care product.
Excellent Chemical Compatibility
Mouthwash isn't just colored water. It often contains active ingredients like alcohol, essential oils, and antibacterial agents like Cetylpyridinium Chloride (CPC). You need a container that won't react with these ingredients. PET has excellent chemical resistance. It creates a strong barrier that prevents the alcohol from degrading the plastic and stops the essential oils from escaping or losing their flavor. This stability ensures your product remains safe, effective, and tastes the way it was formulated, from the factory to the customer's bathroom.
Cost and Production Efficiency
While glass feels premium, it's heavy and fragile. This increases shipping costs and the risk of breakage. PET is lightweight and shatterproof, which immediately lowers logistics expenses and reduces product loss. On the production line, PET bottles are rigid and perform exceptionally well in high-speed filling and capping operations. They don't deform easily, which means fewer line stoppages and better overall efficiency.
Here is a simple table to compare the materials:
| Feature | PET (Polyethylene Terephthalate) | Glass | HDPE (High-Density Polyethylene) |
|---|---|---|---|
| Clarity | Excellent (Glass-like) | Excellent | Poor (Translucent to Opaque) |
| Weight | Lightweight | Heavy | Very Lightweight |
| Durability | Shatter-resistant | Fragile | Very Durable |
| Chemical Resistance | Excellent for mouthwash formulas | Inert, but can have coating issues | Good, but less premium feel |
| Recyclability | Widely recycled (Code 1) | Widely recycled | Widely recycled (Code 2) |
| Production Speed | Excellent for high-speed lines | Slower due to fragility | Good, but can be too flexible |
| Brand Perception | Premium, Clean, Modern | Classic, Premium | Economical, Basic |
What are the Common Sizes and Shapes for Mouthwash Bottles?
Unsure what bottle size or shape will resonate with your target customers? A poorly chosen design can be awkward to use, hard to label, and fail to stand out on the shelf, confusing buyers.
Mouthwash bottles typically come in 50ml travel, 250ml standard, and 500ml family sizes. Popular shapes include classic round, modern square, and ergonomic designs with recessed grips. The shape directly influences the complexity and cost of the blow bottle mold.
The shape and size of your bottle define how customers will use and perceive your product. A small bottle is great for travel, while a large one signals value for families. The design choice here is not just about looks; it's about function and manufacturing feasibility.
Matching Bottle Size to Consumer Needs
Understanding your customer is key. I guide my clients to think about the different use cases for their products. This helps determine the right size mix for their brand.
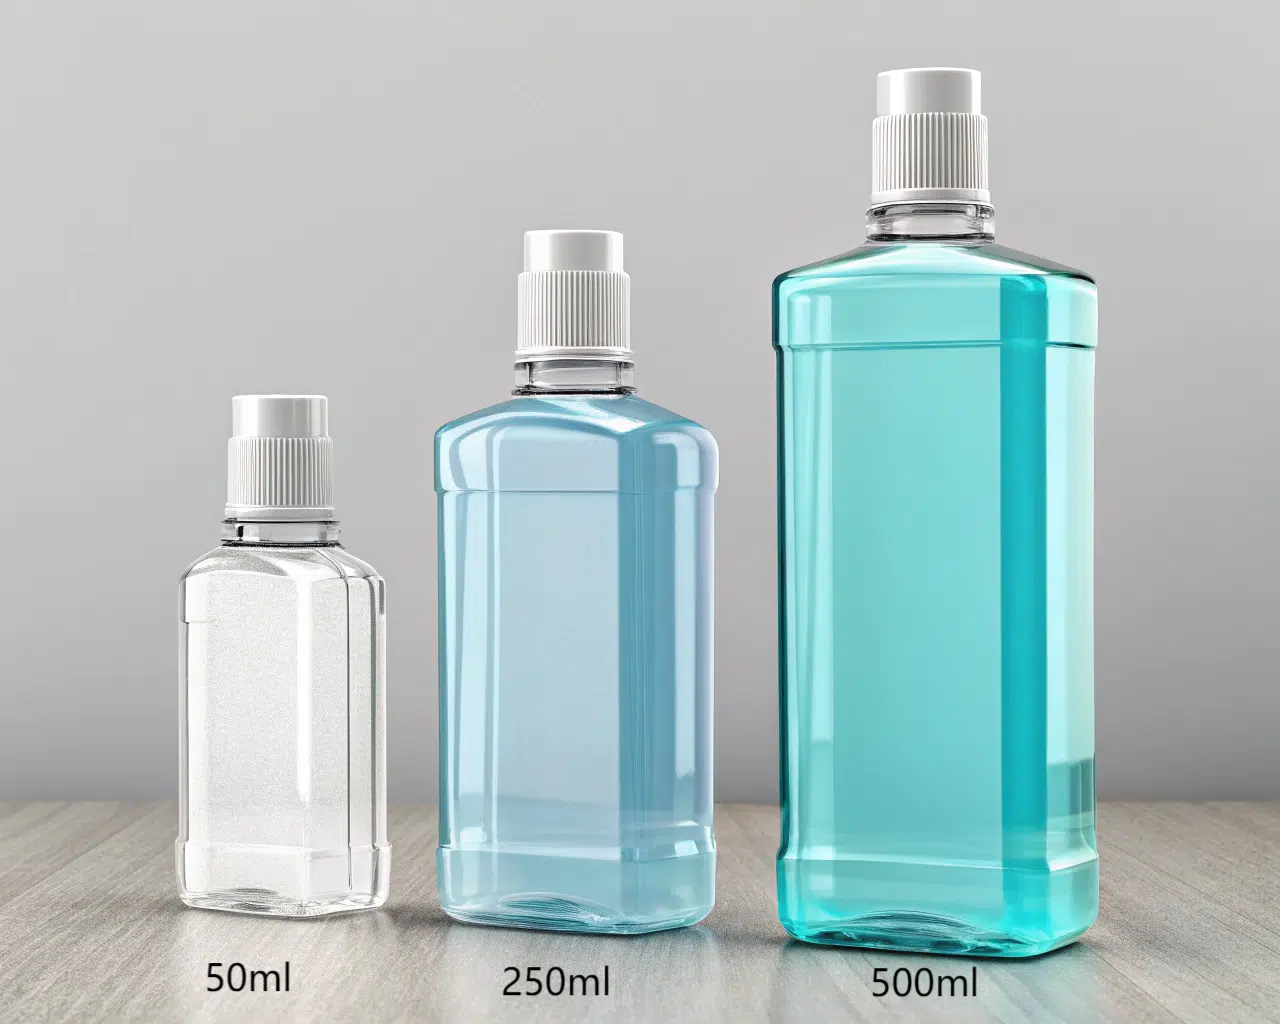
- 50ml–100ml (Travel Size): These are perfect for on-the-go use, fitting easily into a purse, gym bag, or carry-on luggage. They are great for product trials and encouraging new customers to try your brand without commitment.
- 250ml (Regular Size): This is the most common size on the market. It's a great balance for daily use for an individual or a couple. It doesn't take up too much space on the bathroom counter and feels substantial in hand.
- 500ml+ (Family or Value Size): This size offers better value and is targeted at families or loyal users who don't want to repurchase frequently. It communicates value and is a staple for many households.
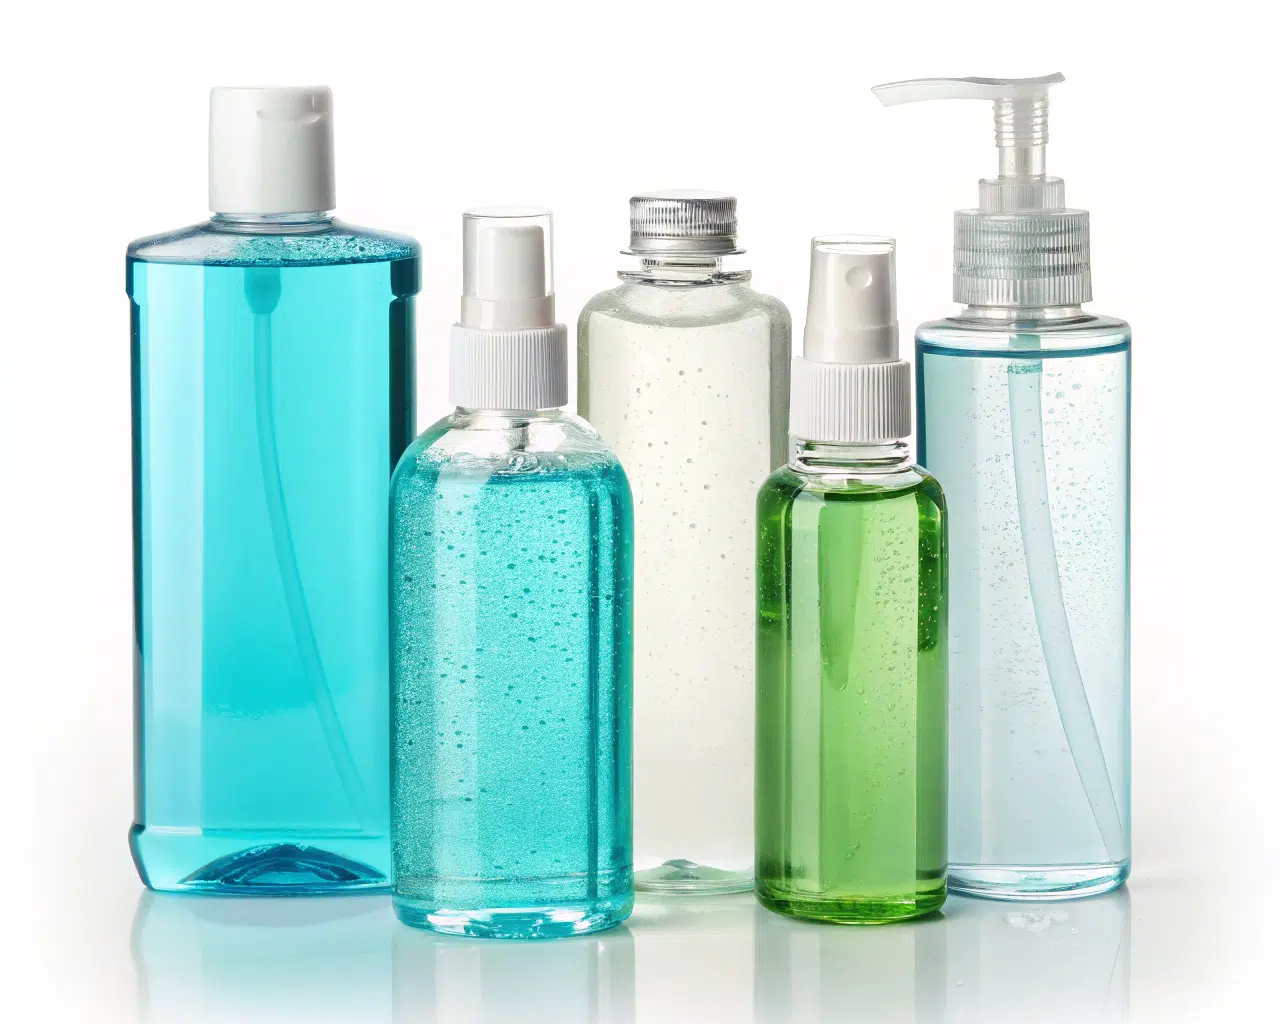
Design Trends: Round vs. Square Bottles
The bottle's silhouette is a major part of its identity.
- Round Bottles: This is the classic, traditional shape. Round bottles are generally easier and cheaper to produce. They are strong, easy to label with wraparound labels, and feel comfortable to hold.
- Square or Rectangular Bottles: These shapes offer a modern, premium look. They stand out on the shelf and can be packed more efficiently in shipping boxes, which saves a small amount on logistics. However, labeling can be more complex (requiring front and back labels), and the sharp corners require a more precise blowing process to ensure uniform wall thickness.
- Ergonomic Shapes: Many brands incorporate recessed grips or curved designs. These make a larger bottle easier to hold and pour, especially with wet hands. While functionally superior, these custom shapes require a more complex and expensive blow bottle mold.
How Bottle Shape Impacts Mold Design
The bottle shape you choose has a direct impact on the manufacturing process. A simple round bottle might only need a two-part mold. A more complex shape with an offset neck or an integrated handle could require a more complicated mold with sliding parts.
| Bottle Shape | Mold Complexity | Pros | Cons |
|---|---|---|---|
| Standard Round | Low | Easy to make, strong, easy to label | Very common, may not stand out |
| Standard Square | Medium | Modern look, space-efficient | Requires precise blowing, harder corners |
| Custom Ergonomic | High | Excellent user experience, unique look | Higher mold cost, potentially slower cycle time |
What are the Key Design Considerations for a Mouthwash Bottle?
Afraid your bottle design will cause problems on the production line or for the end-user? An incompatible neck finish or poor ergonomics can lead to capping failures, leaks, and customer complaints.
Focus on three key areas: the cap type, neck finish, and ergonomics. Common neck finishes like 24/410 and 28/410 must match your chosen cap and filling line. Ergonomic features like an easy-to-grip shape are crucial for a good user experience.
A beautiful bottle is useless if it leaks or is difficult to use. Functionality is paramount. I always tell my clients that the cap, the neck, and the way the bottle feels in your hand are just as important as the overall shape. These details determine the success of the product in the real world.
Selecting the Right Cap and Neck Finish
The cap and neck are a team; they must work together perfectly. The most common neck finish standard you'll see is something like "28/410".
- The first number (e.g., 28) is the outer diameter of the neck opening in millimeters.
- The second number (e.g., 410) refers to the thread style—its height and how many turns it takes to seal.
You must choose a cap and bottle that share the same neck finish. Common cap types for mouthwash include:
- Simple Screw Cap: Basic, cheap, and reliable.
- Flip-Top Cap: Allows for one-handed use, convenient for quick pours.
- Measuring Cup Cap: A cap that doubles as a measuring cup is a huge value-add for customers, as it ensures they use the correct dosage. This is the most popular style.
- Pump Dispenser: Less common for mouthwash but useful for thicker formulas or for users who prefer not to pour.
Ensuring Compatibility with Filling Lines
Your bottle design must be compatible with your automated filling and capping equipment. The neck needs to have a rigid, flat top surface (the "land seal area") for the capping machine to apply consistent pressure and create a tight seal. The bottle's base must be stable enough to travel smoothly on a conveyor belt without tipping over. If the design is too top-heavy or has an unstable base, it can cause major headaches and downtime during production.
Designing for User-Friendliness (Ergonomics)
Think about who is using the bottle.
- Grip: For larger 500ml bottles, incorporating indented or textured grip areas can prevent the bottle from slipping, especially with wet hands.
- Pouring: The neck and opening design should allow for a smooth, controlled pour without gurgling or splashing.
- Children: If the product could be used by children, a child-resistant cap (CRC) is a critical safety feature. The overall bottle shape should also be easy for smaller hands to manage.
Here's how different caps suit different needs:
| Cap Type | Primary Advantage | Best For | Considerations |
|---|---|---|---|
| Measuring Cup Cap | Dosing accuracy, convenience | General daily use, medicated mouthwashes | Slightly higher cost, must be easy to read |
| Flip-Top Cap | One-handed use | Travel sizes, users with limited dexterity | Sealing mechanism must be robust |
| Standard Screw Cap | Low cost, simple | Budget-friendly brands, basic formulas | Less convenient, no measuring feature |
Should You Choose a Semi-Auto or Fully-Auto Blow Molding Machine?
Confused about which blow molding machine is right for your production scale? Choosing the wrong one can mean high labor costs for large volumes or an excessive investment for a small startup.
For small batches or market testing (200–300 bottles/hour), a semi-automatic machine is cost-effective. For mass production (800–1,200+ bottles/hour), a fully automatic bottle blowing machine is essential to save on labor and ensure consistency.
This is a critical business decision that depends entirely on your production goals and budget. I recently worked with a client who faced this exact choice. Let me walk you through the thought process.
The Case for Semi-Automatic Machines
A semi-automatic bottle blowing machine is a great entry point. With this setup, an operator manually loads PET preforms into the heater and then transfers the heated preforms into the blowing station.
- Lower Initial Investment: The upfront cost is significantly lower than a fully automatic system, making it ideal for startups or brands testing a new product line.
- Flexibility: It's generally easier and faster to change molds on a semi-auto machine, giving you more flexibility to produce different bottle shapes in small quantities.
- Lower Output: The tradeoff is production speed. A typical two-cavity semi-auto machine produces around 200-400 bottles per hour, depending on the operator's speed. This is perfect for small-scale orders but becomes a bottleneck for growth.
The Power of Fully Automatic Production
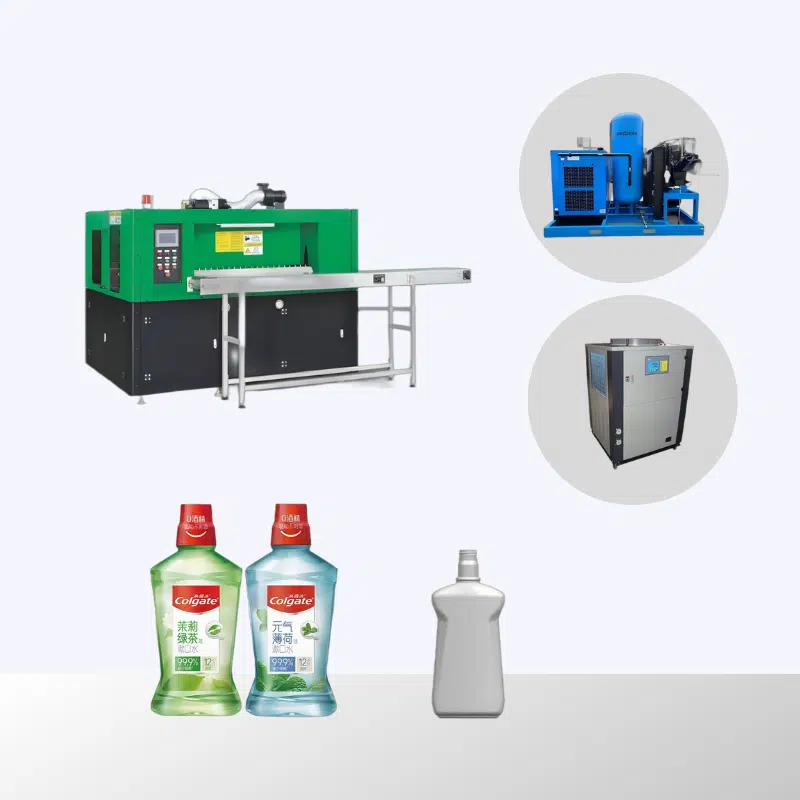
A fully automatic machine handles the entire process, from feeding preforms to ejecting finished bottles, without any operator intervention. This is where you achieve scale.
I have a great example of this. A well-known toothpaste brand from Taiwan, with decades of history, decided to enter the growing mouthwash market. They knew they needed to produce at scale to be competitive. They came to us, and we helped them design their bottle and configure their first production line. They chose a 2-cavity fully automatic bottle blowing machine. This machine produces around 1,200 bottles per hour. Running for 20 hours a day, they can make 24,000 bottles. The project was so successful that they ordered a second identical line from us in less than six months. This kind of scaling is only possible with automation.
Machine Footprint and Key Specifications
The choice also depends on your factory space. Fully automatic machines, with their integrated preform loaders and conveyors, require a larger footprint.
| Feature | Semi-Automatic Machine | Fully Automatic Machine |
|---|---|---|
| Typical Capacity (BPH) | 200–400 (for a 2-cavity mold) | 800–1200+ (for a 2-cavity mold) |
| Labor Requirement | 1 Operator per machine | 1 Operator can oversee multiple machines |
| Consistency | Operator-dependent | Very high and stable |
| Initial Cost | Low | High |
| Footprint | Small | Large |
| Best For | Startups, market trials, small batches | Mass production, established brands |
How Can You Achieve Flawless Clarity with a Custom Blow Mold?
Worried your finished bottles will look cloudy, wavy, or inconsistent? A poorly made mold can ruin the premium appearance of your PET bottles, no matter how good the material is.
Achieving crystal-clear bottles requires a high-precision blow bottle mold. The mold cavities must be meticulously polished to a mirror finish. Precise preform weight control is also critical to prevent uneven stretching, which causes visual defects.

The blow mold is the heart of the bottle-making process. It is a custom piece of engineering that turns a simple test-tube-shaped preform into your final bottle. The quality of this tool directly determines the quality of your product. Investing in a good mold is non-negotiable.
The Importance of Mold Material and Polishing
The surface of your bottle will be a perfect replica of the surface inside your mold cavity. To get a glass-clear, flawless bottle, the mold cavity itself must be perfect.
- Mold Material: We typically use high-grade aviation aluminum alloy (like 7075) or steel for blow molds. Aluminum is lighter and has excellent heat transfer, which allows for faster cooling and shorter cycle times. Steel is more durable for extremely high-volume, long-term production.
- Cavity Polishing: The cavities are polished by skilled technicians using progressively finer abrasives until they achieve a mirror-like finish. Any tiny scratch or imperfection in the mold will show up on every single bottle. For mouthwash bottles, where clarity is key, this polishing step is critical.
Controlling Bottle Weight and Wall Thickness
The process starts with a PET preform. The weight of this preform determines the final weight of the bottle. We work with clients to select or design the perfect preform. If you use a custom bottle shape, you may need a custom preform mold to create the ideal preform. During the blowing process, a stretch rod pushes the heated preform down while high-pressure air inflates it. A well-designed blow bottle mold and a correctly calibrated machine ensure this stretching and inflation happens evenly, resulting in consistent wall thickness. Uneven walls can create weak spots or visual distortions that look like waves in the plastic.
Designing Mold Cavities for Your Production Needs
A blow mold can have one or more cavities. A 1-cavity mold produces one bottle per cycle, a 2-cavity mold produces two, and so on. The number of cavities you choose depends on your required output and your machine's capacity.
- For Semi-Automatic Machines: 1 or 2-cavity molds are most common.
- For Fully Automatic Machines: 2, 4, or even 6-cavity molds are used to maximize output.
The decision on cavity count must balance production speed against mold cost. A 4-cavity mold costs more than a 2-cavity mold, but it doubles your potential output on the same machine. This decision should align with your business plan and sales forecast.
How Do You Ensure a Perfect Neck Finish for Different Cap Types?
Frustrated by questions like "Will this cap fit my bottle?" A mismatch between the bottle's neck finish and the cap can lead to leaks, product spoilage, and a complete production halt.
The answer lies in matching the neck's diameter (e.g., 24mm, 28mm) and thread profile (e.g., 410) precisely. This data must be confirmed early. The blow bottle mold is engineered to form these threads with high precision, ensuring a perfect, leak-proof seal.
I get this question all the time. A client will send me a picture of a cap they like and ask if we can make a bottle for it. The answer is always yes, but we need the exact specifications. The neck finish is one of the most critical technical details of any bottle design. Getting it wrong is not an option.
Decoding Neck Finish Standards (e.g., 28/410)
Let's break down the code. As I mentioned before, a "28/410" finish means:
- 28: The neck has an approximate outer diameter of 28mm.
- 410: This refers to the thread style. A 410 thread is short and requires about 1.5 turns to seal. A 415 thread is taller and takes 2 full turns to seal, often used for child-resistant caps.
It is crucial to get the technical drawing for the exact cap you plan to use. We then design the bottle's neck finish in the blow bottle mold to be a perfect match, ensuring compatibility.
Choosing a Neck Size: Consumer Habits and Filling Equipment
Why choose a 28mm neck over a 24mm neck?
- Consumer Experience: A wider 28mm neck allows for a faster, smoother pour, which users often prefer for a product like mouthwash. It also makes the bottle feel more substantial.
- Filling Line Speed: For production, a larger opening can allow for faster filling speeds with less risk of splashing, which can improve overall line efficiency.
- Cap Availability: 24/410 and 28/410 are extremely common standards, meaning you will have a wide variety of cap suppliers and styles to choose from.
Mold Design for Thread Precision
The neck area of the bottle is not blown like the body. It is precision-molded by the neck-split inserts in the mold. These inserts are engineered to exacting tolerances to form the threads perfectly every time. This precision is what guarantees a secure seal. If the threads are incomplete or malformed, the cap won't seal correctly, leading to leaks during shipping or on the store shelf. This is a quality failure that can lead to product returns and damage your brand's reputation. That's why we focus so heavily on getting the mold's neck design right.
What Machine Configuration and Auxiliary Equipment Do You Need?
Thinking a blow molding machine is all you need? Forgetting the essential auxiliary equipment can lead to production inefficiencies, poor bottle quality, and unexpected costs that derail your budget.
A complete production line requires more than just the bottle blowing machine. You need an air compressor, a water chiller, an air dryer, and conveyors to create an efficient system. Each piece plays a vital role in producing a quality bottle.
Buying a bottle blowing machine is like buying a car engine. You still need the wheels, the chassis, and the transmission to make it go anywhere. I always prepare a full checklist for my clients so there are no surprises. A complete and properly matched system is key to smooth production.
Core Machine Configuration
The blow molding machine itself needs to be configured for your specific bottle.
- Heating Lamps: The oven that heats the preforms has multiple zones of infrared lamps. We adjust the power and position of these lamps to heat the preform precisely where needed. This ensures the plastic flows correctly during blowing.
- Clamping Unit & Stretch Rod: The clamps that hold the mold shut must be strong enough to resist the high-pressure air. The stretch rod that stretches the preform vertically must be the correct length and shape for your bottle design. These are all adjusted during the initial setup.
Essential Auxiliary Equipment Explained
This table outlines the support system your blow molding machine needs. Neglecting any of these will result in problems.
| Auxiliary Equipment | Function | Why It's Crucial for Mouthwash Bottles |
|---|---|---|
| High-Pressure Air Compressor | Provides compressed air (around 30-40 bar) to inflate the bottle. | This is the force that forms the bottle. Without it, the machine is useless. The compressor must be large enough to supply the required volume of air for your machine's speed. |
| Air Dryer & Filters | Removes moisture and oil from the compressed air. | Moisture in the air can cause cloudiness or streaks in the clear PET bottle. Oil can contaminate the bottle, which is unacceptable for an oral care product. |
| Water Chiller | Circulates cold water through channels in the blow mold. | This rapidly cools the mold and the plastic bottle. Proper cooling is essential to set the bottle's shape, achieve high clarity, and allow for a fast cycle time. |
| Mold Temperature Controller | Maintains a precise mold temperature. | While the chiller provides the cooling, this unit fine-tunes the temperature for optimal bottle quality. Consistency is key. |
| Conveyor System | Transports finished bottles away from the machine. | For an automated line, conveyors are needed to move bottles to the next stage, such as leak testing, labeling, or filling. |
Sample Production Line Layout
To give you an idea, for a 2-cavity fully automatic machine producing 1200 BPH, you would typically need at least a 2.0 m³/min high-pressure air compressor and a chiller with a cooling capacity of around 5 HP. We always help our clients calculate these requirements to ensure they purchase the right size auxiliary equipment for their specific setup.
How Can a Turnkey Service Simplify Your Mouthwash Bottle Production?
Feeling overwhelmed by coordinating bottle designers, mold makers, and machine suppliers? Managing multiple vendors is complex, time-consuming, and increases the risk of costly mistakes and delays.
A turnkey service, like ours, handles everything from start to finish. We help you refine your bottle design, create the blow bottle mold, and deliver a fully configured bottle blowing machine, ensuring all components work together seamlessly.
My goal is to make this process as simple as possible for my clients. They are experts in creating great mouthwash; I am an expert in creating the perfect bottle for it. A turnkey solution means you have one point of contact and one team responsible for the entire project's success. This eliminates the blame game between suppliers and ensures a smooth, integrated process.
Step 1: Concept to Design Optimization
It all starts with your idea. You might come to me with a rough sketch, a competitor's bottle you like, or just a list of requirements. My team and I will:
- Discuss your brand, target market, and functional needs.
- Create a professional 3D design of the bottle.
- Optimize the design for manufacturing, ensuring it's not just beautiful but also efficient to produce.
- We can even 3D print a physical prototype so you can hold it in your hand and approve the design before we ever cut steel for the mold.
Step 2: Mold and Preform Integration
Once the bottle design is finalized, we move to the tooling. We handle the technical details of designing and manufacturing the blow bottle mold. This includes selecting the right preform. Sometimes a standard preform works, but for unique bottle shapes, we might need to design a custom one, which involves creating a preform mold as well. We provide you with detailed mold drawings for final confirmation and manage the entire manufacturing process, ensuring the highest quality standards.
Step 3: Machine Delivery and Project Management
This is where it all comes together. We don't just sell you a machine. We provide the right machine for your project. As I mentioned with my Taiwanese client, we supplied the entire line. We helped them choose the 2-cavity full-auto machine, calculated their need for auxiliary equipment, and ensured the mold was a perfect fit. Our team managed the project from the initial design discussions to the final delivery and setup. Their success, and their decision to quickly order a second line, is the best testament to the value of a true turnkey partnership.
Conclusion
In short, launching a successful mouthwash line depends on a holistic approach, from smart material and design choices to the right production equipment. A turnkey partner simplifies this complex process.
Frequently Asked Questions (FAQ)
1. What is the average lead time for a custom mouthwash bottle mold?
Typically, a custom blow bottle mold takes about 30 to 45 days to design, manufacture, and test. This can vary depending on the complexity of the design and the number of cavities. We provide a detailed project timeline upfront.
2. Can I use the same blow mold for different bottle sizes?
No. A blow mold is made for one specific bottle design and volume. The cavity is a fixed shape. If you want to produce a different size, for example, a 250ml and a 500ml bottle, you will need two separate blow molds. However, they can often be run on the same bottle blowing machine with some adjustments.
3. How much does a fully automatic production line for mouthwash bottles cost?
The cost can vary widely based on the machine's output, number of cavities, and the size of the required auxiliary equipment. A complete line can range from tens of thousands to over a hundred thousand dollars. The best approach is to contact us with your specific requirements (bottle size, desired hourly output) for a detailed, customized quotation.
4. What are the most common quality issues in PET bottle blowing and how do we solve them?
The most common issues are:
- Hazy/Cloudy Bottles: Often caused by moisture in the compressed air or improper heating/cooling. This is solved with a good air dryer and a properly configured chiller.
- Uneven Wall Thickness: Caused by incorrect heating of the preform or a misaligned stretch rod. This is fixed by adjusting the machine settings.
- Pearlescence/Whitening: Occurs when the PET is over-stretched. This is solved by adjusting heating temperatures and blowing pressures.
5. Do I need a special type of PET for colored mouthwash bottles?
You don't need a special type of PET, but you do need colored PET preforms. The color is added to the raw material before the preform is injection molded. You can get preforms in a wide variety of transparent colors like blue, green, or amber. The blowing process itself remains the same.
🔗 Learn More about Mouthwash Bottles, Plastic Packaging and Blow Molding
Mouthwash – Wikipedia
Covers the definition and packaging requirements of mouthwash, which often influences bottle material and closure design.Bottle Design – Wikipedia
Provides an overview of functional and aesthetic considerations in bottle design, including shape, neck finish, and labeling areas.Blow Molding – Wikipedia
Describes the process of forming hollow plastic bottles, including mouthwash containers, using compressed air and heated preforms.Plastic Bottle – Wikipedia
General explanation of plastic bottle types, materials, and usage — relevant for packaging liquids like mouthwash.Polyethylene Terephthalate – Wikipedia
Details the material commonly used in mouthwash bottle production (PET), including its clarity, safety, and recyclability.Filling Machine – Wikipedia
Provides insight into liquid filling machines, which must match bottle design and material for efficient mouthwash packaging.🔗 Related Pages on Our Website
Automatic Blow Molding Machines – iBottler
Discover our full range of automatic blow molding solutions for PET bottles.Semi-Automatic Blow Molding Machines – iBottler
Ideal solutions for startups and small-scale PET bottle production.
