Worried about receiving a faulty blow mold from overseas? The costs of returns and production delays are high. You need a reliable way to verify quality before it leaves the factory.
The best way to check blow mold precision is to demand a comprehensive quality control process from your supplier. This includes CMM reports for critical dimensions, photos and videos of the mold, and evaluating trial bottle samples before approving the shipment. This ensures everything is perfect from the start.
I've been in the PET packaging industry for over 16 years, and I understand the anxiety that comes with ordering a new mold. A tiny mistake in a dimension can halt your entire production line. It's a huge risk, especially when the mold has to travel thousands of miles to reach you. That's why I’ve built my entire process around one core idea: confirm everything before it ships. This detailed guide is based on my experience helping over 300 factories get it right the first time. Let’s walk through the exact steps you should take to eliminate any uncertainty and ensure the mold you receive is the mold you need.
Why is it so critical to check blow mold precision before delivery?
Are you worried that a new mold might not work when it arrives? It’s a common fear. A small error can lead to big production headaches and unexpected costs.
You must check precision beforehand to prevent costly mistakes. This guarantees the mold fits your machine and produces perfect bottles, saving you from production halts, material waste, and the nightmare of international returns. It's about securing your investment and peace of mind.

Diving Deeper into Pre-Shipment Verification
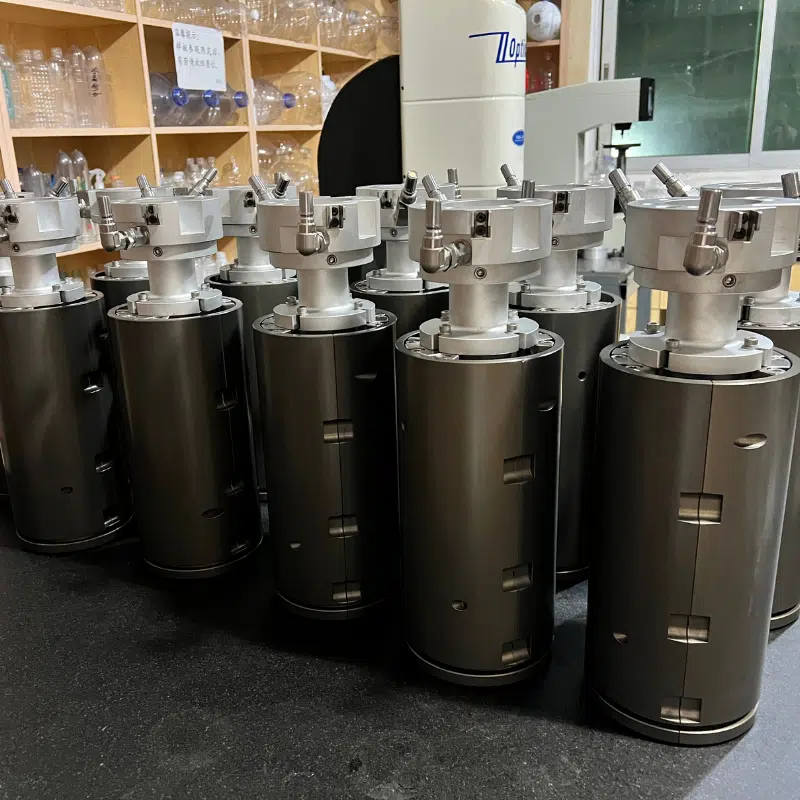
In my experience, many first-time customers are most concerned about the details. They worry about the neck finish, the overall bottle shape, the liquid fill level, and especially the mounting dimensions. They know that once a blow bottle mold arrives at their factory, even a millimeter's difference can make it unusable. Their fear is completely justified. The cost isn't just the mold itself; it's the lost production time, the wasted materials, and the complex logistics of fixing the problem from afar.
I had a client in Vietnam who was very concerned about this. They used a specific SIDEL bottle blowing machine, and they were skeptical that we could match the mounting dimensions perfectly. They had been burned before. I understood their hesitation completely. So, I pulled up the official drawings for their machine and compared them, line by line, with the design for their new mold. I sent them screenshots and even did a video call to review the data together. This transparency is the first step. True precision isn't just about manufacturing; it's about proving that precision to the customer before the mold ever leaves my workshop. Verifying these details early prevents the most common and costly problems down the line.
What are the top risks of skipping pre-shipment mold inspection?
Thinking of saving time by skipping the mold inspection? This can seem tempting, but the potential problems can shut down your entire operation, costing you far more than you saved.
Skipping a pre-shipment inspection can lead to scrap bottles, severe parting lines, and incorrect fill levels. These issues directly translate into wasted material, poor product appearance, and customer complaints, ultimately damaging your bottom line and brand reputation.

A Closer Look at Potential Failures
When a mold is not properly verified, the problems that arise are predictable and severe. It's not a matter of if you'll have issues, but when. Based on my 16 years of experience, these problems fall into a few key categories, each with significant financial and operational consequences. A simple pre-shipment check can prevent all of them. Let's break down exactly what can go wrong.
1. Scrap Bottles and Material Waste
An imprecise mold cavity or poor cooling channel placement can lead to inconsistent wall thickness. Thin spots can cause bottles to break during filling or shipping, while thick spots are a waste of PET material. Over a production run of millions of bottles, this wasted material adds up to a significant financial loss. This is often linked to the quality of the initial preform mold as well, but the blow mold is the final step where things can go wrong.
2. Severe Parting Lines and Cosmetic Defects
If the two halves of the mold don't align perfectly, you'll see a prominent line, or "flash," on the side of the bottle. This is a sign of poor craftsmanship and can be sharp enough to be a safety concern. It makes the product look cheap and can lead to rejection by major retailers. This alignment issue, known as mismatch, is one of the easiest things to spot and correct at the factory.
3. Incorrect Volume and Filling Errors
The internal volume of the mold cavity is a critical dimension. If it's off, your bottles will either be overfilled, wasting product, or underfilled, cheating the customer. Both can lead to legal and regulatory problems. Verifying the trial bottle's volume against the design specification is a non-negotiable step.
Here is a table summarizing these risks:
| Risk Category | Specific Problem | Consequence for Your Business |
|---|---|---|
| Production Failure | Mold does not fit the machine | Complete production halt. Requires expensive, time-consuming modifications or a full remake. |
| Quality Control | High scrap rate (e.g., deformed bottles) | Wasted PET material, increased cost per unit, lower production efficiency. |
| Product Appearance | Heavy, visible parting lines | Unprofessional look, potential for rejection by retailers, negative brand perception. |
| Functional Failure | Incorrect fill level/bottle volume | Wasted product (overfill) or consumer complaints and legal issues (underfill). |
| Performance Issue | Poor wall thickness distribution | Bottles may fail during filling, capping, or transportation, leading to costly recalls. |
What key dimensions should be verified on a PET blow mold?
You know inspection is important, but what exactly should you look at? It's easy to get overwhelmed by technical drawings. You need to focus on the few things that matter most.
Focus on the non-negotiables: the neck finish for a perfect seal, cavity symmetry for bottle stability, and cooling channel positions for efficiency. Getting these three areas right solves 90% of potential bottle production problems and ensures compatibility with your bottle blowing machine.

Breaking Down the Critical Dimensions
A blow bottle mold is an instrument of precision. While every part of the drawing is important, a few dimensions are absolutely critical for the success of your product. These are the areas where I focus my team's attention before any shipment. Think of it as a hierarchy of importance; if these are correct, the mold will almost certainly perform well.
1. Neck Finish Dimensions (The "A, T, E, H" Dimensions)**
This is the most critical part. The neck finish ensures the bottle can be capped correctly and creates a perfect seal. An incorrect neck finish means all your bottles will leak. We use specific gauges and high-precision calipers to check these four key measurements:
- A-Dimension: The outer diameter of the thread.
- T-Dimension: The thread's outer diameter.
- E-Dimension: The inner diameter of the neck opening.
- H-Dimension: The height from the top of the neck to the support ring.
2. Mold Cavity Symmetry and Volume**
The shape of the bottle is defined by the mold cavity. It's not just about looks; it's about performance. We check for two things here:
- Symmetry: Is the cavity perfectly symmetrical? An asymmetrical bottle can be unstable on a conveyor belt and may have weak spots. We use a CMM (Coordinate Measuring Machine) to check this.
- Volume: Does the cavity volume match the design specification? We confirm this by measuring the volume of the trial bottles.
3. Cooling Channel Position and Diameter**
Efficient cooling is the key to a fast cycle time and consistent bottle quality. If cooling is uneven, some parts of the bottle will shrink differently, causing warping. We verify that the cooling channels are drilled exactly as specified in the design, checking their position relative to the cavity and their diameter.
| Key Dimension to Verify | Why It's Critical | How to Verify It |
|---|---|---|
| Neck Finish (A, T, E, H) | Ensures a leak-proof seal with the cap. | Use "Go/No-Go" gauges, precision calipers, and optical comparators. Compare against drawings. |
| Mounting Dimensions | Guarantees the mold will fit into your specific blowing machine. | Measure with calipers and CMM. Compare directly against the machine's technical specifications. |
| Cavity Volume & Symmetry | Determines the final fill level and the bottle's stability and strength. | CMM report for symmetry. Water-fill test on sample bottles for volume. |
| Cooling Channel Placement | Dictates cycle time and bottle quality. Uneven cooling causes warping. | Check placement against drawings using CMM or manual measurement. Verify channel diameter. |
| Parting Line Alignment | Prevents cosmetic defects (flash) and ensures a smooth, safe bottle surface. | Visual inspection of mold halves. Microscopic analysis of sample bottles' parting line. |
| Vent Slit Dimensions | Allows air to escape during blowing, preventing defects like cloudy spots. | Use feeler gauges or microscopic inspection to check the depth and width of vents. |
What inspection tools and reports should you demand from your mold supplier?
You can't be at the factory yourself, so how do you trust the inspection? You need proof. Asking for the right documents turns a "trust me" situation into a "show me" situation.
Always demand a full documentation package. This must include a CMM report for key dimensions, detailed photos of the finished mold with measurements, and clear pictures of the initial trial bottles. This is non-negotiable proof of quality.
Your Evidence Package: From Data to Photos
A professional mold maker should have a standard quality control process that generates clear, understandable reports. These documents are your eyes in the factory. They provide objective evidence that the blow bottle mold has been made to your exact specifications. When I work with a new client, I make it a point to provide this package without them even having to ask. It builds trust and shows we stand behind our work. Here's what you should always ask for:
1. The CMM Report (Coordinate Measuring Machine)**
This is the most important document. A CMM is a highly precise machine that touches the mold at hundreds of points to create a 3D digital map. It then compares this map to the original design file and reports any differences, often down to a thousandth of a millimeter. You should specifically request the CMM report for critical areas like the neck finish, cavity dimensions, and mounting points.
2. The Mold Cavity Map**
This is a visual report, often a color-coded diagram, that shows any deviation across the entire surface of the mold cavity. Green areas are perfect, while yellow or red areas show slight deviations. It's a very quick and easy way to see the overall quality of the machining work.
3. High-Resolution Photos and Videos**
A picture is worth a thousand words. You should request:
- Photos of the finished mold: From all angles.
- Photos with a caliper or ruler: Showing key dimensions being measured. This is a great way to double-check the CMM report with a simple visual.
- Video of the mold halves opening and closing: This shows the smoothness of the action and the alignment of the parting line.
- Photos of the trial blow samples: Clear, well-lit photos of the first bottles produced by the mold.
This complete package leaves no room for doubt. It allows you to see the evidence of quality for yourself and approve the shipment with full confidence.
How should you evaluate trial blow samples before approving shipment?
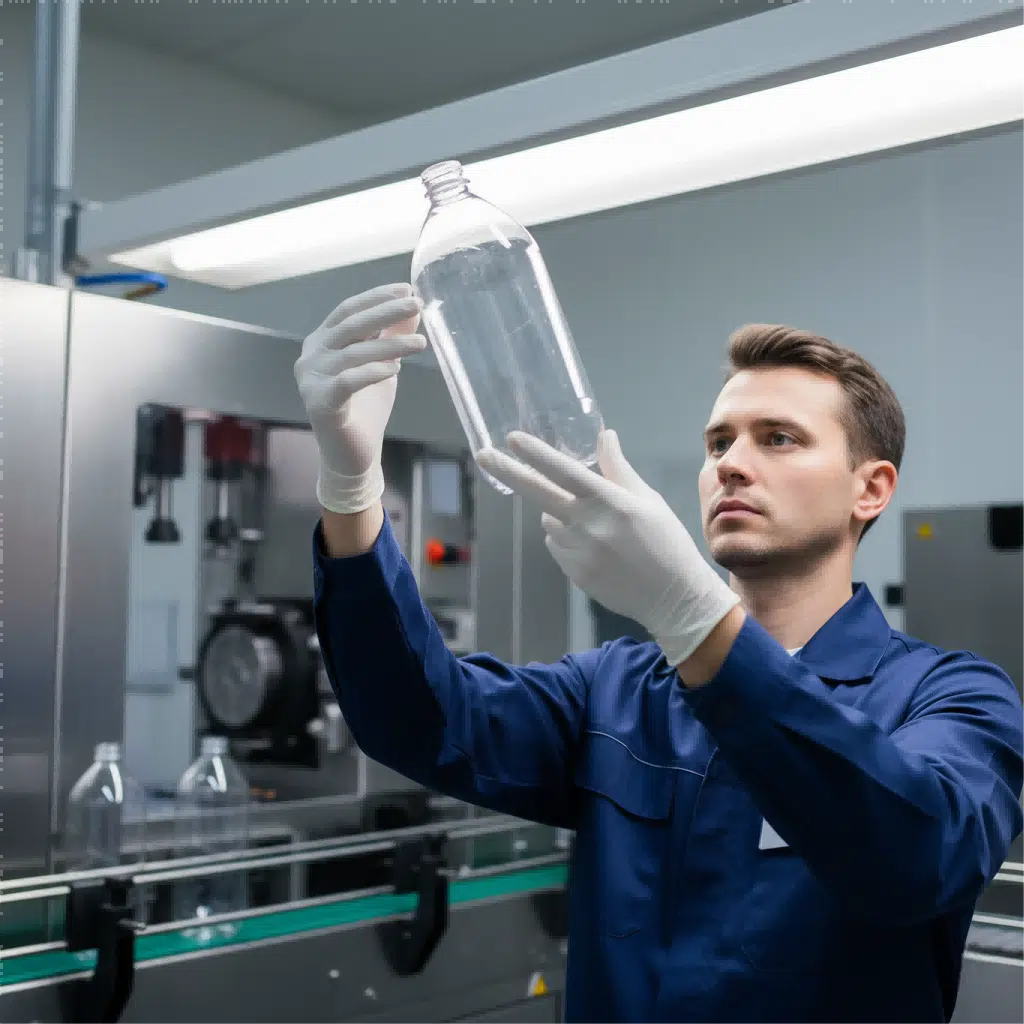
Getting photos of the first bottles is great, but what are you looking for? A bottle might look "good," but you need to check it like an engineer to spot hidden flaws.
Evaluate samples systematically. Check the neck finish for flatness, scrutinize the parting line for smoothness, measure the wall thickness for consistency, and compare the fill level line to your design. These four checks reveal the true quality of the mold.
A Practical Guide to Sample Bottle Evaluation
The sample bottles are the ultimate test of the mold. They are the physical result of all the design and machining work. Approving the mold based on these samples is the final green light. When I send samples to a client—or photos of them—I encourage them to perform a few simple but critical tests. For my Vietnamese client with the SIDEL bottle blowing machine, we sent 5 physical samples so they could do these checks themselves.
1. Visual and Tactile Inspection**
- Neck Finish Flatness: Place the bottle upside down on a perfectly flat surface. Does it wobble? The top sealing surface must be perfectly flat to prevent leaks.
- Parting Line Smoothness: Run your fingernail across the parting line. Is it a smooth bump or a sharp, noticeable ridge? A sharp ridge (flash) indicates poor mold alignment.
- Clarity and Defects: Hold the bottle up to a light. Are there any cloudy spots, streaks, or black specks? These can indicate issues with venting or material contamination.
2. Measurement and Comparison**
- Wall Thickness: If possible, you should cut a bottle open to check the wall thickness distribution. Is it even from top to bottom? Specialized gauges can measure this, but even a visual check of a cross-section is helpful. Consistent wall thickness is crucial for the bottle's strength.
- Weight: Weigh the sample bottle on a precision scale. Does it match the target weight from your design? This confirms the amount of PET material being used.
- Fill Level: Fill the bottle with water up to the designated fill line on your design drawing. Is it accurate? This confirms the mold's internal volume is correct.
By systematically checking these points, you can be very confident that the mold is producing bottles that meet all your quality standards.
What is the ultimate checklist for confirming before your mold ships?
You're ready to approve the shipment, but you have that nagging feeling you might be forgetting something. A final checklist can provide the structure and confidence you need for the final sign-off.
Use a final checklist. Confirm the CMM report is approved, sample bottles are perfect, mounting dimensions are verified via video, all accessories are included, and the shipping crate is secure. This methodical check prevents last-minute surprises.

The 8-Point Pre-Shipment Confirmation Checklist
Over the years, I've developed a final confirmation checklist that I run through with every single client before a blow bottle mold leaves my facility. It acts as a final handshake agreement and ensures we are both 100% aligned. I recommend you use a similar list with your supplier. It formalizes the process and protects both you and the manufacturer.
Here is the checklist I use. We confirm each point with an email or a message so there's a written record.
| Checklist Item | Confirmation Method | Why It's Important |
|---|---|---|
| 1. Final Design Approval | Customer signs off on the final V3/V4 version of the 2D/3D drawings. | Ensures any changes made during design are officially approved. |
| 2. CMM Report Approval | Customer reviews and approves the CMM data for critical dimensions. | Formal acceptance of the mold's dimensional accuracy. |
| 3. Sample Bottle Approval | Customer approves physical samples or detailed photos/videos of them. | Final confirmation that the mold produces the desired product. |
| 4. Mounting Dimension Verification | Video call or detailed photos showing measurement of mounting points. | Guarantees the mold will physically fit your bottle blowing machine. |
| 5. Included Accessories Check | Photo of all included parts (e.g., spare seals, bolts, tools) packed together. | Prevents missing parts on arrival, which can cause installation delays. |
| 6. Anti-Rust Protection | Photo showing the mold coated in anti-rust agent and wrapped. | Protects the precision steel surfaces from corrosion during sea freight. |
| 7. Shipping Crate Inspection | Photo of the mold secured inside a sturdy, seaworthy wooden crate. | Ensures the mold is protected from damage during transit. |
| 8. Shipping Documents Confirmation | Supplier sends draft Bill of Lading, packing list, and invoice for review. | Allows you to check all details (address, contents, value) are correct for customs. |
Walking through this list systematically eliminates ambiguity. It means that when you give the final "OK to ship," you do so with complete information and confidence.
How should you handle issues found during a pre-shipment inspection?
What happens if the inspection reveals a problem? It can be a stressful moment. Your reaction and communication strategy are key to getting the problem solved quickly and effectively.
Stay calm and communicate clearly. Immediately send the supplier objective evidence like photos or the CMM report showing the defect. Reference the approved drawing, define the required correction, and agree on a timeline for the modification and re-testing.
A Productive Approach to Problem-Solving
Finding an issue before shipment is actually a good thing! It means the inspection process worked. It's much easier and cheaper to fix a problem in the manufacturer's workshop than in your own. The key is to handle it professionally, not confrontationally. I've been on both sides of this conversation, and a collaborative approach always yields the best results.
Step 1: Document the Evidence Objectively**
The first step is to clearly present the problem. Don't just say "the dimension is wrong." Provide the proof.
- For a dimensional error: Send the section of the CMM report that shows the deviation. Circle the incorrect number and send the corresponding page from the approved drawing that shows the correct number.
- For a sample bottle defect: Send a clear, high-resolution photo. Use arrows or circles to pinpoint the issue (e.g., the parting line flash, a cloudy spot).
Step 2: Define the Required Correction**
Be specific about what needs to be done. For example: "The neck height 'H' dimension measured 21.5mm on the CMM report, but the approved drawing requires 21.2mm +/- 0.05mm. Please re-machine this surface to meet the specification." This is clear, actionable, and based on previously agreed-upon documents.
Step 3: Agree on a New Timeline**
Ask the supplier two questions:
- How will you make this correction?
- How long will it take?
A good supplier will explain the plan (e.g., "We will use the CNC machine to adjust the surface, which will take 4 hours") and give you a firm date for the re-inspection. This should include time for a new mold trial to produce new sample bottles. You must insist on seeing the results of a new test; don't just take their word that it's fixed. This loop of "test-find-fix-retest" is fundamental to quality assurance for any precision item, from a simple preform mold to a complex blowing mold.
Why should you work with suppliers who offer transparent QC?
Choosing a supplier can feel like a gamble. How do you find one you can trust? The answer lies not in their promises, but in their processes.
Choose suppliers who have a standard, transparent Quality Control (QC) process. A partner who proactively provides CMM reports, trial videos, and detailed photos isn't just selling a mold; they are selling confidence, reliability, and a lower-risk investment.

The Value of a Process-Driven Partner
After 16 years in this business, I can tell you this: the best suppliers don't wait for you to ask for quality checks. They have a robust, unchangeable QC process that they follow for every single order. They volunteer the information because they are proud of their work and want you to be confident in your purchase. This is the single biggest difference between an average supplier and a true manufacturing partner.
A transparent QC process is a sign of a mature and professional company. It shows they have invested in:
- The Right Equipment: They own and operate precision measurement tools like a CMM.
- The Right People: They have a dedicated QC team that is independent of the production team.
- The Right System: They have a standardized workflow for inspection, reporting, and correction.
When a supplier, like we strive to be, sends you a full QC package for your blow bottle mold without prompting, it sends a powerful message: "We are confident in our quality, and we want you to be, too." They are not afraid of scrutiny; they welcome it. This transparency turns a potentially stressful transaction into a predictable and secure business partnership. It proves they understand your concerns—the fear of receiving a faulty product—and have built their entire system to prevent that from ever happening.
Conclusion
In short, checking blow mold precision before it ships is not optional; it's essential for protecting your investment. By demanding clear reports and evaluating samples, you eliminate risk and ensure success.
Frequently Asked Questions
1. What if I receive a mold and it doesn't fit my machine?
This is a nightmare scenario that our pre-shipment checks are designed to prevent. If this happens, you must contact the supplier immediately with photographic and video evidence. A reputable supplier will work with you on a solution, which could involve them paying for local modification or, in a worst-case scenario, arranging for the mold to be returned and replaced. This is why verifying mounting dimensions against your machine's drawings before shipment is absolutely critical.
2. How much does a pre-shipment inspection cost?
Professional suppliers should include their standard QC process (CMM reports, photos, samples) as part of the mold's price. It is not an extra "service"; it is a fundamental part of manufacturing a precision tool. If a supplier wants to charge you extra for a basic CMM report, you should consider that a major red flag.
3. Can I reject a mold if it fails the pre-shipment inspection?
Yes, absolutely. The purpose of the inspection is to give you a chance to approve or reject the mold before it ships. If it does not meet the specifications laid out in the approved drawings, you have every right to reject it and demand the supplier fix the issues. The contract is for a mold that meets the drawing, not an "almost correct" one.
4. What is a CMM report and why is it more reliable than manual measurements?
A CMM (Coordinate Measuring Machine) report is a document generated by a machine that uses a high-precision probe to measure an object in 3D. It is far more accurate and reliable than manual measurements with calipers because it eliminates human error, can measure hundreds of points automatically, and compares the physical object directly against the 3D design file. It is the gold standard for dimensional verification in modern manufacturing.
5. How long does it typically take to fix a mold if an issue is found?
The time depends on the severity of the problem. A minor adjustment to a non-hardened surface might take a few hours. A more significant issue, like re-welding and re-machining a critical area of the cavity, could take several days. A good supplier will be transparent about the issue and provide a firm timeline for the correction and the subsequent re-testing.
