Are you frustrated by persistent bottle defects? You have already checked the mold and the blow molding machine, but the problems continue. The real source may be the hidden "powerhouse" of your production line: the auxiliary equipment.
Your bottle defects might not originate from your mold or machine. Instead, the problem often lies with the auxiliary equipment. An unstable air compressor or a faulty water chiller can disrupt the entire process, causing issues with air pressure, purity, and cooling temperatures, which directly impacts bottle quality.
It is incredibly frustrating when you have spent hours, or even days, checking every component of your mold and every setting on your blow molding machine, only to see the same defects appear again and again. You start to question your equipment, your process, and maybe even your own expertise. But what if the problem isn't where you are looking? What if the root cause is hiding in plain sight, in the very systems that power your entire operation? Before you dive into diagnosing your air compressor and water chiller, I strongly recommend you rule out the first two stages of potential issues. Please follow our detailed troubleshooting guides in order:
- The Blow Mold "Health Check": A Complete Guide to Defects Caused by Mold Issues
- A Troubleshooting Guide for Bottle Defects Caused by the Blow Molding Machine Itself
If you have completed the checks in those guides and are still facing challenges, then this article is the final piece of your puzzle. Let's explore the critical role of your auxiliary equipment.
After the Mold & Machine: Why are auxiliaries your next diagnostic step?
Are you wondering why to look at support equipment now? You've confirmed the mold and machine are working perfectly. Yet, bottles are still failing. The foundation of your process is likely the problem.
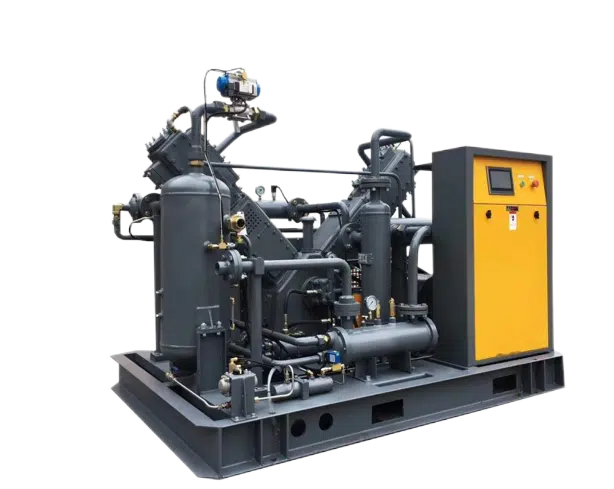
The stability of your entire blow molding line depends on its life support systems. The air compressor and water chiller provide the consistent, clean, and cool conditions necessary for quality production. If this foundation is unstable, nothing built upon it will be reliable.
I often tell my clients to think of their production line like a high-performance race car. Your blow bottle mold is the precision-engineered chassis, and your blow molding machine is the powerful engine. You can have the best engine and chassis in the world, but if you put dirty fuel in the tank or don't have a working radiator, you won't win any races. In fact, you probably won't even finish a lap. The air compressor system is your "fuel," providing the high-pressure air that forms the bottle. The water chiller is your "radiator," removing heat to ensure the bottle holds its shape. When these systems falter, the entire process breaks down, no matter how perfect the primary equipment is.
This article operates on the assumption that you have already performed your due diligence. You have meticulously inspected the mold for any signs of wear, damage, or venting issues. You have verified that all mechanical and electrical components of the blow molding machine are functioning within their specified parameters. You have calibrated sensors, checked heaters, and confirmed clamp movements. After all this work, pointing a finger at a noisy compressor in the corner or a chiller unit outside might seem like a long shot, but in my experience, it's the most logical next step. These auxiliary units are the unsung heroes, the "powerhouse" that provides the stable environment required for a repeatable, high-quality process. Their influence is profound, yet they are often the most overlooked components in the entire factory. We will now investigate why the stability of your production is so deeply connected to its "life support systems."
The Concept of a Stable Foundation
In manufacturing, especially in a sensitive process like PET blow molding, consistency is everything. We strive for a "stable process," which means producing the same high-quality bottle with every single cycle. This stability can only be achieved when all process inputs are controlled and consistent.
- Input 1: The Material (PET Preform): The quality of the preform is a given starting point.
- Input 2: The Tooling (Mold): We've assumed the mold is in perfect condition.
- Input 3: The Machine: We've assumed the machine is operating correctly.
- Input 4: The Energy (Compressed Air): This is where the air compressor comes in. Is the pressure, flow, and quality of the air consistent every single second?
- Input 5: The Cooling (Chilled Water): This is the chiller's job. Is the temperature and flow of the water constant throughout the entire production run?
If inputs 4 or 5 are fluctuating, the process becomes unstable. It's a simple chain of cause and effect. An unstable process leads directly to inconsistent bottle quality and a high scrap rate. By focusing on the auxiliary equipment, we are not just troubleshooting a defect; we are reinforcing the very foundation of our entire production process. It’s about moving from a reactive "fire-fighting" mode to a proactive "process control" mindset.
Part 1: The Air Compressor "Health Check" – Is it more than just pressure?
Is your pressure gauge reading normal, but bottles are still failing? The issue is often not the pressure itself. It could be unstable flow or contaminated air, which the gauge won't show.
A healthy air compressor system delivers more than just pressure. It must provide stable pressure, sufficient flow rate (CFM), and clean, dry air. Problems like undersized tanks, air leaks, or worn piston rings can severely compromise air quality and delivery, leading to defects.

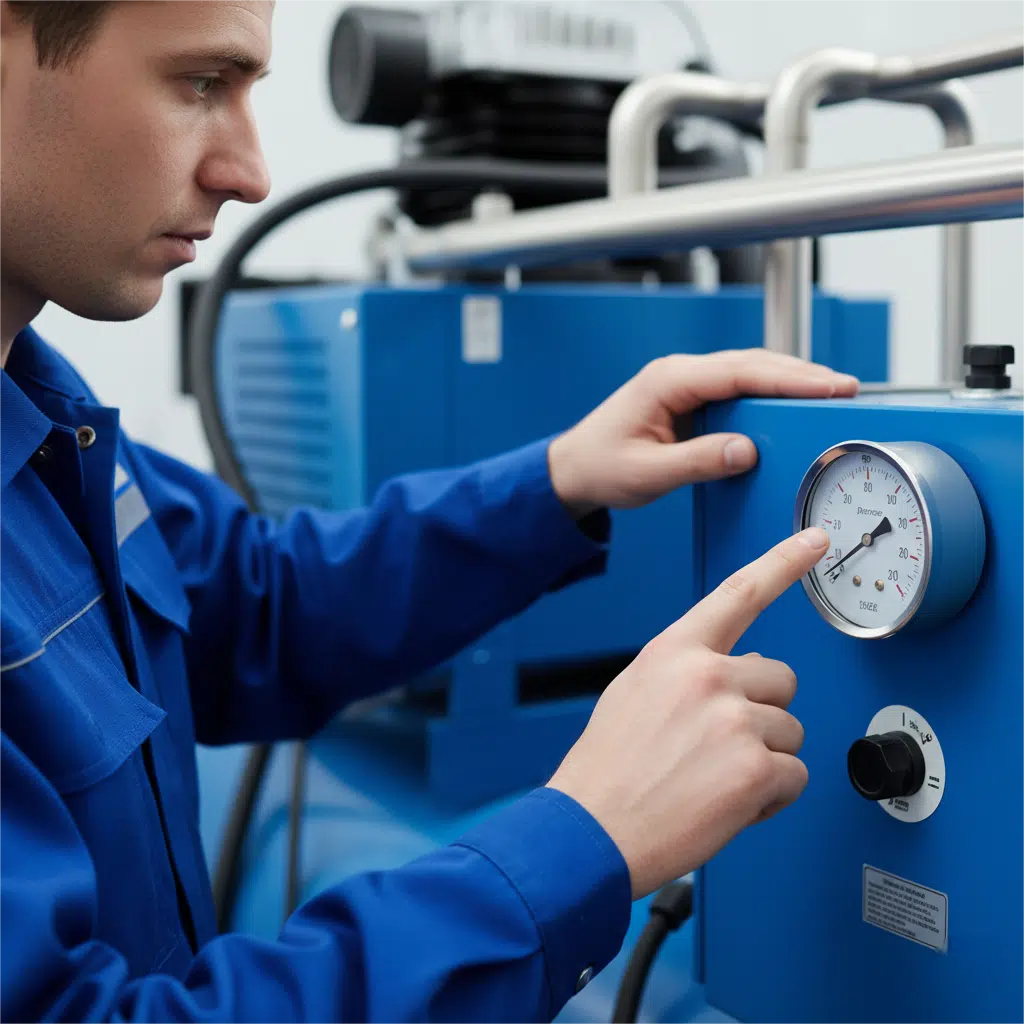
The pressure gauge on the blow molding machine is one of the most misleading indicators of system health. I have visited countless factories where a manager points to a gauge reading a perfect 35 bar and says, "The compressor is fine!" However, this static pressure reading only tells you the pressure in the line between cycles. It tells you nothing about what happens during the most critical 0.2 seconds of the blowing process. The real factors to consider are pressure stability, flow rate, and air purity.
Deeper Than Pressure: The Three Pillars of Air System Health
To truly diagnose your air system, you need to think beyond the pressure gauge and evaluate these three critical pillars:
Pressure Stability: The pressure must not just reach the setpoint; it must stay there with minimal fluctuation during the machine cycle. A large pressure drop during the final blow stage will result in an under-formed bottle.
- Common Cause: An undersized air receiver tank. The tank acts as a buffer. If it's too small, it can't supply the instantaneous high volume of air required, causing the pressure to plummet.
- How to Check: Watch the pressure gauge on the air tank itself, not just the machine. Does the needle swing wildly every time the machine cycles? A drop of more than 1-2 bar is a red flag.
Flow Rate (CFM/CMM): Flow rate, measured in Cubic Feet per Minute or Cubic Meters per Minute, is the volume of air the compressor can deliver. You can have high pressure but low flow, which is like trying to fill a bucket with a high-pressure mist. It has force, but not enough volume to do the job quickly.
- Common Cause: Leaks in the main pipeline. A series of small, hissing leaks at joints, valves, and connectors can add up to a massive loss of flow.
- How to Check: When the factory is quiet (during a break or after hours), walk the entire length of the main air line from the compressor to the machine. Listen for audible hissing. For a more thorough check, use a spray bottle with soapy water on every joint and connection. Bubbles will form instantly at any leak point.
Air Purity: The air used to blow a bottle becomes part of the final product. Any contaminants in the air will end up inside your bottle. The two main enemies are oil and water.
- Common Cause: Worn piston rings or seals in the compressor, or a malfunctioning air dryer. As a compressor ages, tiny amounts of lubricating oil can get past the seals and enter the air stream. Separately, all compressed air contains water vapor, which must be removed by a dryer and filters.
- How to Check: Check the condensate drained from your air filters and tank. Is it milky or oily? A healthy system should discharge mostly clear water. You can also perform a "white cloth test" by cracking open a valve slightly and letting the air blow onto a clean white cloth for a minute. Any oil or rust will show up as a discolored spot. It is shocking how many production issues can be traced back to something as simple as a dirty filter, which is why a proper guide to solving common PET blow molding defects must always consider the air source.
Here is a simple table to guide your initial diagnosis:
| Pillar of Health | Common Problem | Simple Diagnostic Test |
|---|---|---|
| Pressure Stability | Undersized air receiver tank | Watch the pressure gauge on the tank during a cycle. Does it drop more than 1-2 bar? |
| Flow Rate | Leaks in the main air distribution pipeline | Listen for hissing sounds. Use soapy water on all pipe joints to find bubbles. |
| Air Purity | Worn compressor components or failed filters | Check the color of the condensate drain. Perform a white cloth test for oil residue. |
By systematically evaluating these three pillars, you gain a far more accurate picture of your air compressor's health than a simple pressure reading could ever provide.
What bottle defects are caused by an unhealthy air system?
Are your bottles weak, deformed, or contaminated? These are classic signs of an unhealthy air system. Insufficient air flow leads to incomplete forming, while oil or water in the air lines will create specks and odors inside the bottle.
An unhealthy air system directly translates into visible and functional bottle defects. When high-pressure air flow is insufficient, the PET material doesn't stretch fully into the mold cavity. When the air is contaminated, those contaminants are embedded directly into the final product.
The connection between the air system and the final bottle is direct and unforgiving. Unlike some process parameters where you have a small window of tolerance, the blowing air is a critical, non-negotiable component. A problem here will manifest as a defect, guaranteed. Let's break down the most common defects linked to pressure drops and contamination.
Defect 1: Weak / Incompletely Formed Bottles
This is perhaps the most common defect related to the air compressor. The bottle may have a generally flimsy feel, or specific areas like the corners of a square bottle may be thin and not fully defined.
- The Root Cause (It's about Flow, not just Pressure): The key is understanding that forming a bottle requires a massive volume of air delivered in a fraction of a second. The machine's pressure gauge might read 30 bar, but if the flow rate (CFM) from the compressor system is insufficient, the pressure at the preform will drop dramatically the moment the blow valve opens. The system simply cannot supply air fast enough to fill the expanding bottle and keep the pressure high. This results in the PET material not being pushed firmly against the cold mold walls, leading to poor material distribution and weak spots.
- Solutions:
- Check for Leaks First: Before considering a new compressor, conduct a thorough leak detection test using soapy water as described before. A 20-30% loss of air due to leaks is common in poorly maintained systems. Fixing these is the cheapest and most effective solution.
- Evaluate Air Tank Capacity: The air receiver tank acts as a "battery" for compressed air. It stores a large volume right next to the machine. If the tank is too small, it depletes too quickly, causing the pressure drop. A general rule of thumb is to have a tank large enough to supply the air for several cycles without the compressor needing to turn on.
- Pipe Diameter: Ensure the main airline diameter is large enough. An undersized pipe restricts flow, creating a bottleneck no matter how powerful your compressor is.
Defect 2: Black Specks or Odor in the Bottle
This is a critical quality failure, especially for food and beverage products. The customer sees black dots inside the bottle or smells a faint oily or musty odor.
- The Root Cause (Contamination): The source is almost always contaminants from the compressor system that have been carried into the bottle with the high-pressure air.
- Compressor Oil: As piston rings and seals wear out inside the compressor, a fine mist of lubricating oil can enter the compressed air.
- Water and Rust: All air contains moisture. When compressed, this water vapor condenses into liquid water. If not properly removed, this water can sit in the pipes and air tank, causing rust to form. These microscopic rust particles can then break free and be blown into the bottle.
- Solutions: This requires a multi-stage defense system. Relying on a single filter is not enough.
- Air Dryer: An industrial-grade refrigerated or desiccant air dryer is not optional; it is essential. It should be installed right after the compressor to remove the bulk of the water vapor.
- Multi-Stage Filtration: A series of high-efficiency filters must be installed just before the blow molding machine. This is a critical point that is often missed. A typical setup includes:
- Particulate Filter: Removes solid particles like dust and rust.
- Coalescing Filter (Oil Removal): Specifically designed to capture and remove fine oil aerosols.
- Activated Carbon Filter: Removes oil vapor and odors.
- Regular Maintenance: Filters are not permanent. They have a limited lifespan and must be replaced according to the manufacturer's schedule. A clogged filter is just as bad as no filter at all. A failure in this system can compromise even the most perfect PET bottle mold design.
| Bottle Defect | Primary Air System Cause | Corrective Action |
|---|---|---|
| Weak / Incompletely Formed Bottle | Insufficient Air Flow Rate (Low CFM) | 1. Find and repair all leaks in the airline. 2. Verify the air receiver tank is adequately sized for the machine. |
| Black Specks, Oily Residue, or Odor | Oil, water, or rust contamination in the air | 1. Ensure the air dryer is functioning. 2. Install and maintain a multi-stage filtration system. |
A Deep Dive: What is the critical 4000-hour air compressor service?
Ever been told your compressor needs a 4000-hour service? It's not just a suggestion. Ignoring it is a leading cause of premature failure and air contamination as oil degrades and filters become saturated.
This is a crucial maintenance milestone for most industrial compressors. Neglecting it means vital components like lubricating oil, oil filters, and air-oil separators are pushed past their effective lifespan. This directly leads to increased wear, higher operating temperatures, and contaminated air.
I remember a call from a client in Malaysia. He was frantic. His production had stopped because the air compressor kept shutting down. He said, "I don't understand, it's a good brand, it's not that old." I asked him a simple question: "When was the last time you did the 4000-hour service?" There was a long pause on the phone. Then he asked, "Does it need service? I didn't know."
This is a story I've heard many times. Because air compressors are noisy, they are often installed in a separate room, outdoors, or in a forgotten corner of the factory. They are a classic example of "out of sight, out of mind." My Malaysian client had me walk him through finding the hour meter on his machine's control panel. It read over 6,000 hours. He had run it 2,000 hours past its major service interval. His issue wasn't a faulty machine; it was a complete lack of preventative maintenance. This experience highlights why understanding and performing this service is so critical. Investing in a properly sized and maintained cost-efficient air system pays for itself through reliability.
Why 4000 Hours?
The 4000-hour mark (which is about 6 months of 24/7 operation) is not an arbitrary number. It is based on the typical operational lifespan of key consumable components under industrial conditions.
- Lubricating Oil: Compressor oil is not like car engine oil. It is a highly specialized fluid designed to lubricate, cool, and seal the compressor elements (screws or pistons). After 4000 hours, the additives in the oil break down. It loses its viscosity, its ability to dissipate heat, and it becomes acidic, which can start to corrode internal components.
- Filters: Just like the oil filter in your car, the compressor's oil filter, air filter, and air-oil separator have a finite capacity to hold dirt and contaminants. Once they reach saturation, they either become blocked, reducing performance, or they allow contaminants to pass through into your air system.
The Non-Negotiable 4000-Hour Service Checklist
Ignoring this service is like deciding not to change the oil in your car. It might save you a small amount of money today, but it will lead to a catastrophic and expensive failure down the road. Here is what absolutely must be done during this service:
| Component to Replace | Function | Consequence of Neglect |
|---|---|---|
| Specialized Compressor Oil | Lubricates moving parts, cools the compression process, and creates a seal for efficiency. | Increased friction and operating temperature, leading to premature wear of expensive core components like the airend. The compressor may overheat and shut down. |
| Oil Filter | Removes wear particles and contaminants from the oil, keeping it clean to protect the bearings and other precision parts. | A clogged filter will cause the oil pressure to drop, potentially starving the bearings of lubrication. A bypass valve may open, sending dirty, unfiltered oil through the system, accelerating wear. |
| Air Filter | Prevents atmospheric dust and debris from entering the compressor. This is the first line of defense. | A dirty air filter restricts airflow, forcing the compressor to work harder and use more electricity. It can also allow dirt to enter the system, which will contaminate the oil and score the internal components. |
| Air-Oil Separator Element | This is a critical filter. Its job is to remove the fine mist of oil from the compressed air before it leaves the compressor unit. | This is the single biggest cause of oil contamination in the airline. When the separator fails, large quantities of oil are passed downstream, which will saturate your expensive inline filters and contaminate your products. |
Performing this service is not a task for an untrained mechanic. It requires specific knowledge of the machine, the correct parts, and the proper procedures for draining and refilling fluids. I always advise my clients to either use a certified technician from the compressor manufacturer or to invest in training for their own maintenance staff. This proactive approach turned my Malaysian client's situation around. After a proper service, his compressor ran like new, and his production was back online and more stable than before. It was a valuable lesson in the importance of respecting the maintenance schedule.
Part 2: The Water Chiller "Health Check" – Is it the key to stability?
Are your bottles warping or showing hazy spots? Your cooling system might be unstable. A consistent and correct water temperature is just as critical as air pressure for producing high-quality bottles.
The water chiller is the "thermostat" for your entire process. Its health depends on temperature stability, water flow, and water cleanliness. Issues like dirty condenser coils, clogged filters, or a drifting thermostat can cause major quality inconsistencies.

While the air compressor is responsible for forming the bottle, the water chiller is responsible for making sure it keeps its shape. The process of blow molding involves stretching PET at a high temperature. To "freeze" the molecules in this stretched, strong orientation, the material must be cooled rapidly and evenly by the mold. The chiller's job is to supply a continuous flow of water at a constant temperature to pull that heat out of the mold. If this cooling process is inefficient or inconsistent, a whole host of defects can appear, even if every other part of the process is perfect. Many people don't realize how important it is that PET blow molds need to be connected to a chiller. It's not an optional accessory; it's a core process component.
The Three Pillars of Chiller System Health
Similar to the air compressor, evaluating a chiller's health goes beyond looking at the temperature display on its panel. You must consider the entire cooling circuit.
Temperature Stability: This is the most obvious function, but also one that can be deceptive. The chiller must not only reach the set temperature (e.g., 10°C) but also hold it with minimal fluctuation, typically within ±1°C.
- Common Cause: A dirty condenser. The condenser is the radiator for the chiller; it's how the chiller expels the heat it has removed from the water. If the condenser coils are covered in dust and dirt, it can't dissipate heat effectively. The refrigeration system has to work much harder, leading to temperature swings and potential shutdowns.
- How to Check: Visually inspect the condenser fins. Are they clogged with dust? They should be clean enough to see light through them. Also, use an independent, calibrated thermometer to verify the water temperature. Place it in the water flow returning from the mold and compare it to the chiller's display. A discrepancy indicates a faulty sensor or thermostat on the chiller.
Water Flow Rate: The correct temperature is useless if there isn't enough water flowing through the mold's cooling channels to actually absorb the heat.
- Common Cause: A clogged filter on the water pump. Most chiller systems have a simple Y-strainer or mesh filter to protect the pump and mold from debris in the water. Over time, this filter can become clogged with scale or sediment, severely restricting flow.
- How to Check: Many systems have flow meters or pressure gauges before and after the mold. A large pressure drop can indicate a blockage. If you don't have gauges, you can check the pump's filter basket. If it's full of debris, it's a clear sign that flow has been restricted.
Water Quality: The water circulating in your chiller is a closed loop, but it's not immune to contamination.
- Common Cause: Using untreated tap water. Tap water contains minerals that, over time, can build up as scale inside the narrow cooling channels of your expensive blow bottle mold. This scale acts as an insulator, preventing efficient heat transfer from the mold to the water.
- How to Check: Visually inspect the water in the chiller's reservoir tank. Is it clear, or is it cloudy and full of sediment? For a more advanced check, you can get a water quality test kit to measure the hardness and pH. Ideally, the system should be filled with distilled or deionized water with a proper glycol/inhibitor mix to prevent both freezing and corrosion.
| Pillar of Health | Common Problem | Simple Diagnostic Test |
|---|---|---|
| Temperature Stability | Dirty condenser coils or faulty thermostat | Visually inspect condenser fins for dust. Use an independent thermometer to verify the water temperature against the chiller display. |
| Water Flow Rate | Clogged water pump filter | Check and clean the system's Y-strainer or filter basket. Look for a large pressure drop across the mold if gauges are present. |
| Water Quality | Mineral scale buildup from using untreated water | Check the clarity of the water in the reservoir. Disconnect a cooling line to look for white, chalky scale buildup inside. |
A systematic check of these three areas will give you a clear understanding of your cooling system's health and its potential impact on your bottle production.
What bottle defects are caused by an unhealthy cooling system?
Are your bottles hazy, warped, or inconsistent? The problem is very likely your cooling system. High water temperatures cause haziness and warping, while low temperatures can make the mold sweat. Fluctuations lead to inconsistent quality.
The link between cooling and bottle quality is all about thermodynamics. The speed and evenness of heat removal from the PET material determine its final crystalline structure and physical stability. An unhealthy cooling system disrupts this delicate process, creating immediate and obvious defects.
When a bottle comes out of the mold, it may look fine for a second, but its final properties are not set until it has cooled below its glass transition temperature. The chiller's job is to manage this critical phase. Any failure here will undo all the perfect work of the preform heating and blowing stages. This is why validating a new design, often done through methods like 3D printed samples, relies on a stable production process to accurately reflect the final product.
Defect 1: Hazy Bottoms / Warping (Pearlescence)
This is a very common issue, especially in the thickest part of the bottle, the base. The base appears cloudy or milky-white instead of clear, and the bottle may not sit flat.
- The Root Cause (High Water Temperature): The PET was not cooled fast enough. When PET cools slowly, molecules have time to organize into large crystal structures, which scatter light and appear hazy (this is called pearlescence or crystallization). The ideal temperature for blow mold cooling water is typically between 8-12°C. If your chiller is only providing water at 15°C or higher, it simply cannot remove the heat quickly enough, especially from the thick gate area at the base. This slow cooling also allows the bottle to shrink or distort as it cools outside the mold, leading to warping.
- Solutions:
- Clean the Condenser: This is the number one cause of high water temperatures. A condenser clogged with dust cannot release heat, forcing the entire system to run hot.
- Check Refrigerant Level: Just like a home air conditioner, an industrial chiller can leak refrigerant over time. Low refrigerant levels will severely reduce its cooling capacity. This usually requires a certified HVAC technician to diagnose and recharge.
- Verify Chiller Sizing: Is the chiller powerful enough for the job? An undersized chiller will constantly struggle to keep up, and the water temperature will creep up throughout the day.
Defect 2: Mold Sweating (Condensation)
You see droplets of water forming on the outside surface of your mold, which can then get onto the bottles and cause cosmetic defects or labeling issues.
- The Root Cause (Low Water Temperature): The surface temperature of your mold is below the "dew point" of the surrounding air in your factory. The dew point is the temperature at which the moisture in the air will condense into liquid water. If your factory is in a hot, humid environment and you set your chiller too low (e.g., 5-6°C), your mold will act just like a cold glass of iced tea on a summer day, and water will form all over it.
- Solutions:
- Raise the Chiller Temperature: The easiest solution is to slightly increase the set temperature of your chiller. Often, raising it by just a few degrees, for example from 8°C to 11°C, is enough to stop the sweating without negatively affecting bottle quality.
- Control Factory Environment: The long-term solution is to control the humidity in your production area. Installing dehumidifiers or improving the factory's HVAC system can lower the dew point, allowing you to run your molds colder without sweating.
Defect 3: Inconsistent Quality (Good Bottles, then Bad Bottles)
You are producing perfect bottles for an hour, and then suddenly you start getting a series of hazy or warped ones. Then it gets better again. The problem is erratic.
- The Root Cause (Unstable Water Temperature): The temperature of your cooling water is fluctuating. This is often caused by a faulty thermostat on the chiller or the chiller's compressor cycling on and off improperly. The bottle quality will directly follow these temperature swings. When the water is cold, the bottles are good. When the water temperature drifts up, the defects appear.
- Solutions:
- Monitor the Temperature: Use an independent thermometer to track the water temperature over a period of an hour. Is it holding steady, or is it swinging up and down by several degrees?
- Service the Chiller: This kind of issue often points to a problem with the chiller's control system or refrigeration cycle. It could be a failing temperature sensor, a problem with the compressor's loading/unloading mechanism, or a refrigerant issue. This typically requires a professional service call.
| Bottle Defect | Primary Cooling System Cause | Corrective Action |
|---|---|---|
| Hazy Bottoms / Warping | Cooling water temperature is too high. | 1. Thoroughly clean the chiller's condenser coils. 2. Have refrigerant levels checked by a technician. |
| Mold Sweating | Cooling water temperature is too low. | 1. Increase the chiller's setpoint temperature slightly. 2. Implement humidity control in the production environment. |
| Inconsistent Quality | Cooling water temperature is fluctuating. | 1. Monitor the water temperature with an independent thermometer. 2. Schedule a professional service for the chiller unit. |
What is your regular "powerhouse" health check: A maintenance schedule for auxiliaries?
Are you waiting for a breakdown to perform maintenance? A proactive schedule is far cheaper. Regular checks on your compressor and chiller prevent costly downtime and ensure consistent production quality.
Preventative maintenance is the most cost-effective strategy for ensuring the reliability of your entire production line. By creating and following a simple schedule for your auxiliary equipment, you can identify and fix small issues before they become major, production-stopping problems.
This isn't about adding more work for your team; it's about doing the right work at the right time. A few minutes spent on a daily or weekly check can save you days of downtime and thousands of dollars in lost production and emergency repair costs. The goal is to move from a reactive state (fixing things when they break) to a proactive one (keeping them from breaking in the first place). Think of it as a regular health checkup for the heart and lungs of your factory. A simple checklist, followed diligently, is your best insurance policy against unexpected failures.
A Practical Maintenance Schedule
Here is a template for a maintenance schedule that you can adapt for your specific equipment. I recommend printing this out, laminating it, and keeping it near the machines.
Air Compressor System
| Frequency | Task | Why It's Important |
|---|---|---|
| Daily | Manually Drain Air Receiver Tank Condensate: Open the valve at the bottom of the main air tank until only air comes out. | Removes the liquid water that condenses in the tank. If left, this water can cause internal rust and be carried downstream into your air lines and products. |
| Weekly | Check and Clean Air Intake Filter: Visually inspect the filter. If it's dirty, clean it with compressed air from the inside out or replace it if necessary. | A clean filter ensures the compressor can "breathe" easily, improving efficiency and reducing energy costs. It is the first line of defense against dust entering the system. |
| Monthly | Check Oil Level: Check the sight glass on the compressor to ensure the oil level is within the recommended range. | Low oil levels can lead to overheating and catastrophic failure of the main compressor element (the airend). |
| Monthly | Inspect for Air Leaks: Walk the airline and listen for hissing. Use soapy water on joints if a leak is suspected. | Leaks are a major source of wasted energy. A small, insignificant-sounding leak can waste thousands of dollars in electricity over a year. |
| Quarterly | Check Belt Tension: For belt-driven compressors, check the tension and condition of the belts. | Loose belts can slip, reducing efficiency. Belts that are too tight put extra strain on the motor and compressor bearings, leading to premature failure. |
| 4000 Hours | Perform Major Service: As detailed previously, replace oil, oil filter, air filter, and air-oil separator. | This is non-negotiable for the long-term health and reliability of the machine. It prevents wear, overheating, and air contamination. |
Water Chiller System
| Frequency | Task | Why It's Important |
|---|---|---|
| Daily | Check Water Temperature and Pressure: Glance at the gauges on the chiller panel. Are the readings normal and stable? | This is a quick 5-second check that can catch a developing problem early. A sudden change from the previous day's reading is a red flag that something has changed. |
| Weekly | Clean Condenser Coils: Visually inspect the coils. If dusty, use a brush or compressed air to clean the fins. | This is the single most important maintenance task for a chiller. Clean coils ensure efficient heat transfer, reduce energy consumption, and prevent the unit from overheating and shutting down, especially on hot days. |
| Monthly | Check Water Level and Quality: Look into the reservoir tank. Top up with the correct water/glycol mixture if needed. Check for clarity. | Low water levels can cause the pump to run dry, destroying it. Cloudy or dirty water indicates a need to flush the system and can lead to clogged filters and poor performance. |
| Monthly | Check and Clean Water Pump Filter/Strainer: Close the isolation valves, open the strainer housing, and clean the mesh basket inside. | A clogged filter is the most common cause of low water flow, which leads to poor cooling and bottle defects. This simple check ensures your mold is getting the flow it needs. |
| Annually | Schedule Professional Service: Have a certified HVAC technician check refrigerant levels, electrical connections, and safety controls. | Some aspects of chiller maintenance, especially those related to the sealed refrigeration system, require specialized tools and expertise. An annual professional checkup ensures the system is safe, efficient, and reliable for the coming year. |
By implementing and sticking to a schedule like this, you transform maintenance from a chore into a powerful tool for quality control and operational stability.
Is a stable foundation the key to a stable process?
Ultimately, is the health of your auxiliary equipment the secret to high-quality production? Yes. A well-maintained powerhouse is the bedrock of a stable, repeatable, and efficient blow molding operation.
Your mold, machine, and auxiliaries are one integrated system. Investing in the proper maintenance of your air compressor and water chiller is the most effective way to guarantee a stable process.
I want you to stop thinking of your blow bottle mold, blow molding machine, and auxiliary equipment as separate items. They are a single, interconnected system. A weakness in one part will inevitably compromise the performance of the entire system. You can have the best mold and the most advanced machine, but without a stable supply of clean, high-pressure air and a constant flow of cold water, you are building your production on a foundation of sand.
The real takeaway is that investing time and resources into properly configuring and meticulously maintaining your auxiliary equipment is not a cost center. It is a direct investment in quality, efficiency, and reliability. It is the most fundamental way to ensure that your blow molding process is stable, repeatable, and profitable. A stable foundation is truly the key to a stable process.
Frequently Asked Questions (FAQ)
1. For a new defect, is it more likely to be a problem with the air compressor or the water chiller?
It depends on the defect. If the bottle is weak, incompletely formed, or has black specks/odor, start by investigating the air compressor system for flow and purity issues. If the bottle is hazy, warped, or the quality is inconsistent, your first check should be the water chiller for temperature and flow stability.
2. My pressure gauge on the machine shows 30 bar, but my bottles are still weak. Could the problem still be the compressor?
Absolutely. The pressure gauge shows static pressure, not dynamic flow. You likely have a flow rate (CFM) problem. This means that while the pressure is high before the blow cycle, the system can't deliver enough air volume quickly enough to maintain that pressure as the bottle expands. The most common causes are air leaks in the pipeline or an undersized air receiver tank.
3. How does the ambient temperature and humidity in my factory affect the performance of my chiller and air compressor?
Greatly. For the air compressor, higher ambient temperature and humidity mean the air entering the compressor is less dense and holds more moisture. The compressor has to work harder, and the air dryer has to remove more water. For the chiller, high ambient temperature makes it much harder for the condenser to release heat, reducing its efficiency and cooling capacity. High humidity increases the risk of mold sweating, as it raises the dew point temperature of the air.
4. How do I know if my compressor and chiller are correctly sized for my blow molding machine?
Sizing is critical. For the air compressor, you need to know the machine's air consumption in CFM or CMM at the required pressure. The compressor's output capacity should be at least 25% higher than the machine's requirement to account for efficiency loss and future leaks. For the chiller, you need to calculate the total heat load, which depends on the material throughput (kg/hr) and the mold's design. It's always best to consult with the machine manufacturer and your auxiliary equipment supplier to ensure they are correctly matched. An undersized unit will constantly struggle and lead to production problems.
5. What is the best and easiest way to check for oil or water contamination in my compressed air lines?
The "white cloth test" is the simplest method. Go to an air outlet point as close to the machine as possible. Hold a clean, white, lint-free cloth over the outlet and crack the valve open slightly for 30-60 seconds. Then inspect the cloth. Any yellowish or brownish stain indicates oil contamination. Any dampness indicates water is getting past your dryer. For a healthy system, the cloth should remain perfectly clean and dry.
