Struggling to produce that perfect, premium shampoo bottle? Standard machines often fail, leading to wasted materials and frustrating defects. A fully custom approach for both the machine and mold is the real solution.
The key is recognizing that shampoo bottles have unique needs. Their heavier weight, thicker walls, and often complex shapes require specialized bottle blowing machine and mold designs. Standard equipment designed for simple water bottles cannot handle these demands, leading to poor quality and production failures.

I've been in this industry for 16 years, and I’ve seen firsthand how a one-size-fits-all approach just doesn’t work for shampoo bottles. It’s a lesson many learn the hard way. The difference between success and failure often comes down to understanding the specific technical requirements right from the start. A client might see a beautiful bottle on a shelf and think it’s simple to replicate, but the engineering behind it is incredibly detailed. This article will walk you through the essential considerations, showing you why a custom setup isn't just an option, but a necessity for getting the results you want. Let's dive into what makes these bottles so special.
1️⃣ What Are the Key Bottle Shape Design Considerations for Shampoo Bottles?
Designing a shampoo bottle that looks great but is also easy to manufacture? The shape itself presents the first set of challenges. Success depends on balancing aesthetics with the physical limitations of blow molding.
A successful design focuses on smooth contours, a gradual shoulder transition, and anticipating material behavior. These elements are critical for preventing defects like uneven wall thickness, distortion, and excessive shrinkage during production.
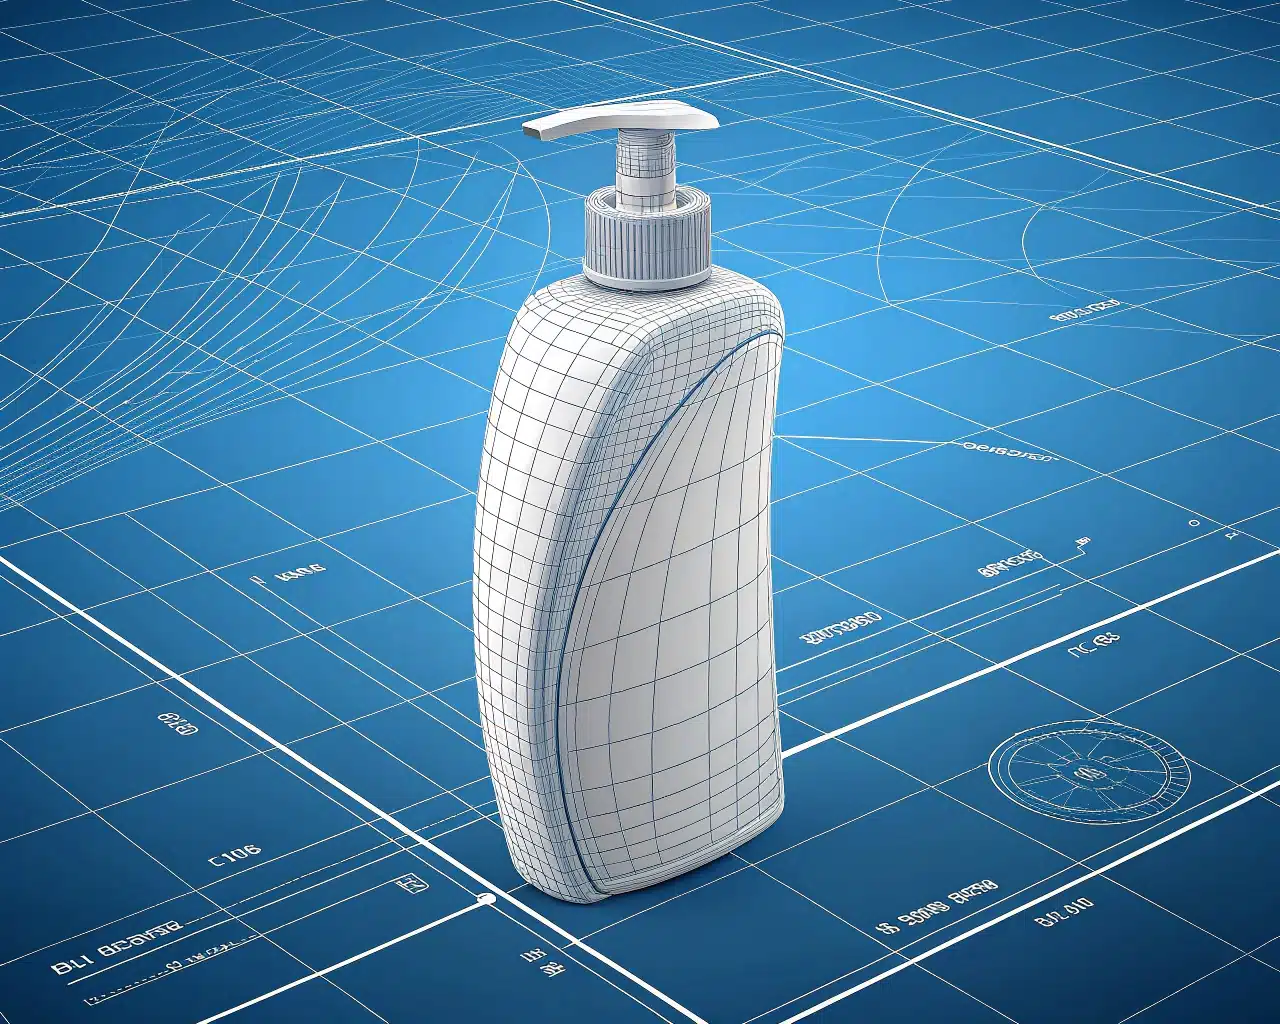
Over the years, I've learned that the most beautiful designs on paper can be the most problematic in production. It’s my job to bridge that gap. The design process for a blow bottle mold needs to account for how the hot, stretched PET material will behave. Sharp corners or overly ambitious shapes can create weak spots or prevent the plastic from distributing evenly. We must design not just for the final look, but for a stable and repeatable manufacturing process. This deep dive will explore the specific elements you need to get right from the very beginning.
The Importance of a Smooth Body
A bottle with a smooth, flowing body is much easier to produce consistently. Sharp angles or intricate, tight patterns can trap air or cause the plastic to stretch unevenly. When I work with a designer, I always suggest simplifying complex features. For example, instead of a sharp edge, we can use a soft, rounded bevel. This small change dramatically improves the material flow inside the mold, resulting in a stronger and more visually appealing final product. The goal is to guide the plastic into its final shape without fighting it.
Managing the Shoulder Transition
The shoulder area, where the body narrows to the neck, is a critical point. A transition that is too abrupt will cause the material to thin out excessively, creating a weak spot. I always recommend a gentle, sweeping curve for the shoulder. This allows the PET to stretch and form naturally, maintaining a more consistent wall thickness from the body all the way to the neck. A well-designed shoulder not only improves the bottle's structural integrity but also contributes to a more elegant and premium feel.
Designing to Counteract Deformation and Shrinkage
All plastics shrink as they cool, and PET is no exception. A good bottle design anticipates this. For example, flat, large panels on the sides of a bottle are prone to sinking inward or warping after molding. I often incorporate subtle curves or reinforcing ribs into the design to counteract this effect. These features add rigidity without compromising the aesthetic. We also calculate the expected shrinkage rate and build it into the blow bottle mold dimensions, ensuring the final, cooled bottle matches the intended size and volume perfectly.
| Design Feature | Poor Design (High Risk) | Good Design (Low Risk) | Rationale |
|---|---|---|---|
| Body Shape | Sharp corners, intricate details | Smooth curves, simple geometry | Prevents uneven material stretching and weak spots. |
| Shoulder | Abrupt, 90-degree angle | Gentle, sweeping curve | Ensures consistent wall thickness and strength. |
| Base | Perfectly flat base | Pushed-up, concave base (punt) | Adds stability and helps manage pressure during filling. |
| Side Panels | Large, flat surfaces | Subtle curves or reinforcing ribs | Prevents warping and paneling as the bottle cools. |
2️⃣ How Can a Diagonal Parting Line Design Improve Bottle Quality?
Tired of that visible seam line running down the side of your bottle? This small imperfection can make a premium product look cheap. A diagonal parting line is a clever design trick to solve this.
By shifting the mold's seam line to a less noticeable area, like a corner or edge, its visibility is drastically reduced. This technique is especially effective for high-end personal care brands that demand a flawless finish.
When a customer invests in a premium look, every detail matters. The first thing I discuss for non-round bottles is the location of the parting lines. A standard mold splits in the middle, leaving two noticeable lines on opposite sides. For a square or oval bottle, we can hide these lines on the corners. This small adjustment to the blow bottle mold design elevates the final product's perceived value significantly. Let's explore how this works and why it's a signature of high-quality bottle production.
Understanding the Parting Line
Every blow-molded bottle is made from a mold that splits into two halves. The line where these two halves meet is called the parting line or seam line. In a standard setup for an oval or square bottle, the mold opens and closes like a book, leaving vertical seams on the narrowest sides. While functional, these lines can interrupt the smooth surface of the bottle, especially if the mold is not perfectly aligned or becomes worn over time. For brands where aesthetics are paramount, this is often unacceptable.
The Advantage of a Diagonal Split
A diagonal parting line is an advanced technique where the mold is designed to split at the corners of the bottle rather than on the flat sides. For a square bottle, the parting lines would run along two opposite diagonal corners. For an oval bottle, they are placed where the curve is sharpest. This has two major benefits:
- Reduced Visibility: The seam line is now on a natural edge or corner, where it blends in with the bottle's geometry. The human eye is less likely to notice it compared to a line on a perfectly smooth, flat surface.
- Improved Finish: Because the parting line is on a corner, any minor flashing (excess plastic) that might occur is far less apparent. It doesn't disrupt the primary surfaces that the consumer sees and touches.
When is a Diagonal Parting Line Necessary?
I recommend this approach for any brand that wants to project a high-end image. Think of premium shampoos, conditioners, and lotions. These products often come in uniquely shaped containers that are meant to look and feel luxurious. A visible seam line can detract from that experience. While designing a blow bottle mold with a diagonal parting line is more complex and requires higher precision in manufacturing, the payoff in terms of final product quality is immense. It's a subtle detail that signals superior craftsmanship and attention to detail, reinforcing the brand's premium positioning in the market.
| Parting Line Type | Visibility | Best For | Mold Complexity |
|---|---|---|---|
| Standard Vertical | High on flat surfaces | Round bottles, budget products | Low |
| Diagonal Corner | Very Low | Square, rectangular, premium bottles | High |
| Custom Curve | Low | Irregularly shaped bottles | Very High |
3️⃣ How Do You Optimize Preform Neck Size and Weight?
Trying to find the sweet spot between a bottle that feels substantial and one that is cost-effective? This balance comes down to the design of the PET preform, specifically its neck size and weight.
Optimizing the preform is crucial. The neck must match your chosen cap, while the weight directly impacts material cost and the bottle's final rigidity. Getting this right prevents production issues and controls your budget.
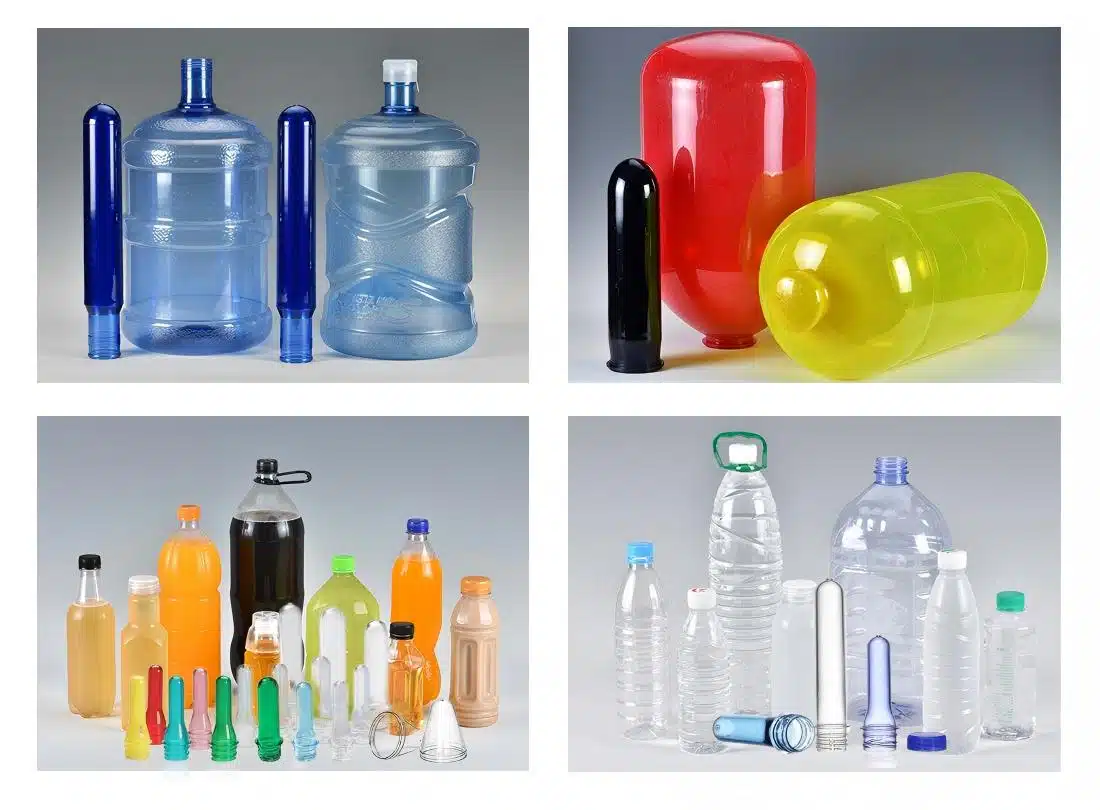
I often tell my clients that the bottle-making process truly begins with the preform. A poorly designed preform will cause problems no matter how good your bottle blowing machine is. The preform's weight and shape are the foundation for the final container. It dictates how the material stretches, where the thickness is distributed, and ultimately, the sturdiness of the bottle. Let's break down how we approach the design of the preform mold to achieve that perfect balance of quality and cost.
Selecting the Right Neck Finish
The "neck finish" refers to the threaded opening of the bottle. This is the only part of the preform that does not change during the blow molding process. Therefore, the first decision is always choosing a neck finish that is compatible with your desired cap or pump. Common sizes for shampoo bottles include 24/410, 28/410, and 33/410. The choice depends on the product's viscosity and the type of dispensing closure you plan to use. Once the neck finish is locked in, the rest of the preform can be designed around it.
Determining the Optimal Preform Weight
The weight of the preform, measured in grams, is one of the biggest factors in the final cost of the bottle. More grams means more PET material and a higher price. However, shampoo bottles require a certain rigidity to feel good in the hand and to withstand the pressures of shipping and handling. A bottle that is too thin will feel flimsy and cheap.
My process involves starting with the target bottle volume and shape, then calculating the minimum preform weight needed to achieve the required wall thickness. For example, a standard 500ml water bottle might use an 18-gram preform. A 500ml shampoo bottle, however, might need a 35-gram or even 45-gram preform to achieve its thick, robust feel. We often produce samples at slightly different weights so the client can physically hold them and decide which one provides the best balance of premium feel and cost.
The Impact on Blow Molding Stability
The preform design directly affects how it behaves in the bottle blowing machine. A well-designed preform will heat evenly and stretch predictably, leading to a stable process with a very low defect rate. A preform that is too short and fat, or too long and thin for the target bottle can cause a host of problems, such as:
- Uneven wall thickness: Thin spots in critical areas.
- Incomplete formation: The bottle doesn't fully take the shape of the mold.
- Pearlescence: A cloudy appearance from over-stretching the material.
By carefully designing the preform mold, we ensure the preform is perfectly tailored to both the final bottle shape and the blowing process, guaranteeing high-quality results every time.
4️⃣ How Does a Mold Cooling System Affect Bottle Quality?
Are you seeing inconsistent wall thickness or slow production speeds? Your blow bottle mold cooling system is likely the cause. Proper cooling is essential for quality and efficiency.
An optimized cooling system with strategically placed water channels ensures the bottle cools uniformly. This locks in the correct shape, maintains consistent wall thickness, and allows for a faster, more repeatable production cycle.

I explain to my clients that blowing the bottle is only half the battle; cooling it down properly is the other half. For thick-walled shampoo bottles, this step is especially critical. If one part of the mold is hotter than another, the plastic in that area will cool slower, resulting in shrinkage and deformation. An effective cooling system is not just a set of drilled holes; it's a carefully engineered network designed to remove heat from the mold efficiently and evenly, ensuring every bottle comes out identical.
The Role of Cooling in Blow Molding
After the hot preform is stretched and blown into the shape of the mold, it must be cooled rapidly to solidify the plastic. The time it takes to cool the bottle is often the longest part of the entire cycle, meaning it dictates the overall production speed. The goal is to remove heat as quickly as possible without introducing stress into the plastic. For a typical shampoo bottle with a wall thickness of around 1mm or more, this requires a robust cooling design. A standard water bottle mold might have simple cooling channels, but a custom shampoo bottle mold needs a more advanced approach.
Designing an Optimized Cooling Channel Layout
When I design a mold for a thick-walled bottle, I pay close attention to the cooling layout. The process involves:
- Mapping Heat Zones: We use software to simulate where the most heat will accumulate in the mold. These are typically the thicker sections of the bottle, like the base and shoulder.
- Strategic Channel Placement: We design cooling channels that run as close as possible to these hot spots. The channels must follow the contour of the bottle shape to ensure uniform cooling across the entire surface.
- Ensuring High Flow Rate: The diameter of the channels and the layout of the connectors are designed to maximize the flow of chilled water. A high, turbulent flow is much more effective at pulling heat away than a slow, laminar flow.
For complex shapes, we might use multiple independent cooling circuits for different parts of the mold, allowing us to fine-tune the temperature in specific areas.
Impact on Consistency and Cycle Time
A well-designed cooling system delivers two key advantages. First, it ensures consistency. Every bottle produced will have the same dimensions, the same wall thickness distribution, and the same structural integrity. This is because uniform cooling prevents warping and internal stresses. Second, it reduces the cycle time. By removing heat more efficiently, we can shorten the cooling phase and open the mold sooner, increasing the number of bottles produced per hour. This directly translates to higher productivity and lower manufacturing costs. For any high-volume production, investing in a superior cooling design for your blow bottle mold pays for itself very quickly.
5️⃣ Why is a 4-Platen Clamping Structure Needed for Shampoo Bottles?
Have you ever noticed a thick, unsightly seam line on a bottle? This is often caused by "mold expansion" or "flashing," where the mold halves are pushed apart during the high-pressure blowing process.
A 4-platen clamping structure provides superior locking force. This heavy-duty system is essential to resist the high blowing pressures needed for heavy, thick-walled shampoo bottles, ensuring a clean, fine parting line.

This is a detail that separates a standard bottle blowing machine from one built for high-performance applications. I learned early on that you can have the best mold in the world, but if the machine can't hold it shut properly, the results will be poor. Shampoo bottles, with their heavier preforms and the need for high pressure to define crisp details, exert immense force on the mold. A standard clamping system just isn't strong enough to handle it, which is why a specialized design is non-negotiable.
The Problem of Mold Expansion
When the high-pressure air is blasted into the preform (often at 30-40 bar), it exerts an outward force on the inside of the bottle. This force tries to push the two halves of the mold apart. If the clamping system holding the mold is not strong enough, the halves will separate by a tiny fraction of a millimeter. This is enough for a small amount of plastic to squeeze into the gap, creating a thick, raised seam line known as "flash." This not only looks bad but can also create a sharp edge on the bottle. This is a common failure point when trying to produce heavy bottles on a machine designed for lightweight water bottles.
How the 4-Platen System Works
A standard blow molder often uses a 3-platen toggle system. It’s effective for lower pressures but can lack rigidity. A 4-platen clamping structure, however, provides a more robust and direct lock. Here’s a simplified breakdown:
- Fixed Platen: Holds one half of the mold.
- Movable Platen: Holds the other half of the mold and moves to open/close it.
- Two Tie-Bar Platens: These additional platens work with a high-pressure cylinder to directly lock the movable platen against the fixed platen.
This design distributes the clamping force more evenly and creates an extremely rigid "box" structure around the mold. It effectively resists the blowing pressure and prevents any separation between the mold halves.
The Result: A Perfect Seam Line
The benefit of using a powerful clamping system on the bottle blowing machine is immediately visible on the final product. The parting line is delicate, clean, and barely perceptible to the touch. It allows for the production of bottles with sharp details and a premium finish, free from the defects that plague machines with weaker clamping units. When a customer demands the highest quality, I know that the machine's clamping system is one of the most important components to guarantee success. It’s the unseen strength that ensures visible perfection.
| Clamping System | Rigidity | Best For | Resulting Seam Line |
|---|---|---|---|
| 3-Platen Toggle | Standard | Lightweight bottles (e.g., water) | Can be thick under high pressure |
| 4-Platen Direct Lock | Very High | Heavy, thick-walled bottles (e.g., shampoo) | Consistently fine and clean |
| Servo-Driven | High, with Precision Control | Complex shapes, energy efficiency | Fine, with excellent repeatability |
6️⃣ Why Do Thick-Walled Preforms Need an Extended Heating Zone?
Are your thick-walled bottles coming out misshapen or cloudy? The problem often starts in the heating oven. Standard ovens are too short to properly heat thick preforms all the way through.
An extended heating zone provides a longer residence time for the preform in the oven. This ensures the heat penetrates from the surface to the core evenly, making the preform soft and pliable for perfect stretching.

This is one of the most critical customizations on a bottle blowing machine for shampoo bottles. I remember a case with a new client who wanted to produce a 45-gram bottle. He believed a standard machine would work. I explained that a 45-gram preform is much thicker than an 18-gram water bottle preform. If you don't heat it long enough, the outside gets scorched while the inside remains too hard. The result is a disaster during blowing. It's like trying to cook a thick steak in two minutes on high heat – the outside is burnt, and the inside is raw.
The Physics of Heating Thick Preforms
Think of a PET preform like a small, thick piece of plastic. To blow it into a bottle, you need to heat it to a precise temperature, around 100-110°C. At this temperature, the material becomes soft and rubbery. The heat needs to be uniform throughout the thickness of the preform.
- Thin Preforms (e.g., 18g): Heat penetrates quickly. A standard, shorter heating oven provides enough time for the preform to reach a uniform temperature.
- Thick Preforms (e.g., 45g): Heat takes much longer to travel from the outer surface to the inner core. If you use a short oven, you have two bad options: either you don't heat it long enough, and the core is too cold, or you turn up the lamp intensity, which burns the surface before the core is ready.
The Solution: More Lamps, More Time
An extended heating zone solves this problem. By making the heating oven longer, we add more heating lamps and increase the amount of time the preform spends traveling in front of them. This allows us to use a gentler heating profile. The lamps don't have to be at maximum intensity. The preform is warmed up gradually and evenly as it moves through the longer oven. This "low and slow" approach ensures the heat has time to soak through to the core without overheating the surface. The result is a preform that is homogeneously heated to the ideal temperature, ready for flawless blowing.
Benefits for Production Stability
A properly heated preform is the key to a stable process. When every preform entering the mold has the exact same temperature profile, the blowing results are highly repeatable. This eliminates common defects associated with poor heating, such as:
- Inconsistent material distribution: Thick and thin spots on the bottle.
- Pearlescence or haziness: Caused by stretching material that is too cold.
- Brittleness: From a scorched or overheated outer surface.
For any serious production of thick-walled containers, a customized bottle blowing machine with an extended heating zone isn't a luxury; it's a fundamental requirement for achieving quality and efficiency.
7️⃣ Why Use Ruby Infrared Lamps for Colored Preforms?
Having trouble heating dark or opaque preforms without burning the surface? Standard clear infrared lamps are often inefficient, leading to poor heating and defects. Ruby infrared lamps are the specialized solution.
Ruby lamps emit infrared heat at a shorter wavelength that penetrates colored and opaque PET material more effectively. This heats the preform core efficiently without overheating and yellowing the surface, ensuring better results.

This is a more technical aspect of customizing a bottle blowing machine, but it makes a huge difference. Many brands want their shampoo bottles in rich, dark colors like amber, black, or cobalt blue. These colorants make the preform behave very differently in the heating oven. I’ve seen many producers struggle with this, getting inconsistent results until they understand that the type of heating lamp matters just as much as the heating time. Using the wrong lamp is like trying to see in the dark with sunglasses on – it’s just not effective.
The Challenge with Colored Preforms
Standard infrared lamps emit a broad spectrum of heat radiation. Clear PET is transparent to most of this radiation, allowing the heat to pass through and warm the material relatively evenly. However, the pigments and dyes used in colored preforms, especially dark ones, absorb this energy very quickly right at the surface.
This leads to a major problem:
- The outer surface of the preform heats up extremely fast, and can easily become scorched or yellowed.
- The core of the preform remains cool because the surface absorbs all the energy before it can penetrate deeper.
When you try to blow a preform like this, it fails. The stiff, cool core doesn't stretch properly, while the hot outer layer is overstretched, resulting in a weak, inconsistent bottle.
The Ruby Lamp Advantage
Ruby infrared lamps are not just colored red for show. The quartz tube is doped with a material that filters the infrared spectrum. They are designed to emit a higher proportion of their energy at shorter wavelengths (around 1.2 micrometers). This specific wavelength of energy has a much higher "penetrating power" when it comes to pigmented PET.
Instead of being absorbed instantly at the surface, the energy from a ruby lamp travels deeper into the plastic before it turns into heat. This allows the preform to be heated from the inside out, or at least much more uniformly throughout its thickness. We can effectively heat the core of a black or dark blue preform without burning the surface.
When to Specify Ruby Lamps
I specify ruby lamps on a bottle blowing machine for any client who plans to run:
- Darkly colored preforms: Black, dark blue, dark green, amber.
- Opaque preforms: White or other pastel colors that have a high level of opacifier (like titanium dioxide).
- Very thick preforms: Even for clear preforms, ruby lamps can sometimes help achieve a more uniform heat profile if the wall is exceptionally thick.
By matching the right heating technology to the specific material being used, we gain precise control over the process, leading to higher quality bottles and a much more stable production environment.
8️⃣ Why is Fully Customized Machine and Mold Integration So Crucial?
Why do some custom bottle projects fail even with a good mold? The answer is a lack of integration. A perfect mold is useless if the machine isn't tailored to work with it.
True success comes from designing the blow bottle mold and the bottle blowing machine as a single, cohesive system. Every component, from heating to clamping, must be optimized for your specific bottle design to ensure a high success rate from the very first run.
This is the core of my philosophy, built on 16 years of experience. I learned this lesson most powerfully through a client from Argentina. He came to me wanting to produce a range of bottles, including some beautiful but heavy shampoo bottles. He showed me PET bottles for water, and I quoted him a standard two-cavity automatic machine. Everything seemed fine until, right before placing the order, he mentioned the shampoo bottles.
I told him immediately, "This standard machine will not work well for your shampoo bottles." I explained that the heavier, thicker preforms for those bottles required a machine with a longer heating zone. He thought I was just trying to increase the price. He couldn't understand why one PET bottle was so different from another. A week later, he told me he had bought a standard machine from another factory that promised it could make any bottle.
I was worried for him. Six months later, my phone rang. It was the Argentinian client. He was apologetic. "You were right," he said. "The machine I bought is great for 600ml water bottles with 18-gram preforms, but it's a complete failure for my 45-gram shampoo preforms. The bottles won't form correctly." He had learned the hard way that the preform mold and the final bottle design dictate the machine's specifications. He came back to me, and we built him a fully custom machine. This time, it worked perfectly from day one.
A Holistic Design Process
My client's story is one I see often. A bottle project is not a collection of separate parts; it is a single integrated process. When we take on a new bottle project, we don't just ask for the bottle drawing. We analyze everything:
- The Bottle: What is its shape, volume, and target weight?
- The Preform: What is the ideal neck finish, weight, and design from the preform mold?
- The Mold: How many cavities? What parting line design is best? What are the cooling requirements from the blow bottle mold?
- The Machine: Based on all the above, what specifications are needed? Does it need an extended heating oven? Ruby lamps? A 4-platen clamping system?
Synergy Between Machine and Mold
This integrated approach creates synergy. The custom mold is built with the specific capabilities of the custom machine in mind. The custom machine is configured to provide the exact heating, stretching, and pressure parameters that the specific mold and preform require.
For example, when we design a high-precision mold with a diagonal parting line, we pair it with a bottle blowing machine that has an ultra-stable, high-force clamping unit. This ensures the mold halves meet with perfect alignment and force, delivering the flawless seam line the mold was designed to produce. When we design a thick-walled bottle, we match the heavy preform with an extended heating oven. Every piece of the puzzle is designed to fit together. This is how we guarantee that when the client pushes the "start" button, they get the exact bottle they envisioned, efficiently and reliably.
Conclusion
Producing high-quality shampoo bottles is a precise science. It demands a custom-designed system where the machine and mold work in perfect harmony, a lesson I've seen proven time and again.
Frequently Asked Questions (FAQ)
1. Why can't I just use a standard water bottle machine for my shampoo bottles? They are both PET.
A standard machine is designed for lightweight preforms (15-20g) and simple shapes. Shampoo bottles use much heavier preforms (35-50g+) which are thicker and often colored. They require a longer heating oven to warm the preform core evenly, and a stronger clamping structure to handle the higher blowing pressure needed for a thick-walled container. Using a standard machine results in defects, poor quality, and production failure.
2. Is a custom machine and mold much more expensive?
There is a higher initial investment, but it provides a lower total cost of ownership. A custom system is designed for your specific bottle, leading to higher efficiency, faster cycle times, lower scrap rates, and a premium final product. The cost of wasted material and failed production runs on an inadequate standard machine often exceeds the initial savings.
3. How long does it take to create a fully custom bottle production system?
The process typically takes from 60 to 120 days, depending on complexity. This includes bottle design consultation, preform design, mold manufacturing, and building the custom blowing machine. We design the mold and machine in parallel to ensure perfect integration and shorten the overall lead time.
4. What is the most common point of failure when making custom bottles?
The most common failure I see is a mismatch between the preform, the mold, and the machine. This usually starts with heating. If the preform isn't heated correctly because the oven isn't suited for its thickness or color, nothing else in the process can fix it. This is why an integrated design approach is so critical.
5. Can you make bottles from recycled PET (rPET) on these custom machines?
Yes, absolutely. However, using rPET adds another layer of complexity. The material properties of rPET can vary, and it often heats differently than virgin PET. We can design the machine's heating system, particularly the lamp configuration and control software, to be more flexible and forgiving, allowing for stable production with high percentages of rPET.
🔗 Learn More about Blow Molding Technology
To better understand the core components of a 6-cavity automatic blow molding machine, here are some useful resources:
Blow Molding – Wikipedia
A comprehensive overview of various blow molding processes, including extrusion, injection, and stretch blow molding.Injection Molding – Wikipedia
Important for understanding the production of preforms used in stretch blow molding.Stretch Blow Molding – Wikipedia
Explains how PET bottles are formed through axial and radial stretching processes.PET Bottle – Wikipedia
Background information on the materials and properties of typical PET bottles.Design of PET Bottles – Wikipedia
An introduction to the design considerations and geometry used in PET bottle manufacturing.
🔗 Related Pages on Our Website
Automatic Blow Molding Machines – iBottler
Discover our full range of customizable automatic PET bottle blow molding machinesSemi-Automatic Blow Molding Machines – iBottler
Ideal solutions for startups and small-scale PET bottle production.Blow Bottle Mold – iBottler
Explore our precision blow molds designed for PET and PP bottles.Preform Mold – iBottler
Learn more about our high-precision preform molds suitable for various injection molding machines.
