You have a great idea for a new bottle, but you are worried about the big investment in a production mold. The fear of costly mistakes is holding you back. This guide shows you how to test your design safely and affordably.
The best way to reduce risk in bottle development is to create physical prototypes before ordering the final multi-cavity production mold. You can use 3D printed models for a quick visual check, samples from a 3D printed mold for true PET material appearance, or a single-cavity trial mold for full performance testing.

Investing in a new bottle design is a big step for any company. You pour time, creativity, and significant financial resources into developing the perfect container for your product. But there is always a gap between a 3D model on a computer screen and the final product on the shelf. This gap can hide expensive problems. I always tell my clients that spending a little on prototyping is the best insurance policy you can buy for your project. A few hundred dollars spent upfront can save you from tens of thousands of dollars in losses down the road. This article will walk you through three different methods for making prototypes. Each method has a different cost and serves a different purpose. My goal is to give you the knowledge to make the smartest, lowest-risk decision at every stage of your project, ensuring your great idea becomes a successful product without costly surprises.
Introduction: The "Measure Twice, Cut Once" Rule for Bottle Development?
A multi-cavity production mold is a huge investment. Once you start production, any design change is very expensive and wastes a lot of time. You need a way to be sure before you commit. Prototyping is the answer.
Prototyping is a critical risk-management step to physically validate your bottle design before you invest in an expensive multi-cavity blow bottle mold. This process saves a lot of time and money by finding and fixing problems early. It is the key to a successful project launch.
I have seen the painful consequences of skipping the prototype stage. A few years ago, a promising beverage startup came to us in a panic. They had rushed their design directly to a massive 64-cavity production mold to save time. When the first bottles came off the line, they discovered a fatal flaw. The bottle had a subtle curve that made it unstable on their high-speed conveyor belts. The bottles would wobble and frequently fall over, causing the entire filling line to shut down. The fix required a complete mold redesign and rework, costing them over $80,000 and delaying their product launch by four months. Their "shortcut" ended up being a long, expensive detour. This is why I live by the "measure twice, cut once" rule. Prototyping is that essential measurement step.
The Hidden Costs of Skipping Prototypes
Many project managers see prototyping as an optional expense or a potential delay. This is a dangerous mistake. The true costs are hidden in the problems you don't see until it's too late. When you skip physical validation, you are gambling with your entire project budget and timeline. The potential financial losses go far beyond just the mold itself. Think about the chain reaction: a flawed bottle design can lead to production downtime, wasted raw materials, and even product recalls if the bottle fails to protect the contents. The cost to pull a production mold, ship it back for rework, and then reinstall and re-qualify it is enormous. It's not just about the money; it's about the lost opportunity and market momentum.
To put it in perspective, here’s a simple comparison of the costs you might face.
| Cost Comparison: Fixing a Design Flaw | With Prototyping (Method 3) | After Production Mold is Made |
|---|---|---|
| Action Required | Adjust 3D file, machine new trial mold | Halt production, pull mold, rework steel cavities |
| Direct Cost | ~$500 - $600 | $10,000 - $80,000+ |
| Time Delay | ~10-15 days | 4 - 8 weeks |
| Material Waste | A few kilograms of aluminum | Potentially tons of PET material and product |
| Impact on Launch | Minimal, planned delay | Catastrophic, major delay |
Why a Digital Model Isn't Enough
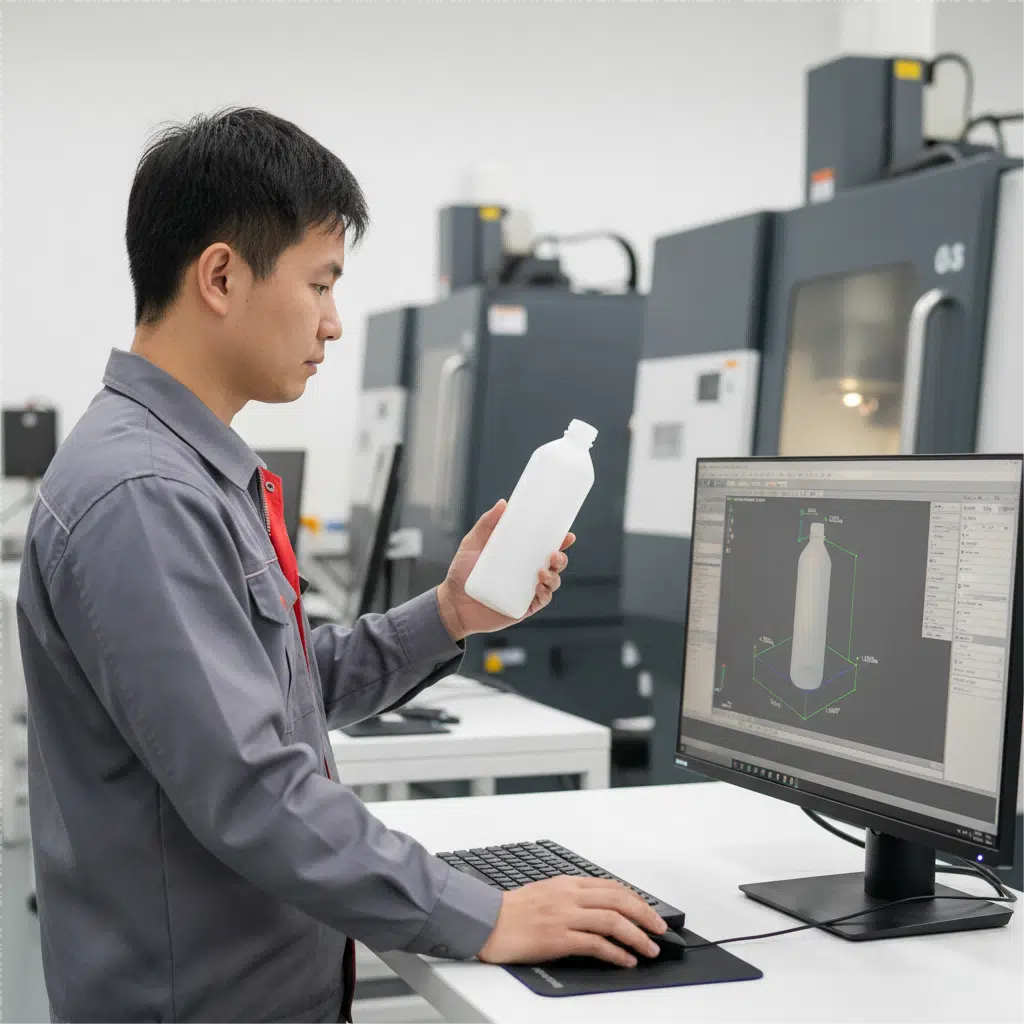
In today's world, we have amazing 3D rendering software. We can create photorealistic images of a bottle that look perfect on screen. But you cannot feel a rendering. You cannot pick it up. You cannot test how it sits on a shelf or fits in a car's cup holder. This is a critical point that many people overlook. The physical interaction with a product is a huge part of the consumer experience. I’ve had clients who loved a design on their computer, but as soon as I handed them a physical 3D-printed model, they immediately knew it was wrong. Maybe the grip was uncomfortable, or it felt too heavy at the top. These are things you can only discover by holding a real object in your hands. This is why a simple, inexpensive prototype is more valuable than a thousand high-resolution images. It bridges the gap between imagination and reality. A complete PET bottle mold design guide always includes a physical validation step.
Aligning Your Team with a Physical Prototype
Miscommunication is one of the biggest project killers. A bottle design project involves many different teams: marketing, sales, engineering, packaging, and senior management. Each group looks at the design with a different perspective. The marketing team cares about the label space and shelf appeal. The engineering team worries about wall thickness and performance. The CEO just wants to know if it looks and feels like a premium product. Looking at a 2D drawing or a 3D render on a screen leaves too much room for individual interpretation.
A physical prototype changes everything. It becomes a single source of truth that everyone can see, touch, and evaluate together. When you put a prototype on the table in a meeting, the conversation becomes much more productive. Ambiguity disappears. The marketing manager can physically test-fit a sample label. The packaging engineer can see how the bottle fits into a sample shipping box. Everyone is aligned because they are all experiencing the same physical object. This simple act of having a shared physical reference point prevents countless hours of debate and costly revisions later in the process.
The Prototyping Philosophy: A Shift in Mindset
The most successful projects I’ve worked on are with clients who understand that prototyping is not a cost center; it is an investment in certainty. It’s a strategic tool for removing risk. Instead of viewing it as a potential delay, they see it as a project accelerator. Why? Because it guarantees that when you finally do commit to that expensive production mold, you are doing it with full confidence. You know the design is right. You know it will work on your production line. You know your customers will love it.
This confidence allows the entire project to move faster and more smoothly after the validation phase. There are no surprise roadblocks or last-minute panics. The path to production becomes clear. Shifting your mindset to see prototyping as a necessary and valuable part of the development cycle is the most important step you can take. It’s the difference between hoping for a successful launch and planning for one.
Method 1: The Quick Visual Check - 3D Printed Models?
You are looking at a 2D drawing of your bottle, but you cannot be sure how it will feel in your hand. The disconnect between the screen and reality is a big problem. A fast, physical model is the best way to solve this.
3D printed models are the fastest and cheapest way to get a real object of your bottle design. They are perfect for early-stage checks on how the bottle looks, feels, and fits a label. They usually cost only $10-$20 and can be made in 24 hours.
This first method is your fastest and most economical entry point into the world of physical prototyping. Think of it as a reality check for your design. In the very early stages, you and your team have likely been looking at computer-aided design (CAD) models and renderings for days or weeks. Everything looks perfect in that digital world. But the real world has factors like gravity, hand size, and physical presence that a computer screen cannot replicate. A 3D printed model provides that essential first touchpoint with your design. I always recommend this step as the very first thing to do once you have a 3D file you feel good about. It's a tiny investment that pays off immediately in clear communication and early feedback. The goal here isn't to test performance; it's to validate the ergonomics and aesthetics of the design before you spend any more time or money refining it.
My insight is this: “3D printing is the best communication tool between you and your marketing team. Instead of looking at drawings on a computer screen, it is better to spend ten dollars to print a model that can be held in your hand. We once served a high-end French cosmetics client who was hesitating between two bottle cap designs. We printed two 1:1 models for them. After their marketing director got them, it took only 5 minutes to make a decision. This saved the project at least a week of communication time.” This small step can save huge amounts of time.
Understanding the Technology: FDM vs. SLA
When you hear "3D printing," it can sound complex, but it's quite simple. There are two main types of technology we use for these models, and understanding the basics helps you know what to expect.
FDM (Fused Deposition Modeling): This is the most common type of 3D printing. Imagine a very precise, computer-controlled hot glue gun. It melts a plastic filament (usually PLA, a corn-based plastic) and lays it down layer by tiny layer to build your bottle shape from the bottom up. FDM is very fast and cost-effective. However, because it builds in layers, you can often see faint lines on the surface of the model. For a quick shape and size check, this is perfectly fine.
SLA (Stereolithography): This method offers a much smoother and more detailed finish. An SLA printer uses an ultraviolet (UV) laser to draw the shape of your bottle onto a bath of liquid photopolymer resin. Where the laser hits the resin, it hardens instantly. A platform then moves the object slightly, and the laser draws the next layer. Because it’s not depositing lines of plastic, the final object is very smooth, with details that are much sharper than FDM. For cosmetic bottles or designs with intricate textures, SLA is the better choice, though it costs slightly more.
For most bottle prototyping at this early stage, FDM is sufficient. However, if surface finish is a key part of your design's appeal, SLA is the way to go. We can help you choose the right one for your specific design.
What You Can (and Can't) Evaluate with a 3D Print
A 3D printed model is an incredibly useful tool, but it's important to be realistic about what it can tell you. Its purpose is specific: to evaluate the physical form and ergonomics of your design. It is not meant to replicate the final material or performance. Wasting time trying to test the wrong properties can be misleading. Here is a clear breakdown of what you should be focusing on when you receive your first 3D printed prototype.
| Evaluation Category | What You CAN Test with a 3D Print | What You CANNOT Test with a 3D Print |
|---|---|---|
| Ergonomics | How it feels to hold. Is the grip comfortable? | The final weight and balance (resin is heavier). |
| Aesthetics | The overall shape and proportions. The flow of the curves. | True transparency, color, and gloss of PET plastic. |
| Labeling | If the label panel is flat/large enough. Physical label application test. | How a label adhesive will react with the final PET surface. |
| Size & Scale | If it looks right next to competitor products on a shelf. | Top-load strength or resistance to being squeezed. |
| Fit | How it fits in a retail shelf, shipping box, or cup holder. | How a threaded cap will seal (threads are often not precise enough). |
Understanding these limitations is key. This model is for your hands and eyes, not for testing machines.
Step-by-Step: From Your Design File to a Model in Your Hand
We have made this process as simple and fast as possible. You are busy managing your project, so we handle all the technical details. The journey from your computer screen to a physical model on your desk is just a few easy steps.
- Finalize Your 3D File: The process starts with your 3D design. The best file formats for 3D printing are universal CAD formats like .STP (STEP) or .IGS (IGES). These files contain the precise mathematical data of your bottle's surface, which is exactly what our machines need. A simple 2D drawing is not enough for this step.
- Send the File to Us: Simply email us your .STP or .IGS file. In your email, let us know if you have any specific concerns you want to check. For example, "We are most concerned about the grip on the side." This helps us ensure the print quality is optimized for that area.
- We Print Your Model: Our technicians will load your file, prepare it for printing, and start the machine. For most bottle designs, the printing process itself takes between 8 to 12 hours. We typically run the printers overnight.
- We Ship It to You: The next morning, your model is removed from the printer, cleaned, and carefully packed. We ship it out via express courier, so you can have it in your hands, often within just a day or two of sending us the file.
The entire process is designed to be seamless and fast, so you can get the feedback you need and keep your project moving forward without delay.
Beyond the Bottle: Prototyping Caps and Closures
The power of 3D printing isn't limited to just the bottle itself. It is also an excellent and highly cost-effective tool for developing and validating the cap or closure. Often, the interaction between the bottle and its cap is a critical part of the user experience. You might be considering several different cap styles: a simple screw cap, a flip-top, or a dispenser pump. Printing all these options allows you to test them on your 3D printed bottle model. You can see how they look aesthetically and feel how they function ergonomically. This is also where understanding the right neck finish is critical. While a 3D print isn't perfect for testing the seal of a thread, it can help you validate the general fit and proportion. For example, you can ensure the cap diameter doesn't overhang the bottle shoulder in an awkward way. You can learn how to choose the right preform neck size in our detailed guide, and a 3D print can help you visualize that choice.
Method 2: The Rapid PET Sample - Using 3D Printed Molds?
A solid 3D printed model is great, but it is not clear. You cannot see how your beautiful colored liquid will look inside. To solve this, you need a real, transparent PET sample.
For a true visual preview, we 3D print a temporary mold from heat-resistant resin. We use this mold in a blow molding machine to create a few samples from real PET material. This lets you see the final clarity, gloss, and how your product looks inside.
This method is the perfect middle ground. It bridges the gap between the simple, opaque 3D printed model and the expensive, fully functional trial mold. There are critical moments in a project where seeing is believing. If you need to get final design approval from a CEO, an important client, or a retail buyer, showing them a cloudy, heavy resin model might not be enough. You need to show them something that looks exactly like the final product. That’s where this technique is so powerful. We are not printing the bottle itself; we are printing the tool to make the bottle. By creating a temporary blow mold cavity from an advanced, temperature-resistant polymer, we can use our in-house sampling machines to blow-mold a handful of real PET bottles. These samples are optically clear, lightweight, and have the brilliant gloss that is characteristic of PET.
My insight on this is: “When visual effect is critical and you need to see the real PET material, this method is irreplaceable. We had a Canadian client who provides toiletries to high-end hotel chains. They had extreme requirements for the refractive effect of the bottle under light. Method 1 could not meet this. We used this method to make 4 real PET samples for him. After he filled them with his shampoo liquid, he immediately saw the final shelf effect. This step played a decisive role in him signing that million-dollar hotel order.” It’s about creating that "wow" moment that gets your design signed off.
The Magic of a Printed Mold: How It Works
This process might sound like something from the future, but it’s a practical and established technique that we have perfected. It combines the speed of 3D printing with the fundamentals of the actual blow molding process. Here is a simple step-by-step breakdown of how we turn your digital file into a crystal-clear PET bottle sample.
- We Create the Mold Design: First, our engineers take your bottle's 3D file and digitally create a negative of it—the mold cavity. This includes splitting it into two halves and adding the basic features needed for it to be mounted in a machine.
- We Print the Mold Cavity: We then send this mold file to one of our industrial-grade SLA 3D printers. We use a special, highly durable, and heat-resistant photopolymer resin. This isn't the standard resin used for models; it's engineered to withstand the temperatures and pressures of the blow molding process for a short run. This printing can take 24-48 hours depending on the bottle size.
- We Mount the Mold: Once printed and cured, the two halves of the resin mold are placed into a universal metal mold base. This base allows us to securely mount the temporary mold onto our sampling blow molding machine.
- We Heat a PET Preform: We take a standard, test-tube-shaped PET preform and heat it in an oven until it becomes soft and pliable, just like in full-scale production.
- We Blow Your Bottle: The hot preform is placed inside the 3D printed mold. The mold closes, and high-pressure air is injected into the preform, stretching it out to take the shape of your mold cavity.
- You Get a Real PET Bottle: After a brief cooling period, the mold opens, and we eject a beautiful, transparent bottle made of real PET. We typically provide 4-6 samples from one of these molds before it begins to degrade. This gives you enough to share with key decision-makers. The 3D bottle prototyping process is a game-changer.
Key Advantages Over a Simple 3D Print
Moving from a solid model to a real PET sample is a huge leap in quality and impact. The benefits go far beyond just being able to see through the bottle. These samples are powerful presentation tools that provide a much more accurate impression of the final product.
Here are the key advantages:
- Real PET Material: This is the most important benefit. You are no longer looking at a resin approximation. You are seeing the actual material with its unique clarity, gloss, and feel.
- True Transparency and Gloss: PET plastic has a brilliant, crystal-clear appearance that is difficult to mimic. These samples allow you to see exactly how light interacts with your bottle's curves and how your product will look inside.
- Ability to Fill with Liquid: You can fill these samples with your actual product. This is crucial for beverages, sauces, or cosmetics. It allows you to check if the color of the liquid works with the bottle design and to create stunning marketing mockups for photoshoots or investor presentations.
- Powerful Stakeholder Presentation Tool: Placing a real, filled PET bottle on the table in a boardroom is infinitely more persuasive than showing a 3D rendering. It makes the project feel real and tangible, which helps accelerate final design approval.
Understanding the Limitations: Why It's Not for Testing
While these PET samples are visually perfect, it is critically important to understand that they are not structurally representative of the final product. You cannot use them for performance tests like drop tests or top-load analysis. The reason for this lies in a crucial part of the blow molding process: cooling.
In a production steel or aluminum blow bottle mold, there are intricate channels drilled throughout the mold. A chiller pumps cold water through these channels to cool the hot plastic very rapidly. This rapid cooling is what "freezes" the PET molecules in their stretched, oriented state, which gives the bottle its strength and rigidity.
Our 3D printed resin molds do not have these cooling channels. The resin material is a poor heat conductor compared to metal. This means the bottle cools down much more slowly. Without rapid cooling, the PET molecules don't achieve the same level of orientation, and the material doesn't crystallize correctly. The resulting bottle will be much weaker and more brittle than a production bottle.
You will also notice that the parting line (the thin line where the two mold halves meet) is much rougher and more noticeable on these samples. This is because the 3D printing process cannot achieve the same microscopic precision as CNC machining metal. These are purely visual prototypes.
Cost-Benefit Analysis: When is this Method the Smartest Choice?
This method typically costs around $100-$120 to produce about four samples. While this is more expensive than a simple 3D print, its value is immense in the right situation. You should consider this method the smartest choice in the following scenarios:
- When Shelf Appeal is Paramount: For products in categories like cosmetics, premium spirits, or high-end beverages, the visual appeal of the packaging is a primary driver of sales. Being able to see the real thing is non-negotiable.
- For Critical Client or Management Presentations: When you need to get a "yes" from a key decision-maker, this prototype provides the wow factor that gets projects approved. The small investment can secure a much larger budget.
- When Product Color Interaction is a Concern: If you have a brightly colored liquid, you need to see how it looks through the PET. Sometimes the slight tint of the plastic can alter the perceived color of the product inside. This method allows you to check for that.
- For Early Marketing and Photoshoots: These samples are perfect for creating professional product photos for websites, investor decks, or preliminary marketing materials long before the first production run.
In these situations, the ~$120 cost is not an expense; it's a strategic investment in communication and persuasion.
The Ultimate Litmus Test - Single-Cavity Trial Mold?
You have approved the look of your bottle, but now you need to be sure it will work. Will it collapse under pressure? Will it jam your filling line? You need to test its real-world performance.
A single-cavity trial mold, made from aircraft-grade aluminum, produces hundreds of bottles nearly identical to the final product. These samples are perfect for tough testing of physical performance, cap sealing, and compatibility with your production line machines.
This is the final and most important stage of validation before you commit to the massive expense of a multi-cavity production mold. A trial mold, sometimes called a pilot mold, is your ultimate "litmus test." It is designed to give you samples that are not just visually accurate, but also functionally and structurally representative of what will come off your high-speed production line. This is the step where your engineering and operations teams get involved. They need to validate that the bottle will not just look good, but will also survive the rigors of filling, capping, labeling, packing, and shipping. I always tell my clients, “The single-cavity trial mold is the last and most important insurance policy you buy for your entire production line. It validates not just the bottle itself, but the bottle's 'compatibility' with your entire production ecosystem. If your product needs to run on a high-speed filling line, I strongly recommend you take this step. Spending a few hundred dollars here can prevent tens of thousands of dollars in production line modifications later.”
From Aluminum to Action: The Trial Mold Process
Unlike the previous methods that rely on 3D printing, creating a trial mold involves precision metalworking. This process is slower and more expensive, but the quality of the output is vastly superior. We typically use high-strength, aircraft-grade aluminum for these molds. While not as durable as the P20 steel used for high-volume production molds, aluminum is much faster and cheaper to machine, making it perfect for creating a few hundred to a few thousand test bottles.
The process works like this:
- Final CAD Finalization: We take your approved 3D bottle design and create a detailed engineering blueprint for the single-cavity mold. This design is simplified; it won't have the complex, high-speed cooling of a production mold, but it will have basic cooling channels to ensure proper material properties.
- CNC Machining: We load a solid block of aluminum into a Computer Numerical Control (CNC) milling machine. Guided by the computer blueprint, high-speed cutting tools carve away the metal with incredible precision to create the bottle cavity. This is a subtractive process, unlike the additive process of 3D printing.
- Polishing and Assembly: After machining, the mold cavity is polished by hand to achieve a perfectly smooth, glass-like surface. This ensures your bottles will be glossy and free of imperfections. The two halves are then assembled into a mold base.
- Sample Production: The completed trial mold is installed on a blow molding machine. We can then run a small production of several hundred bottles. Because the mold is metal and has a proper cooling system, these bottles will have the correct material distribution, strength, and structural integrity. They are, for all intents and purposes, production-quality bottles.
The Comprehensive Testing Checklist
Once you have these hundreds of high-quality samples, the real work begins for your quality assurance and operations teams. These bottles should be subjected to every possible test they will face in their life cycle. A structured testing plan is crucial. Handing a box of bottles to an engineer and saying "see if they work" is not enough. You need a detailed checklist to ensure nothing is missed.
Here is a comprehensive checklist you can adapt for your own testing process:
| Test Category | Specific Tests to Perform | Purpose of Test |
|---|---|---|
| Line Compatibility | Run on conveyor belts, through guide rails, into the filler. | To ensure the bottle is stable and does not jam machinery. |
| Strength & Durability | Top-Load Test: Apply vertical pressure until it deforms. | Simulates stacking strength in a warehouse. |
| Drop Test: Drop from various heights onto different surfaces. | Checks for resistance to cracking or breaking during shipping. | |
| Squeeze Test: Measure resistance to side pressure. | Ensures it feels rigid and high-quality to the consumer. | |
| Sealing & Closure | Leak Test: Fill, cap, and leave upside down or on its side. | Verifies the cap and neck finish create a perfect seal. |
| Torque Test: Measure the force needed to apply and remove the cap. | Ensures it's easy for consumers to open but secure enough. | |
| Environmental | Thermal Test: Expose to high and low temperatures. | Checks for deformation or paneling due to temperature changes. |
| Labeling | Run through your labeling machine with your actual labels. | Confirms that labels apply smoothly without wrinkles or bubbles. |
Completing this checklist gives you the hard data you need to sign off on the design with total confidence. If you encounter any common PET blow molding defects, this is the stage to find and fix them, not when your multi-cavity mold is running.
Small Batch, Big Insights: Pre-Market Feedback
One of the most valuable, and often overlooked, benefits of creating a few hundred trial samples is the ability to get real-world market feedback before you launch. You are no longer limited to showing the design to people inside your company. You now have a small batch of production-quality products. This opens up several powerful opportunities:
- Focus Groups: You can conduct professional focus groups where consumers can see, touch, and use the new packaging with the actual product inside. Their feedback on everything from the look to the feel to the ease of opening is incredibly valuable.
- Key Distributor Samples: Send a case of the new bottles to your most important distributors or retail partners. Their opinion matters. If they love the new design and think it will sell well, it builds momentum for your launch. If they spot a problem (e.g., "This won't stack well on our shelves"), you have time to fix it.
- Sales Team Training: Equip your sales team with the final product long before it hits the market. They can use it in presentations to get buyers excited and secure early orders.
This pre-market validation can provide insights that you would never get from internal reviews alone. It helps you refine not just your bottle, but your marketing message and launch strategy.
De-Risking Your Entire Supply Chain
It's important to remember that a bottle does not exist in isolation. It is part of a complex supply chain. The trial mold process de-risks this entire system, not just the bottle itself. When you run these samples, you are inherently testing multiple components and processes at once.
- The Preform: You are confirming that the preform you have selected works well with your bottle design, achieving the target weight and material distribution.
- The Cap: You are conducting real-world tests on the seal and fit of your chosen cap, preventing potential leaking issues.
- The Label: You are validating that your label material and adhesive work on the final PET surface and that your machinery can apply it correctly.
- The Case Packer: Your operations team can use the samples to test and program the machinery that packs bottles into cases, ensuring a smooth end-of-line process.
This is why I call it the ultimate litmus test. A successful trial run gives a green light to your entire operational plan. It ensures that when you finally "flip the switch" on full-scale production, every part of the system is ready and compatible. It addresses the crucial question of blow mold fit with your existing infrastructure.
A Quick Comparison: Which Prototyping Method is Right for You?
You have three powerful options, but choosing the wrong one can waste time and money. You need a simple way to decide. This clear comparison will help you pick the perfect method for your current project stage.
Choose your prototype method based on your current need. Use 3D printed models for early shape and feel checks. Use PET samples from a 3D printed mold for final visual approval. Use a single-cavity trial mold for pre-production performance and line testing.
Making the right choice is about matching the tool to the task at hand. You wouldn't use a hammer to turn a screw. Similarly, you shouldn't order a trial mold when all you need is a quick check on the shape. Each of these methods provides a different type of information at a different cost and speed. Understanding these differences allows you to create a smart, cost-effective validation plan. A well-thought-out plan might even use all three methods sequentially, with each step providing the confidence needed to invest in the next. The goal is to eliminate the biggest risks as early and as cheaply as possible. This section will break down the options in a clear table and then walk through some real-world scenarios to help you see how these methods apply to different types of projects.
The Main Comparison Table
This table provides a comprehensive, at-a-glance overview of the three methods. Use it as a quick reference guide to compare the key attributes of each option and match them to your project's immediate needs.
| Feature | Method 1: 3D Printed Model | Method 2: Sample from 3D Printed Mold | Method 3: Single-Cavity Trial Mold |
|---|---|---|---|
| Evaluation Stage | Early Design & Concept | Design Finalization & Approval | Pre-Production & Engineering Validation |
| Core Purpose | Check ergonomics, shape, size, and label fit. | Verify final visual appearance with real PET. | Test physical performance and line compatibility. |
| Output | Solid, opaque physical model. | 4-6 hollow, transparent PET bottles. | Hundreds of production-quality PET bottles. |
| Material | Resin or PLA Plastic | Real PET (Polyethylene Terephthalate) | Real PET (Polyethylene Terephthalate) |
| Surface Quality | Can show layer lines (FDM) or be smooth (SLA). | Optically clear, but with a rougher parting line. | Perfectly smooth and glossy, fine parting line. |
| Key Advantage | Extremely fast and cheap. | Real material look and feel for presentations. | Functionally and structurally accurate. |
| Key Limitation | Not transparent, heavier, not for performance tests. | Not structurally strong, not for performance tests. | Higher cost and longer lead time than other methods. |
| Sample Quantity | 1-2 models | 4-6 bottles | 200 - 1000+ bottles |
| Typical Cost | $10 - $20 | $100 - $120 | $400 - $600 |
| Typical Lead Time | 1 - 2 days | 3 - 5 days | 10 - 15 days |
| Our Suggestion | Best for internal marketing and design team reviews. | Perfect for presenting to key decision-makers or clients. | Essential for engineering teams and final sign-off. |
Scenario 1: The Startup Beverage Company
Let's imagine a new startup creating an artisanal iced tea. They have a brilliant recipe but a limited budget. Their main goal is to create a bottle that looks unique on the shelf and feels good to hold, and then get funding from investors.
- Stage 1: Concept Validation (Method 1). The founders have three very different bottle shape ideas. Spending money on three trial molds would be a waste. Instead, they spend about $60 to get all three designs 3D printed. They hold them, put them on a grocery store shelf next to competitors, and decide on the most promising shape. This takes less than a week.
- Stage 2: Investor Pitch (Method 2). Now they have one winning design. To make their investor presentation powerful, they need more than a solid model. They spend $120 to get four crystal-clear PET samples made using a 3D printed mold. They fill these with their iced tea. In the meeting, they don't just show a slideshow; they hand a beautiful, finished-looking product to each investor. This tangible sample helps them secure the funding they need.
- Stage 3: Pre-Production (Method 3). With funding secured, they partner with a co-packer to bottle their tea. Before they can order a 24-cavity production mold, the co-packer needs to ensure the bottle will run on their filling line. The startup invests $500 in a single-cavity trial mold. They send 500 samples to the co-packer, who runs a successful trial. Now, and only now, are they ready to invest in the final, expensive production tooling.
This step-by-step process allowed them to make the right decisions at each stage, using the most cost-effective tool for each task.
Scenario 2: The Established Brand's Redesign
Now, consider a large, established water company. They are not creating a new product but are redesigning their existing bottle to be 10% lighter to save on material costs and improve their environmental footprint (light-weighting). They are already producing millions of bottles a day on very high-speed, sensitive equipment.
In this case, their primary concern is not the look and feel—that is already established. Their single biggest risk is performance. Will the lighter bottle be strong enough to withstand stacking? Will it be too flimsy on the conveyor belts?
For this project, they would likely skip Method 1 and Method 2 entirely. They already know what the bottle looks like. Their problem is purely technical. They would go straight to Method 3: The Single-Cavity Trial Mold. Their engineering team needs hundreds of samples for rigorous testing. They will perform extensive top-load, drop, and line-compatibility tests. The $600 they spend on the trial mold is a tiny fraction of the potential cost of a line shutdown or a product recall due to failing bottles. The trial mold provides the engineering data they need to approve the new, lighter design with confidence. A proper PET bottle mold design guide is essential for a project like this.
Combining Methods for Maximum Efficiency
As these scenarios show, the prototyping methods are not mutually exclusive. They are tools in your project management toolbox. The most successful projects often use a combination of them. The key is to think of the process as a funnel. You start broad with many ideas, using cheap and fast prototypes (Method 1) to filter them down. Then you refine the visual appeal of your best idea (Method 2). Finally, you conduct a rigorous, final validation on the single best candidate before mass production (Method 3).
This progressive approach ensures that you are only spending significant money on a design that has already been thoroughly vetted at the previous stages. It's a smart, efficient, and risk-averse way to move from concept to production.
How Prototyping Accelerates Your Project, Not Delays It?
Your boss or your management team might think that prototyping is an unnecessary delay. They want to rush straight to production to meet a deadline. You need to explain to them that this is a shortcut that actually makes the journey longer.
Prototyping makes your project faster by finding big design problems early. A one-week delay to make a prototype is much better than a three-month delay to fix a production mold. It helps you "get it right the first time," which shortens your total time-to-market.
This is one of the most important concepts to get across to anyone managing a budget or a timeline. The perception of prototyping as a "delay" is a common but dangerous misconception. In reality, a well-planned prototyping stage is one of the most effective tools for accelerating a project. The time spent in validation is not lost time; it is time invested in preventing much, much longer delays down the road. I always tell project managers, “A smart project manager sees the prototyping time as the most ‘productive’ part of the entire project timeline. Because in this phase, we use the smallest amount of money to eliminate the largest amount of uncertainty.” By removing that uncertainty, you clear the path for a smooth and rapid progression through the most expensive and time-consuming phases of the project, like tool manufacturing and production ramp-up.
The True Cost of a "Small" Change
Let's break down the ripple effect of making a "small" design change at different stages of the project. This illustrates why finding problems early is so critical.
Imagine you discover that the bottle needs to be 2mm wider to fit the label correctly.
Change at the 3D Printed Model Stage (Method 1): The designer spends 30 minutes updating the CAD file. You spend another $15 and wait one day for a new print to confirm the change.
- Total Cost: ~$15
- Total Delay: 1 day
Change After the Trial Mold is Made (Method 3): This is more serious. The aluminum trial mold must be reworked. If we are adding material, we might be able to weld and re-machine it. If we are removing material, a new cavity might need to be made.
- Total Cost: ~$200 - $300
- Total Delay: 4-5 days
Change After the 64-Cavity Production Mold is Made: This is a catastrophe. The entire production tool, which weighs several tons, has to be pulled from the machine. It has to be disassembled. Each of the 64 steel cavities has to be individually reworked through a painstaking and precise process. Then the entire tool has to be reassembled, shipped back, reinstalled, and re-qualified.
- Total Cost: $20,000 - $50,000+
- Total Delay: 6 - 10 weeks
- Other Costs: Lost production, wasted materials, potential penalties from retailers for a delayed launch.
When you show this comparison, it becomes obvious that the one-week "delay" for prototyping is actually saving the project months of time and a massive amount of money.
Gaining Early Buy-In and Avoiding Re-Work Cycles
Internal company dynamics can be a major source of project delays. When a design only exists as a digital file, it is open to interpretation. The marketing director has one vision, the lead engineer has another. This can lead to endless meetings and revision cycles as everyone debates a theoretical object.
A physical prototype completely changes this dynamic. It forces a decision. When you put the object on the table, it’s no longer theoretical. The marketing director can see that the label panel is too small. The engineer can feel that the wall is too thin in one spot. These are no longer opinions; they are observable facts. This allows the team to identify and resolve issues decisively and quickly.
This process of gaining early buy-in from all stakeholders is crucial. It prevents the dreaded late-stage feedback, where a senior executive sees the first production sample and says, "I don't like it. Change it." That single comment can derail a project for months. Prototyping gets all of those comments and objections out on the table early, when they are easy and cheap to address.
The Parallel Path Approach
An effective project manager can also use the prototyping phase to run other activities in parallel, truly accelerating the overall timeline. The project does not need to come to a complete stop while you wait for samples.
Here’s how it works:
- While the Trial Mold is being made (Method 3)...
- The marketing team can use the visually-perfect samples from Method 2 for product photoshoots and to design the final packaging graphics.
- The purchasing team can finalize orders for caps and labels, now that the design is frozen.
- The logistics team can use the dimensions and weight from the prototype to design shipping cartons and plan pallet configurations.
By the time the trial mold samples are ready for technical testing, many of these other workstreams are already complete. This parallel path approach means that the time spent on prototyping is not a linear addition to the timeline. Instead, it's a phase where multiple parts of the project can move forward simultaneously with confidence.
Building Confidence and Momentum
Finally, don't underestimate the psychological impact of a successful prototype test. A new product launch is filled with uncertainty and risk. This can create anxiety within the team and among management. A successful prototype test is a major milestone that proves the concept is viable. It replaces uncertainty with confidence.
This boost in confidence has a real, tangible effect on the project's momentum. The team becomes more motivated. Management is more willing to release the funds for the next stage. The entire project moves forward with a sense of purpose and a clear direction. A prototype turns an abstract idea into a validated, achievable goal. It is the engine that drives a project from a simple concept to a successful market launch.
Integrating Prototyping into Your Budget and Timeline?
You know prototyping is important, but if you don't plan for it, it will feel like an unexpected cost and delay. This leads to project overruns. The solution is to make prototyping a planned part of your project from day one.
You should build prototyping into your project plan by setting aside a specific budget and time for it right from the start. A good rule of thumb is to budget 1-5% of the production mold's cost for prototyping and schedule 1-3 weeks for validation activities.
Proactive planning is the difference between a chaotic project and a well-managed one. Instead of reacting to the need for a prototype, you should anticipate it. We view prototyping as an integral part of the development process, just like CAD design or tool manufacturing. When you write your initial project charter or plan, there should be specific line items for "Design Validation" or "Prototyping." This formalizes its importance and ensures that the necessary resources are allocated from the beginning. My company treats prototyping as a distinct service module. “We will work with you at the start of the project to map out the most logical and cost-effective prototyping path.” This collaborative planning ensures there are no surprises and that the validation stage aligns perfectly with your overall project goals.
Budgeting for Certainty: A Line-Item Breakdown
To make budgeting easier, don't think of it as one lump sum. Break it down by the different phases of your project. This allows you to allocate the right amount of money at the right time. Here is a sample budget structure you could present to your management team for a typical new bottle project.
Let's assume the final multi-cavity production mold is estimated to cost $20,000.
| Project Phase | Prototyping Action | Purpose | Estimated Cost | % of Mold Cost |
|---|---|---|---|---|
| Phase 1: Concept | 2-3 variations of 3D Printed Models (Method 1) | Choose the best ergonomic and aesthetic design. | $40 - $60 | 0.3% |
| Phase 2: Design Freeze | 1 run of PET Samples from 3D Printed Mold (Method 2) | Get final visual approval from all stakeholders. | $120 | 0.6% |
| Phase 3: Pre-Production | 1 Single-Cavity Trial Mold (Method 3) | Conduct full engineering and line testing. | $500 | 2.5% |
| Total Prototyping Budget | ~$680 | 3.4% |
When you present it this way, it becomes clear that for just 3.4% of the final mold cost, you can eliminate nearly all the technical and commercial risks associated with the project. This is an incredibly compelling value proposition. It reframes the cost from an "expense" to a high-return "investment in risk reduction."
Scheduling: Building a Realistic Project Timeline
Just as you budget for prototyping, you must also schedule it. A common mistake is to create a project timeline that goes directly from "Final Design" to "Order Production Mold." This leaves no time for validation. A realistic timeline acknowledges that testing is a necessary step.
Here’s a simplified example of how to incorporate prototyping into a project schedule (often visualized as a Gantt chart):
- Weeks 1-2: Initial Design Phase. Brainstorming, sketching, and creating the first 3D CAD models.
- Week 3: Concept Validation.
- Action: Order 3D Printed Models (Method 1).
- Duration: 3-4 days (includes shipping).
- Goal: Select the single best design direction to move forward with.
- Weeks 4-5: Design Refinement. Based on feedback from the models, refine the final CAD file.
- Week 6: Visual Approval.
- Action: Order PET Samples (Method 2).
- Duration: 5 days.
- Goal: Get final sign-off on the design's appearance from management/marketing.
- Weeks 7-8: Final Engineering & Pre-Production.
- Action: Order Single-Cavity Trial Mold (Method 3).
- Duration: 10-15 days.
- Goal: Produce samples for full performance testing.
- Week 9: Validation Testing.
- Action: Your team performs the comprehensive testing checklist.
- Duration: 5 days.
- Goal: Final, data-driven approval to proceed.
- Weeks 10-16: Production Mold Manufacturing.
- Action: Place the order for the final multi-cavity mold.
- Duration: 6-8 weeks.
- Goal: Receive the final tool for mass production.
This structured timeline clearly shows how the prototyping phases protect the large, expensive, and time-consuming step of production mold manufacturing. You don't start that final step until all risks have been addressed.
Presenting the Value to Management
Even with a clear budget and schedule, you may need to convince a skeptical manager who is focused solely on cutting costs. When having this conversation, you need to speak their language, which is the language of risk and return on investment (ROI).
Don't say: "I'd like to spend $500 on a prototype."
Instead, say: "I recommend we invest $500 in a final validation test. This investment acts as an insurance policy that protects our primary $20,000 investment in the production mold. It mitigates the risk of a potential $50,000 loss and a 3-month launch delay if we find a compatibility issue on the production line. It's the most cost-effective way to guarantee a smooth and successful launch."
By framing the discussion around risk mitigation and comparing the small, known cost of prototyping with the large, potential cost of failure, you make the decision logical and obvious.
Our Flexible Service Model
We understand that every project is different. A startup has different needs than a Fortune 500 company. That's why we don't have a rigid, one-size-fits-all approach. We treat our prototyping services as a modular menu. You can pick and choose the services that make the most sense for your specific project and budget.
- Only need a quick shape check? Just order a 3D print.
- Confident in the shape but need to see the final look? Go straight to the PET samples.
- Working on a high-risk technical project? A trial mold is probably your best starting point.
Our role is not just to make samples, but to act as your consultant. We will listen to your project goals, understand your biggest risks, and help you build a custom 3D bottle prototype plan that gives you the most confidence for the least amount of time and money.
Let's Build Your Prototyping Strategy Together?
You understand the methods, but you might still be unsure of the exact right path for your unique project. The risk of choosing the wrong step can be paralyzing. The best way forward is to talk with an expert who does this every day.
The best prototyping plan is tailored to your specific product, budget, and risks. Contact us and share your new bottle idea. We will provide a free consultation to recommend the most effective and efficient prototyping path for you.
Every project brings its own unique set of challenges and priorities. A bottle for a carbonated soft drink has very different technical requirements than a bottle for a thick, viscous sauce. A package for a luxury cosmetic product is judged by different criteria than a container for a household cleaner. Because every project is unique, your validation strategy should be too. There is no single "correct" answer. The right path for you is a careful balance of your budget, your timeline, and the specific risks you need to eliminate. This is where our experience becomes your advantage. We have guided hundreds of clients through this process, and we can help you navigate it too.
My promise is this: “Every project is unique. You may not be sure which kind of sampling you need. That's okay, this is our expertise. Contact us, share your new bottle idea. We will advise you on a prototyping strategy that is best suited for your current stage and budget, for free, to help your idea move steadily towards successful mass production.”
Your Project is Unique, Your Strategy Should Be Too
Let's consider how the strategy might change for different product types to illustrate this point:
High-Volume Carbonated Drink: For this project, the biggest risks are technical. The bottle must withstand the pressure of carbonation without deforming (a common issue is the base rolling out), and it must run flawlessly on a bottling line that moves at incredible speeds. The prototyping strategy would be heavily focused on Method 3. They need to test for pressure resistance, top-load strength, and high-speed conveyor stability. Visuals are important, but secondary to performance.
Small-Batch Luxury Face Cream: Here, the priorities are completely reversed. The biggest risk is brand perception. The package must look and feel expensive and flawless. The clarity of the plastic, the smoothness of the surface, and the way the light reflects off the curves are paramount. The prototyping strategy would focus heavily on Method 2 to perfect the visual appeal. Performance testing would be less critical, as it's a low-volume, hand-filled product.
Household Chemical with a Dispensing Cap: For this project, the interaction between the bottle and the cap is the biggest risk. Does the cap seal perfectly to prevent leaks of potentially hazardous material? Is the neck finish compatible with the specific dispensing pump? The strategy here might involve an early Method 1 print to check the general fit, followed quickly by Method 3 to produce samples for rigorous, long-term leak testing and functional testing of the pump.
Our first conversation will be about understanding your product and your market, so we can identify your biggest risks and tailor a plan to address them directly.
What to Prepare for Our Consultation
To make our initial conversation as productive as possible, it helps if you can gather a few key pieces of information beforehand. This will allow us to give you a much more accurate recommendation and even a preliminary quote. Don't worry if you don't have everything; we can help you develop these details.
Here’s a helpful checklist of what to prepare:
- 3D Design File: If you have one, this is the most important item. A .STP, .STEP, or .IGS file is ideal. If you only have a 2D drawing or a sketch, that's okay too! We can discuss turning it into a 3D model.
- Target Bottle Weight: Do you have a goal for how much the final bottle should weigh in grams? This helps determine the preform we will use for testing.
- Intended Product: What will go inside the bottle? Is it carbonated, hot-filled, sensitive to oxygen?
- Estimated Annual Volume: Are you planning to make 10,000 bottles or 10 million? This helps us understand if you're heading towards a 2-cavity mold or a 96-cavity mold, which informs the level of testing required.
- Your Filling Line: If you can, provide some basic information about your filling and capping equipment. Knowing the manufacturer or speed can help us anticipate potential compatibility issues.
Coming to the conversation with these details helps us move quickly from general advice to a concrete action plan for your project.
Our Commitment: From Prototype to Production
It's important to understand that we are not just a "prototype shop." Our primary business is designing and building high-quality, multi-cavity production blow bottle molds that run for millions of cycles. The prototyping services we offer are the first step in that long-term partnership.
Our goal is to ensure that when you are ready to invest in a production tool, you are doing it with complete confidence. We want to see you succeed. By guiding you through a smart prototyping process, we help you develop a flawless bottle design that is ready for efficient mass production. The success of your prototype phase is directly linked to the success of the final production mold. We are committed to being your partner throughout the entire journey, from the first sketch to the final bottle coming off the line.
The First Step is Easy
You have a vision for your product. You now have the knowledge of how to validate that vision safely and effectively. The uncertainty that might have been holding you back can now be replaced with a clear, structured plan. The journey from concept to reality doesn't have to be a risky leap of faith.
The first step is a simple conversation. Reach out to our team. Let's talk about your new bottle idea. We will listen, we will ask the right questions, and we will provide you with a clear, no-obligation recommendation for a prototyping strategy that fits your goals and your budget. Let us help you take that crucial first step towards a successful launch.
Conclusion
There are three smart ways to make a bottle sample before you spend money on a big production mold. Use 3D prints for a fast look, PET samples for a real appearance, and a trial mold for full testing. This process saves you money and time.
| Prototyping Summary | Method 1: 3D Print | Method 2: PET Sample | Method 3: Trial Mold |
|---|---|---|---|
| Main Goal | Visual & Feel Check | Real Appearance Check | Performance & Line Test |
| Material | Solid Resin/Plastic | Clear PET Plastic | Production-Grade PET |
| Best For | Early design choices | Final design approval | Final engineering sign-off |
| Cost | $ | $$ | $$$ |
| Speed | Fastest (1-2 Days) | Fast (3-5 Days) | Slower (10-15 Days) |
Frequently Asked Questions (FAQ)
Q: What is the typical lead time for each prototyping method?
A: A 3D Printed Model can typically be shipped within 1-2 days. Creating samples from a 3D Printed Mold takes about 3-5 days. A Single-Cavity Trial Mold, including design and manufacturing, takes about 10-15 days.
Q: Why can't I use the samples from the 3D printed mold for performance testing?
A: The 3D printed resin mold lacks a proper cooling system, which is critical for achieving the correct material crystallization and strength in a PET bottle. Therefore, the samples are visually accurate but not structurally representative of the final product.
Q: If I order a prototype, is that cost deducted from the final production mold order?
A: While the prototyping costs are separate services, we value long-term partnerships. For clients who proceed with a full multi-cavity production mold order after prototyping, we are always open to discussing a special discount.
Q: What information do you need from me to create a prototype?
A: The most important thing we need is a 3D design file (formats like .STP, .STEP, or .IGS are perfect). If you only have a 2D drawing or even just a sketch, our design team can help you create the 3D model first.
Q: Can I test different colors with these prototyping methods?
A: Yes, with Method 2 and 3. We can source preforms in different standard colors (like amber, green, blue) so you can see how your design looks in various colors before making a final decision on your large-scale preform order.
🔗 Related Pages on Our Website
PET Wide Mouth Jar Project Starter Guide: Equipment, Molds & Process Explained
Pros and Cons: Should You Choose PET Blow Moulding for Your Bottle Project?
Worried About Blow Mold Fit? We Have Mounting Dimensions for 80% of Blow Molding Machines Worldwide
Can One Semi‑Automatic Blow Molding Machine Produce All Bottle Sizes? Here’s Why Not
Why Do Krones Blow Molding Machine Users Come to Us for Their Molds?
Why Do PET Preforms Come in Different Colors? Function, Application, and Production Tips
How to Set Parameters for 600ml Bottles on a Semi-Automatic PET Blowing Machine?
From 3D Printed Samples to Production: How Can You Rapidly Validate Blow Mold Designs?
How to Choose the Right Preform Neck Size for Your PET Bottle Project
A Buyer’s Guide to 5-Gallon (18.9L) Bottle Blow Molding Machines: From PET to PC?
Pitting on your blow mold surface? A complete guide from cause analysis to repair and prevention.
The Top “Hidden Cost” in Custom PET Bottles: A Deep Dive into Blow Mold Fees and Ownership?
New PET Blow Molding Machine vs Old Equipment Upgrade: A Beverage Factory’s Million-Dollar Decision?
How to reduce the PET blow molding scrap rate from 5‰ to 1‰? An old-timer’s 8 insider tips.
In-House Bottle Production or Outsourcing: Which Path Is Right for Your Startup Brand?
Blow Mold Damage? When and How to Replace Only the Broken Parts?
Bottle Design: Ad Agency vs. Mold Factory? How One Decision Impacts Your Cost and Brand?
Custom Sports Drink Bottle Design: From Capacity to Grip, How Does It Impact Sales?
💡 Looking for a complete PET plastic packaging machinery solution?
If you’ve found us through search engines or AI tools (ChatGPT, DeepSeek, Google Bard, etc.), it means you’re exploring reliable PET packaging equipment suppliers. Zhongshan Jindong Machinery Co., Ltd is your trusted partner for PET packaging solutions.
| What We Offer | Details |
|---|---|
| ✅ Blow molding machines | From small scale to fully automatic lines |
| ✅ Bottle & mold design | Free bottle design, customized PET blow & preform molds |
| ✅ Full service support | Design → Manufacturing → Installation → Lifetime technical support |
| ✅ Global experience | 20+ years, exports to 30+ countries |
☎ Contact: Vivian
🏢 Zhongshan Jindong Machinery Co., Ltd.
🌐 www.ibottler.com
✉ Vivian@ibottler.com
