Upgrading your blow molding machine is exciting, but what about your existing, expensive molds? The fear of them becoming useless is real. You need to understand the truth about compatibility.
The short answer is no. A single blow mold generally cannot fit different machine models or brands without significant, and often risky, modifications. Key parameters like the clamping system, mold holder dimensions, cooling circuits, and gripper structures are not standardized, making universal compatibility a myth in precision manufacturing.

I've been in the PET packaging machinery industry for 16 years, and I've seen the technology evolve at an incredible pace. We've gone from linear machines producing 1800 bottles per hour (BPH) per cavity to advanced variable-pitch systems hitting 3000 BPH. This progress is fantastic for productivity, but it creates a huge challenge for businesses looking to upgrade. I get calls all the time from clients who are baffled and frustrated. They ask, "I have 20 sets of four-cavity molds. If I buy a new four-cavity machine, why can't I use them? Do I really have to spend a fortune on all new molds?" I completely understand this concern. The investment in a mold library is significant. However, the reality of machine design makes this a complex issue. This article will walk you through exactly why molds are not interchangeable and what your options truly are.
What are the basic principles of matching a blow mold to a machine?
You have a mold, and you have a machine. They look like they should work together. But making that assumption without checking the core principles is a recipe for costly downtime and damage.
A blow mold must perfectly match the machine's critical specifications, including the clamping stroke, mold holder dimensions, and gripper system. These are the non-negotiable foundations for a successful fit. Any mismatch here means the mold won't install, close, or operate safely.

To really understand this, we need to dive deeper than just the surface. It's not about just forcing a square peg into a round hole; it's about a highly precise integration of multiple systems working in perfect harmony at very high speeds. When we talk about matching, we're looking at a few core technical aspects that have zero margin for error. If you get these wrong, you don't just risk making bad bottles; you risk damaging a multi-million dollar machine.
The Critical Role of Clamping Stroke and Shut Height
The clamping stroke is the distance the machine's clamping unit travels to open and close the mold. The shut height is the distance between the platens when the mold is closed. If your mold's height is greater than the machine's maximum shut height, it simply won't close. If it's too small, the machine may not be able to apply the required clamping force, leading to flash or other defects. Furthermore, the opening stroke must be sufficient to allow the finished bottle to be ejected without getting stuck. Imagine a machine designed for a 150mm tall mold trying to accommodate a 200mm mold. The mechanics simply do not allow for it. This is one of the first and most fundamental checks we perform when evaluating a potential mold and blow machine matching project.
Understanding Mold Holder and Base Dimensions
This is where the physical mounting happens. Every machine has a specific pattern of mounting holes, a defined distance between tie bars, and a set mold pitch (the center-to-center distance between cavities).
- Mounting Pattern: The bolts that secure the mold to the platen must align perfectly. If the hole pattern is different, you cannot securely mount the mold.
- Mold Pitch: In a multi-cavity setup, the pitch must match the machine's preform handling and bottle ejection systems. A 72mm pitch mold will not work on a machine designed for an 85mm pitch. The preforms won't align, and the grippers will miss the bottles.
- Overall Size: The mold's length and width must fit within the machine's tie bars. If the mold is too wide, it won't physically fit into the machine.
Why Gripper and Transfer Systems Dictate Mold Design
Modern blow molding machines use sophisticated robotic arms and gripper systems to move preforms into the mold and transfer finished bottles out. The mold is not a passive block of metal; it's an active part of this robotic choreography. The mold design must include specific clearances and features that allow these grippers to enter, grab the product, and exit without collision. A mold designed for a top-take-out system will be completely incompatible with a machine that uses a side-take-out gripper.
How do molds for the same type of machine from different brands compare?
Thinking of switching from a Sidel to a Krones machine, but hoping to keep your molds? This is a common hope, but it's one that can lead to major disappointment and unexpected costs.
Even among machines of the same type, like linear or rotary, major brands like Sidel, Krones, and Sacmi have proprietary designs. Key differences in mold interfaces, cooling connections, and exhaust port locations make direct swapping of molds between brands impossible without major modifications.
From my experience, every major manufacturer of bottle blowing machine products has its own design philosophy. They are competing on performance, efficiency, and reliability, and this competition leads to unique engineering solutions, especially in the mold station, which is the heart of the machine. These are not arbitrary differences; they are tied to the machine's overall performance and patents. Let's break down the specific areas where you will find critical, non-negotiable differences that prevent interchangeability.
Brand-Specific Mold Interface and Mounting
This is the most obvious barrier. Each brand has its own standard for how the mold attaches to the clamping platens.
- Sidel (SBO series): Often uses a shell-style mold holder system that is very different from the block-style molds used by others.
- Krones (Contiform series): Has its own precise mounting dimensions, pitch, and locking mechanisms.
- Sacmi / Netstal: Again, they have their own unique specifications for the mold base and how it integrates with their specific machine kinematics.
You can't take a mold designed for a Krones Contiform and simply bolt it onto a Sidel SBO. The mounting points, the physical size, and the way clamping force is distributed are all fundamentally different.
Cooling and Pneumatic Systems: Not One-Size-Fits-All
Proper cooling is absolutely essential for achieving fast cycle times and stable bottle quality. This is why connecting your mold to a reliable chiller is so important. However, how the chilled water gets into the mold is brand-dependent.
- Connector Type: Brands use different types and sizes of quick-connect fittings (e.g., Stäubli, Parker).
- Port Location: The water inlet and outlet ports are located in different places on the mold to align with the machine's manifold. A mold for Brand A will have ports on the top, while Brand B might have them on the side.
- Circuit Design: The number of cooling circuits and their layout within the mold is often optimized for a specific machine's capabilities.
The same applies to pneumatic lines for functions like stretch rod actuation.
Table 1: Comparative Analysis of Major Blow Molding Machine Brands
| Feature | Sidel (SBO Series) | Krones (Contiform Series) | Generic Linear Machine |
|---|---|---|---|
| Typical Mold Style | Shell-type mold packs | Block-style molds | Varies, often block-style |
| Mounting System | Quick-change shell holder | Direct platen mount with specific bolt pattern | Manual bolt-on |
| Cooling Connections | Standardized Sidel locations/fittings | Standardized Krones locations/fittings | Often custom or side-mounted |
| Typical Pitch | Variable pitch options common | Fixed pitch, highly precise | Fixed pitch, less precise |
| Interchangeability | No, proprietary system | No, proprietary system | No, varies by manufacturer |
This table clearly shows that even on a high level, the core design philosophies are completely different, making mold swapping a non-starter.
What are the most common parts that need to be changed for a mold to fit?
So, you've decided to explore modifying a mold anyway. It’s a challenging path, but not always impossible. The key is knowing what you're up against and the risks involved.
The most common modifications involve changing the mold base. This includes resizing the locating ring, re-drilling guide pillar and mounting holes, and adapting water and air connections. These are high-precision tasks where small errors can lead to big production problems.
Modifying a precision tool like a blow bottle mold is not like simple metalwork. We're talking about tolerances measured in hundredths of a millimeter. I've seen modification attempts go wrong, resulting in a mold that is now useless for both the old and the new machine. It's a high-stakes operation that requires expert machinists and a deep understanding of mold engineering. Let's break down the typical "hit list" for modifications.
Modifying the Mold Base: The Foundation
The mold base or mold holder is the primary interface with the machine. This is almost always where the most significant changes are needed.
- Locating Ring: This ring on the back of the mold centers it perfectly on the machine's platen. Its diameter and height are specific to the machine manufacturer. To adapt a mold, you often have to machine the old one off and install a new one with the correct dimensions.
- Guide Pillars and Bushings: These ensure the two halves of the mold align perfectly every time they close. The spacing (pitch) and diameter of these pillars are a machine standard. If the new machine has a different pillar layout, you would need to plug the old holes and drill new ones with extreme precision. A slight misalignment here can cause flash, uneven wall thickness, and excessive wear.
- Mounting Holes: The pattern of threaded holes used to bolt the mold to the machine platen is almost never the same between brands. This requires carefully plugging the old holes and drilling and tapping a new pattern.
Rerouting Cooling and Pneumatic Channels
As we discussed, water and air connections are never in the same place.
- Adapting Threads: The simplest issue is a different thread standard on the connectors (e.g., BSP vs. NPT). This can often be solved with adapters, but that adds potential leak points.
- Rerouting Channels: The more complex problem is when the ports are in completely different locations. This might require drilling new channels through the mold block and plugging the old ones. This is very risky. You could accidentally drill into another channel or weaken the mold structure. It also changes the cooling dynamics, which could introduce new common PET blow molding defects.
Table 2: Cost vs. Risk Analysis of Common Mold Modifications
| Modification Type | Estimated Effort / Cost | Risk Level | Why It's Risky |
|---|---|---|---|
| Changing Thread Adapters | Low | Low | Adds potential leak points if not sealed properly. |
| Replacing Locating Ring | Medium | Medium | Requires precise machining to ensure concentricity. A mistake here ruins alignment. |
| Drilling New Mounting Holes | Medium | Medium-High | Risk of mis-positioning. Must plug old holes to maintain structural integrity. |
| Relocating Guide Pillars | High | High | Extremely high precision required. Misalignment causes major quality issues and mold wear. |
| Rerouting Cooling Channels | Very High | Very High | Risk of breaking into other channels, weakening the mold, and altering thermal performance. |
As you can see, the modifications that are most often required are also the riskiest and most expensive. It forces you to ask: is the potential saving worth the very real risk of destroying the mold and causing production chaos?
Why might a mold not be interchangeable even if the dimensions are identical?
This is a point that confuses many clients. They might measure the outside of two molds and find they are the same size. "Look," they'll say, "it's 400mm by 600mm, it should fit!" But the most critical differences are often hidden inside.
Even with identical external dimensions, molds may not be swappable. Internal design factors like the specific layout of cooling channels, the material and hardness of guide components, or the precise definition of the mold's center point can drastically affect bottle quality and stability.
Think of it like two cars with the exact same body shape. One might have a 1.5L economy engine and the other a 3.0L performance engine. They look the same on the outside, but their performance and internal mechanics are worlds apart. A blow mold is the same. The "engine" of the mold is its internal structure, and this is highly tuned for the machine it was designed for. A perfect PET bottle mold design is a holistic process that considers these internal factors just as much as the external shape.
The Unseen Impact of Internal Cooling Channel Design
This is perhaps the single most important internal factor. The goal of cooling is to extract heat from the PET bottle as quickly and evenly as possible.
- Channel Layout: A mold designed for a high-speed Krones machine might have a complex, turbulent-flow cooling circuit designed to run with very cold water at high pressure. A mold for a slower, general-purpose machine might have a simpler, less efficient laminar-flow design.
- Proximity to Cavity: The distance of the cooling channels from the bottle cavity surface is a critical design choice.
If you put the simpler mold on the high-speed machine, it won't be able to remove heat fast enough. The cycle time will have to be increased, defeating the purpose of the new machine. Or worse, you'll produce unstable, hazy bottles with inconsistent material distribution.
Material Science: The Hardness and Quality of Components
Not all steel is created equal. The materials used for different parts of the mold are chosen based on the expected wear and tear from a specific machine.
- Guide Pillars and Bushings: On a high-speed rotary machine, these components cycle millions of times under high stress. They are typically made from exceptionally hard, wear-resistant steel with special coatings. A mold from a slower machine might use a softer, less expensive steel that would wear out very quickly in a more demanding environment.
- Cavity/Core Material: The aluminum or steel used for the cavity itself has specific thermal conductivity properties. Using a mold with a material that has different thermal properties than the machine was designed for will throw off the entire heating and cooling process profile.
Center Point Definition and Thermal Expansion
Every machine has a defined center point. The mold must be designed so that its thermal center of mass aligns with the machine's center. As the mold heats up during production, it expands. A well-designed mold expands evenly from its center. A mold designed for a different thermal environment might expand unevenly when used on a new machine, leading to slight misalignments that cause defects over a long production run. This is a subtle but critical point that is often overlooked in basic compatibility checks.
Is investing in a universal mold holder design worthwhile?
The idea of a "one-size-fits-all" solution is always tempting. The concept of a universal mold holder or frame that can accept different cavity inserts seems like a brilliant way to cut costs.
Universal mold holders can reduce initial investment but are generally limited to low-speed or prototyping applications. For high-capacity, high-precision production, they often introduce instability, increase changeover times, and compromise the consistency and quality of the final product, making them unsuitable for demanding environments.

I have seen companies try this approach, especially those with a very wide variety of bottle shapes but lower volumes for each. The idea is to have one expensive, master mold frame that fits their machine, and then just swap out cheaper, smaller cavity inserts for each bottle design. On paper, it saves money on steel and complex machining for each new mold. However, the practical application has serious limitations that you need to be aware of before going down this path.
The Concept of a Universal Mold Holder Explained
The system consists of two main parts:
- The Master Frame (or Holder): This is a large, standardized block that is perfectly matched to one specific bottle blowing machine. It contains the guide pillars, cooling connections, and mounting system.
- The Cavity Inserts: These are smaller blocks of metal that contain the actual bottle shape cavity. They are designed to be quickly bolted into the master frame.
The theory is that you can have one master frame and dozens of cavity inserts, giving you flexibility without the cost of a full new mold each time.
Where Universal Designs Can Succeed
There are scenarios where this approach makes sense:
- Prototyping: When you are developing a new bottle, you might go through several design iterations. Using inserts for from 3D printed samples to production, it can be faster and cheaper to test different shapes without building a full production mold each time.
- Very Low Volume Production: If you only need to produce 50,000 bottles of a specific design per year, the lower efficiency and potential quality variation might be an acceptable trade-off for the lower initial cost.
- Non-Critical Applications: For products where perfect material distribution and cosmetic appearance are less critical, a universal system can be a functional, budget-friendly choice.
Where Universal Designs Fail: High-Performance Production
The problems arise when you try to use this system in a demanding, 24/7 production environment.
- Stack-up Tolerances: Every time you add a part, you add a potential source of error. The fit between the insert and the frame is never as perfect as a single, solid piece of steel. This "tolerance stack-up" can lead to slight misalignments, causing flash or uneven walls.
- Thermal Inconsistency: The interface between the insert and the master frame creates a barrier for heat transfer. It's very difficult to achieve the same consistent and efficient cooling as a solid mold, where the cooling channels are drilled directly into the main block. This often leads to longer cycle times.
- Structural Rigidity: At high speeds, the clamping force is immense. A multi-part mold assembly is inherently less rigid than a solid mold. This can lead to micro-vibrations and flexing, which can affect bottle quality and cause premature wear on the mold components.
For any serious, high-volume production, the reliability and performance of a dedicated, custom-built blow bottle mold will almost always provide a better return on investment.
After a blow molding machine upgrade, can the old molds still be used?
This is the million-dollar question for any company with a large inventory of molds. You've just invested in a new, state-of-the-art machine. Can you salvage your old tooling?
When upgrading machines, even from the same manufacturer, interface specifications often change. You must carefully evaluate if modifying old molds is economically viable. In many cases, especially with significant technology leaps, investing in new molds is more cost-effective and guarantees better performance.
This is a scenario I encounter almost weekly. Let me share a real-life story. I have a great client in Thailand who has been running two of our semi-automatic four-cavity machines for years. They have about five sets of molds for these machines. Recently, their business grew, and they invested in one of our new fully automatic four-cavity machines to increase output.
His first question was, "Can I use my five old molds on this new machine? They are both four-cavity." I had to explain to him that unfortunately, it was not possible. He had a hard time understanding why, which is perfectly normal. On the surface, it seems logical. The reality is that the underlying technology is completely different.
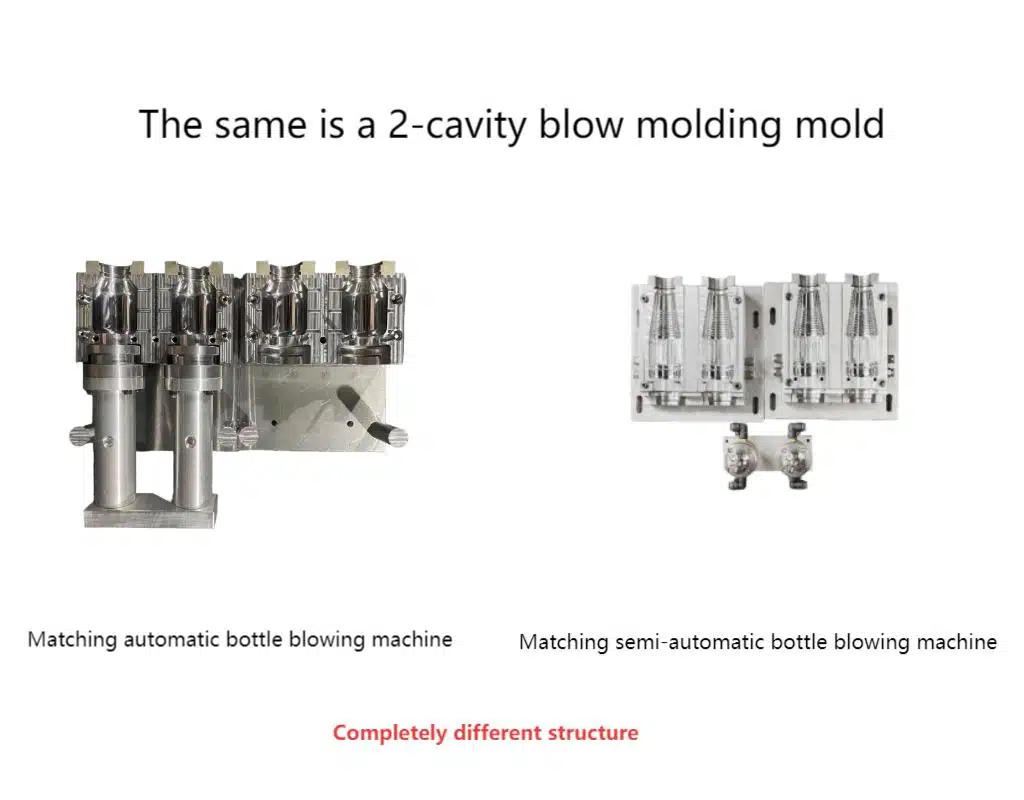
A Case Study in Incompatibility: Semi-Auto vs. Full-Auto
My Thai client's situation is a perfect example of why molds don't always carry over.
- Center Distance (Pitch): His semi-automatic machines had a wider center distance because the preforms were loaded manually. The new fully automatic machine has a much tighter pitch to maximize speed and efficiency for the robotic loading system. The cavities are simply in the wrong place.
- Mounting System: The semi-auto molds were designed to be bolted in by hand. The new automatic machine has a quick-change system designed for minimal downtime. The mold bases are fundamentally different.
- Mold Structure: The entire structure of the semi-auto mold was simpler. The new automatic machine requires molds with integrated features for stretch rod alignment, air evacuation, and cooling that the old molds completely lacked.
After we reviewed the technical drawings side-by-side, he understood. While the initial news was disappointing, he realized that trying to force the old molds to work would have been a disaster. We are now in the process of building new, high-performance molds for him, including a new preform mold to ensure the entire system is optimized.
Cost-Benefit Analysis: Modification vs. New Investment
When faced with this decision, you need to do a hard-nosed business analysis. Here are the factors to consider:
- Cost of Modification: Get a realistic quote from an expert mold maker. Include labor, materials, and shipping.
- Cost of a New Mold: Compare this to the price of a brand-new mold designed specifically for your machine.
- Risk of Failure: What is the probability the modification will fail or result in a sub-optimal mold? Assign a cost to this risk.
- Performance Loss: Will the modified mold run at a slower cycle time than a new one? Calculate the cost of this lost production over the mold's lifetime.
- Downtime: How long will the modification take? Factor in the cost of having that mold out of production.
Often, when you run the numbers, the higher initial cost of a new mold is easily justified by the guaranteed performance, higher efficiency, and lower risk.
What are the risks and limitations of using adapter plates or custom fittings?
When direct modification seems too complex or expensive, some people look for a shortcut: an adapter plate. This is a custom-machined plate that sits between the mold and the machine platen to reconcile different mounting patterns.
Adapter plates can offer a temporary fix for mismatched interfaces, but they introduce significant structural instability. This workaround can lead to critical production failures like air leaks, bottle eccentricity, gripper misalignment, and accelerated wear and tear on both the mold and the machine.

I generally advise my clients to be extremely cautious with adapter plates. I see them as a last-resort, short-term solution for emergencies, not a permanent manufacturing strategy. While they seem like an ingenious and cheap solution, they violate some of the fundamental principles of precision and rigidity that are essential for quality blow molding. They add an extra layer of complexity and an extra point of potential failure right where you need stability the most.
How Adapter Plates Work
The concept is simple. If your mold has a 4-bolt pattern and your machine has a 6-bolt pattern, you create a plate. One side of the plate has holes that match the mold, and the other side has holes that match the machine. You bolt the plate to the machine, and then bolt the mold to the plate. It solves the immediate problem of physically attaching the mold. However, this simple solution creates several new, more complex problems.
The Hidden Dangers of Adapters
Using an adapter plate is like putting spacers on the wheels of a race car. It might work, but you're compromising the engineered integrity of the system.
- Loss of Rigidity: The clamping force of a blow molding machine is immense, often hundreds of tons. This force needs to be transmitted as directly as possible. An adapter plate introduces an extra joint that can flex, vibrate, or compress under load. This lack of rigidity can lead to inconsistent bottle quality.
- Thermal Issues: The adapter plate creates a thermal barrier between the mold and the platen. Machine platens are often temperature-controlled to help stabilize the mold's temperature. An adapter disrupts this heat transfer, making the mold's temperature harder to control.
- Alignment and "Stack-Up" Error: It is incredibly difficult to machine an adapter plate that is perfectly flat and has perfectly located holes. Any tiny error in the adapter gets added to any tiny error in the mold and the machine, a problem known as "tolerance stack-up." This can easily lead to misalignment, causing defects or mold damage.
Table 3: Risk Assessment for Using Adapter Plates
| Potential Issue | Cause | Consequence | Mitigation Difficulty |
|---|---|---|---|
| Bottle Eccentricity | Misalignment due to tolerance stack-up or plate flexing. | Uneven wall thickness, weak spots in the bottle. | Very High |
| Flashing | Loss of rigidity prevents a perfect seal when mold closes. | Plastic leaks out of the parting line, creating waste and mess. | High |
| Increased Mold Wear | Misalignment puts uneven stress on guide pillars and bushings. | Premature failure of critical mold components. | Very High |
| Cooling Inefficiency | Thermal barrier effect of the plate. | Longer cycle times, inconsistent bottle properties. | High |
| Gripper Collision | The plate moves the mold, potentially interfering with the path of robotic arms. | Machine crashes, damaged grippers, costly downtime. | High |
Given these serious risks, the perceived cost savings of an adapter plate can quickly be wiped out by the cost of one significant production problem. It's almost always better to invest in getting the mold right from the start.
How can we help you evaluate mold compatibility and modification costs?
Navigating this complex landscape of mold and machine compatibility is daunting. Making the wrong decision can cost you hundreds of thousands of dollars in useless molds or inefficient production.
We provide a comprehensive evaluation service to eliminate the guesswork. By using detailed 3D drawing comparisons, on-site physical measurements, and remote video consultations, we can accurately assess compatibility and give you a clear, data-driven recommendation to maximize your return on investment.
My goal is not just to sell you a mold or a machine; it's to be your long-term technical partner. I want to ensure that any investment you make is sound and profitable. That's why we have developed a robust process to help clients analyze their existing assets and make the best decision for their future. We want to prevent you from ending up in a situation like my Thai client, who was facing the potential write-off of his entire mold inventory. Our approach is based on precision, data, and clear communication.
Our Assessment Process: A Step-by-Step Guide
We don't guess; we measure and analyze.
- Data Collection: We start by gathering the technical documentation for both your existing mold and the target machine. This includes 2D drawings, 3D models, and specification sheets.
- Virtual Fitment: Our engineers use advanced CAD software to perform a "virtual assembly." We can place a 3D model of your mold into a 3D model of the machine. This immediately highlights major issues like physical interference, mounting hole misalignment, and clearance problems with grippers.
- Detailed Comparison: We then create a detailed report comparing all critical dimensions: shut height, pitch, cooling port locations, guide pillar specs, and more. This is the core of our mold and blow machine matching service.
- Modification Feasibility Study: If modifications are theoretically possible, we analyze the risks and estimate the cost. We will tell you frankly if we believe the risks outweigh the benefits.
- Clear Recommendation: You receive a final report that clearly states our recommendation: "Option A: Modify the existing mold with these specific changes and these associated risks," or "Option B: Invest in a new mold for guaranteed performance and reliability."
The Power of Remote and On-Site Consultation
We understand that not all information is on a drawing. Sometimes, you need eyes on the factory floor.
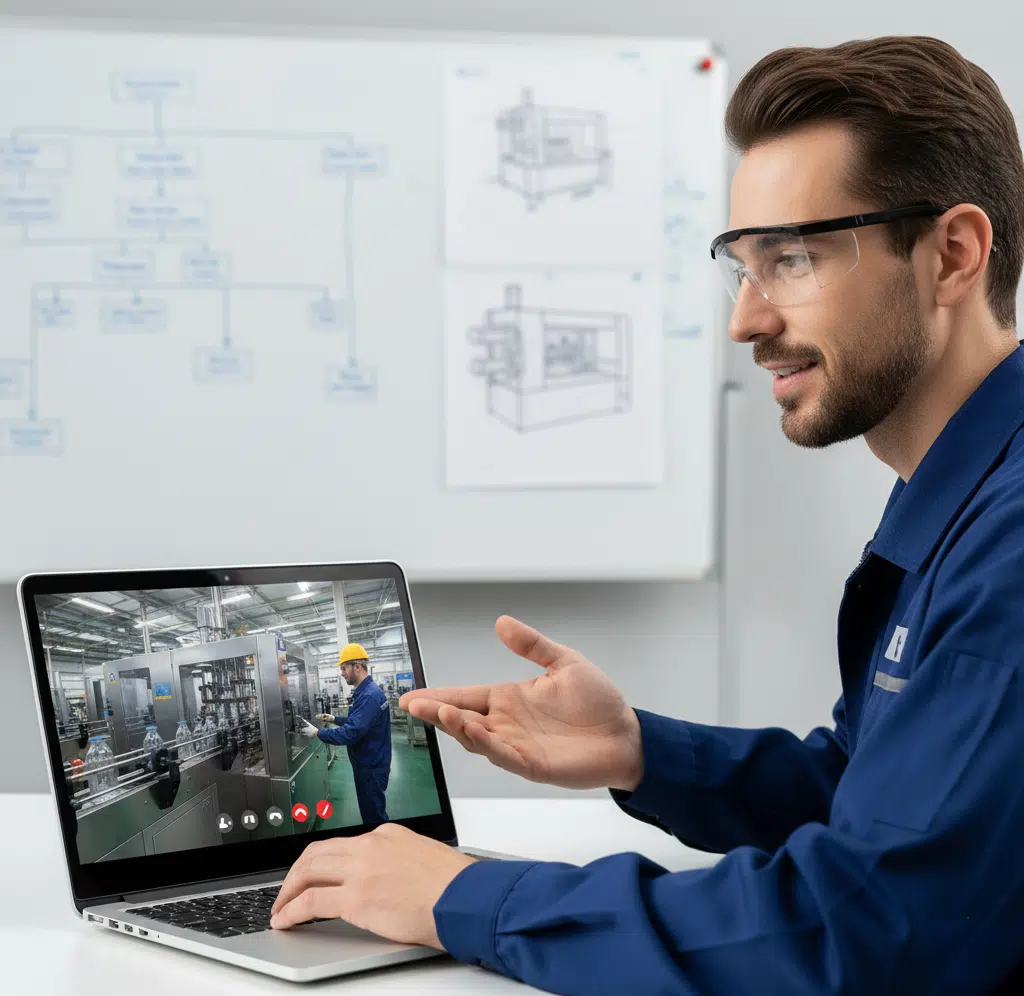
- Remote Video Calls: Using a simple video call, your technicians can walk us through your facility. We can guide them on what to measure and look for, providing real-time feedback and analysis.
- On-Site Measurement: For complex projects or large-scale audits, we can arrange for an engineer to visit your plant to take precise measurements and provide a hands-on assessment.
This combination of digital analysis and real-world verification ensures that our recommendations are not just theoretical but practical and actionable for your specific situation. Ultimately, our job is to give you the clarity and confidence to make the right financial and operational decision.
Conclusion
In short, blow molds are highly specialized tools, not universal commodities. True compatibility depends on a precise match of machine specifications. While modifications are sometimes possible, they carry significant risks and costs that must be carefully weighed against the benefits of investing in a new, perfectly matched mold.
Frequently Asked Questions (FAQs)
What is the very first thing I should check for mold compatibility?
The first things to check are the fundamental machine specifications: the mold shut height, the overall dimensions (to ensure it fits between the tie bars), and the mounting hole pattern on the platens. If these don't match, no amount of smaller modifications will help.Is it ever cheaper to modify an old mold than to buy a new one?
It can be, but only in specific situations. If the modifications are minor (e.g., changing connector threads or a simple locating ring) and the mold is for a lower-speed machine, it might be cost-effective. However, for major changes or high-performance applications, the risk of failure and potential loss in efficiency often make a new mold a better long-term investment.Can I use a mold designed for a Sidel machine on a Krones machine?
No, not without extreme and cost-prohibitive modifications. The design philosophies, mounting systems (shell vs. block), cooling standards, and mold holder dimensions are fundamentally different between major brands like Sidel and Krones. It is not a feasible conversion.What happens if I run production with a poorly fitted or modified mold?
Running a poorly fitted mold is dangerous for both your product quality and your machine. You can expect to see a range of issues, from cosmetic flaws to critical failures. These are often the same common PET blow molding defects you see from a bad process, but they are caused by a mechanical mismatch. This includes flashing (plastic leaking from the mold), uneven wall thickness, bottle eccentricity, and even catastrophic damage to the mold or machine clamping unit.How much does a typical mold modification cost?
The cost varies dramatically depending on the complexity. A simple connector swap might cost a few hundred dollars. A full re-work of the mold base with new guide pillar locations and mounting patterns could easily run into tens of thousands of dollars, approaching the cost of a new mold, especially when you factor in the high-risk nature of the work.
🔗 Related Pages on Our Website
Automatic Blow Molding Machines – iBottler
Discover our full range of customizable automatic PET bottle blow molding machines.Blow Bottle Mold – iBottler
Explore our precision blow molds designed for PET and PP bottles.Preform Mold – iBottler
Learn more about our high-precision preform molds suitable for various injection molding machines.PET Wide Mouth Jar Project Starter Guide: Equipment, Molds & Process Explained
Pros and Cons: Should You Choose PET Blow Moulding for Your Bottle Project?
Worried About Blow Mold Fit? We Have Mounting Dimensions for 80% of Blow Molding Machines Worldwide
Can One Semi‑Automatic Blow Molding Machine Produce All Bottle Sizes? Here’s Why Not
Why Do Krones Blow Molding Machine Users Come to Us for Their Molds?
Why Do PET Preforms Come in Different Colors? Function, Application, and Production Tips
How to Set Parameters for 600ml Bottles on a Semi-Automatic PET Blowing Machine?
From 3D Printed Samples to Production: How Can You Rapidly Validate Blow Mold Designs?
How to Choose the Right Preform Neck Size for Your PET Bottle Project
