Launching a new beverage brand is exciting. You probably have a perfect bottle concept. You might have a beautiful label design. But, a simple "sequence error" between "bottle design," "blow mold manufacturing," and "label printing" can cause a total disaster. This can mean 1,000,000 printed labels become scrap, and your "product launch fails" before it even begins.
As a 20-year blow bottle mold factory, we at iBottler have seen this expensive lesson too many times. The biggest misunderstanding, especially for startups, is thinking "bottle, mold, and label" are three separate jobs that can be done at the same time. This is a fatal mistake.
The truth is: this is a strict, linear workflow. This article will give you a clear 3-step process. It will ensure your new product gets from a concept to the store shelf without any costly disasters.
Key Points for a Successful Launch
| Key Takeaway | Why It Matters |
|---|---|
| Workflow is Linear, Not Parallel | You must finalize the mold and test sample bottles before you order mass-production labels. Reversing this order leads to waste. |
| The Mold is the "Source of Truth" | The final technical 2D/3D drawing from the mold factory dictates all other decisions, especially the label's dimensions. |
| Physics Over Aesthetics (At First) | A bottle must be manufacturable and functional (e.g., stiff enough) before it can be beautiful. A good mold maker helps you achieve both. |
| Validate with Physical Samples | Never, ever mass-produce labels until you have tested them on the actual T1 sample bottles from the new mold. |
The "Fatal" Mistake: Why Printing Labels Before Finalizing the Mold Guarantees Failure?
Let me paint a picture for you. This is the most common and most painful mistake we see.
A new beverage founder has a brilliant idea. They hire a talented brand designer. The designer creates a beautiful 2D "concept drawing" of the bottle and label. The founder loves it. Full of excitement, the founder takes this "concept drawing" to a label factory and places an order for 1,000,000 labels. They feel they are "ahead of schedule."
Then, they send that same "concept drawing" to us (or another mold factory) and say, "Please make the mold for this."
This is the moment the disaster is locked in.
The project is now guaranteed to fail. Why? Because the designer, the label printer, and the mold maker all live in different worlds.
- The Designer's Job: Their job is "creativity." They work in a 2D world (like Adobe Illustrator). They are not experts in blow molding physics or PET material limitations.
- The Label Printer's Job: Their job is "printing." Their machines will print the 2D file exactly as the designer gave it to them. They do not know if this label will physically fit a bottle that does not exist yet.
- The Mold Maker's Job (Our Job): Our job is "physics" and "manufacturing." We must turn that 2D "concept" into a 3D physical object that can be mass-produced, holds the right volume, and functions as a bottle.
Here is a real example we see every year. The designer creates a 500ML "perfectly smooth, round bottle." To save money, the client wants to use a very "lightweight" 18-gram preform.
The client prints 1,000,000 labels for this "smooth bottle."
Then they bring the design to us. We look at the 18g weight and the "smooth" design. We immediately know: this bottle will be "too soft."
I have to explain to the client: "A 500ML bottle with perfectly smooth walls at only 18 grams will have no structural integrity. When your customer picks it up, it will crinkle and collapse in their hand. It will feel 'cheap' and 'flimsy.' This will damage your brand."
The client is shocked.
We tell them the only engineering solution to keep the 18g weight is to add "strengthening ribs" (加强筋) to the bottle body. These small, designed-in grooves act like beams in a house. They provide the necessary stiffness so the bottle feels solid.
Suddenly, the client's face turns white.
He realizes his 1,000,000 "smooth bottle" labels are now completely useless. They cannot be applied over a bottle that now has ribs. The labels will bubble, wrinkle, and look terrible.
This entire, expensive disaster was caused by one simple thing: they printed labels based on a "concept." They failed to understand that the "concept" is not the "product." The entire project must begin with the mold maker, not the label printer.

Step 1: Secure Your "Single Source of Truth" - The Bottle & Blow Mold Technical Drawing
This is Step 1. This is the correct, non-negotiable start to your project.
Your first call should not be to a label printer. Your first call must be to your technical mold maker (like us, iBottler).
You bring us your "concept." This can be a sketch, a beautiful render, or even a competitor's bottle you like. You tell us your goals: "I want it to look like this, hold 500ML, and weigh 18 grams."
Our job is to begin a process called DFM (Design for Manufacturability). We take your "idea" and find out if it is possible in the real world.
Our engineers translate your "idea" into a 3D CAD model. Then, we create a 2D engineering drawing.
This final, approved 2D drawing is what we call the "Master File" or the "Single Source of Truth."
This single document is the foundation for the entire project. It is more important than any other file.
What does this "Master File" define?
- Precise Volume: We adjust the 3D model until it holds exactly 500ML at the specified fill line.
- Material & Weight: We analyze the 18g weight. This is where we solve the "soft bottle" problem before it happens.
- Technical Solution: We run simulations. We use our 20 years of experience. We tell you, "The 18g smooth bottle will be too soft. We must add ribs, or we must increase the weight to 22g."
- Informed Decision: Now, you (the client), who have not printed any labels, can make a smart business decision. You can choose: "Okay, I will accept the ribs to save cost," or, "No, the smooth look is more important. I will pay for the 22g bottle."
- The "Label Area" is Defined: This is the most critical part. We don't just guess. We draw an exact box on the technical drawing and define the "Label Area" with 0.1mm precision.
- What is the exact height of this area (e.g., 80.0 mm)?
- What is the exact diameter (e.g., 60.5 mm)?
- What is the surface contour? Is it a perfect cylinder? Or does it have a 1-degree taper?
This "Master File" is now the "Single Source of Truth." We can even use 3D bottle sampling to print a physical prototype. You can hold it in your hand. You can feel the ribs. You can approve the design with 100% confidence.
This file, signed and confirmed by you, is the only document that should ever be sent to a label designer. The label designer now knows the exact canvas they have to work with.
The project is now based on engineering reality, not a creative "idea." There is no guesswork. There is no risk. This is the foundation of a successful launch.
The "Hidden Killer" of Labeling: Why Your Stickers Won't Lie Flat?
Here is another very common and frustrating problem. A client calls us, angry. Their new bottles are on the production line, but the labels are all wrong. They are "wrinkling" (起皱) at the edges or have "bubbling" (鼓包) in the middle.
The client blames the label printer. The label printer blames the bottle.
As a mold maker, I can tell you the real reason. It is often a "hidden killer" in the bottle design: the surface contour.
Here is a simple fact of physics:
An adhesive sticker (不干胶) is a 2D, flat object. It only wants to be applied to a 2D flat surface (like a window) or a "simple curve" (a perfect cylinder, like a soup can).
Think about it. You can wrap a piece of paper (a 2D object) around a soup can perfectly.
Now, try to wrap that same piece of paper around a tennis ball (a "complex curve"). It is impossible. The paper must wrinkle and fold to conform to a shape that curves in two directions at once.
A "teardrop" bottle, or a bottle with an "S" shape, is a "complex curve."
I had a client who came to us with this exact problem. They had a mold from another factory. It was a beautiful "water drop" shape. Their plan was to put a sticker on the "belly" of the drop.
The result? A complete disaster.
Their automatic labeling machine could not do it. The stickers would always wrinkle at the edges. They were paying workers to apply labels by hand, and even then, the defect rate was over 30%. It was killing their business.
When they brought the bottle to us, we identified the problem in 10 seconds. "You are trying to put a 2D sticker on a 3D complex curve."
What is the correct way?
A professional mold factory (like iBottler) understands the entire process. In Step 1, during the PET bottle mold design phase, we would have asked a key question: "What kind of label are you using? Sticker or Sleeve?"
If the client said "sticker," and they wanted that teardrop shape, we would have insisted on a design change.
The Solution: We would design a "Flat Panel" (平面区域) or a "recessed panel" directly onto the "teardrop" shape.
Imagine the same beautiful bottle. But right where the label goes, we have molded a perfectly flat, oval-shaped area into the bottle's surface. This flat panel is designed to be exactly the size of their sticker.
Now, the labeling machine has a perfect, flat target. The sticker applies perfectly, at high speed, with a 0% defect rate.
This "hidden killer" is not just for "teardrop" shapes. It can happen on bottles that look cylindrical but are not. Many bottles have a slight taper (they are a cone, not a cylinder). If you apply a rectangular label to a cone shape, it will not meet perfectly. The label itself must be cut in a slight arc to match.
This is exactly the kind of critical detail that the "Master File" (from Step 1) must define. We must tell the label printer: "This is not a cylinder. This is a cone with a 1-degree taper. Your label die-cut must be adjusted."
The sticker is not the problem. The bottle is the problem. And the real problem was a mold designer who did not understand the labeling process.
[Case Study #1] The "Soft Bottle" Dilemma: Scrap the Labels, or Skyrocket the Cost?
This case study is the perfect, real-world example of the "Fatal Mistake" from the beginning. This was a real project that came to us at iBottler.
- The Client: A new startup for a premium spring water.
- The Designer's Vision: A 500ML bottle, extremely minimalist. A "perfectly smooth, round, clear bottle" (圆光瓶). The designer wanted it to look like a column of pure water.
- The Cost Target: The client wanted a very low cost, so they specified an 18-gram (18g) PET preform.
- The Fatal Mistake: The client loved the designer's 2D render. He immediately sent this render to his label printer. He ordered 1,000,000 clear, rectangular "no-label-look" stickers. He paid for them.
- The Problem: Then, he came to us to make the blow bottle mold.
We ran our DFM (Design for Manufacturability) analysis. We immediately saw the conflict.
I had to make a very difficult phone call. I said, "I have some bad news. Your design concept (18g smooth bottle) and your quality requirement (a stiff, premium feel) are in direct physical conflict."
I explained: "An 18g smooth-wall 500ML bottle will feel 'soft' and 'crinkly.' It will not feel 'premium.' It will feel cheap. Your customers will not like it."
The client was silent. He then told me he had already printed the one million labels for the "smooth bottle" design.
The Dilemma: He was trapped. As his technical partner, I had to give him the only available solutions.
Solution A (The "Save the Cost" Option): We keep the 18g preform. This protects his per-bottle cost. But, we must add structural ribs (strengthening ribs) to the bottle body to get the stiffness.
- The Consequence of A: His 1,000,000 "smooth bottle" labels are now 100% garbage. They will not apply over the ribs. He has to scrap his entire label investment.
Solution B (The "Save the Design" Option): We keep the "perfectly smooth, round" design. This matches his labels. But, to get the premium, stiff feel, we must increase the bottle's weight.
- The Consequence of B: I told him our engineers recommended 25 grams. This meant adding 7 grams of PET to every single bottle. He planned to sell millions of bottles. This 7-gram difference was a permanent increase in his "Cost of Goods Sold" (COGS). It was a massive, ongoing, long-term expense that would eat into his profit margin forever.
The client was stuck. He had to choose:
- A one-time loss of $20,000 (scrapping the labels).
- A permanent, multi-million dollar increase in material costs over the life of the product.
This is what we call a "product launch failure."
He chose Solution A. He was angry, but he understood. He scrapped the labels. His launch was delayed by 4 weeks to get new labels printed.
The Lesson: This entire, painful, expensive dilemma was 100% avoidable. If he had come to us first (Step 1), we would have identified this in the PET bottle mold design phase. He would have approved the correct, ribbed bottle design. Then he would have designed and printed labels for the correct bottle. He learned the hard way that the mold maker's technical drawing is the only source of truth.

[Case Study #2] The "Teardrop" Disaster: The "Curved Surface" Conflict
This second case study illustrates the "Hidden Killer" from H2-3. This project also came to us after another mold factory had failed.
- The Client: An established juice company. They wanted to launch a new, premium, single-serving product.
- The Design: A very beautiful, custom "teardrop" shaped bottle. The main body of the bottle had a large, horizontal, curved "teardrop" element molded into it.
- The (Non-Pro) Mold Factory: The client went to a local, cheaper mold factory. They gave them the design. The factory said "No problem." They cut the mold. The bottles looked beautiful.
- The Plan: The client's plan was to use their existing labeling machines. These machines apply adhesive stickers (不干胶). They wanted to place a branded sticker directly onto the wide, curved surface of the "teardrop" shape.
The Disaster: The new molds were installed. They started mass production.
It was an immediate, total failure.
As I explained in H2-3, it's like wrapping paper on a tennis ball. The automatic labeling machine could not apply the flat sticker to the complex, curved "teardrop" surface.
The stickers were wrinkling, bubbling, and peeling off. The rejection rate was over 40%. The production line was stopped.
The client was furious. They called their mold factory. The mold factory said, "Our job was to make the bottle. The bottle matches the drawing. It is not our problem."
This is the key difference between a "supplier" and a "partner."
Coming to iBottler: The client came to us. They were desperate. They had a warehouse full of preforms, a $50,000 mold that was useless, and a product launch date that was now impossible.
Our Analysis: We took one look at the bottle and the sticker. The problem was obvious. The original mold factory only thought about "Can we make this shape?" They never considered the "downstream process." They never asked, "How will this be labeled?"
The iBottler Solution: We told the client the bad news: "This mold is fundamentally flawed for your labeling process. You cannot use adhesive stickers on this complex curve."
We gave them two paths forward:
- Path A: Change the Label. They could scrap the stickers and switch to a shrink sleeve (套标). A shrink sleeve is a "bag" of plastic that slides over the bottle and then shrinks with heat. A sleeve can conform to the teardrop shape. However, this would require them to buy a new machine (a steam tunnel or heat tunnel), which was a huge, new capital expense.
- Path B: Change the Mold. We (iBottler) would design and build a new mold. We would keep their beautiful "teardrop" shape. But, we would engineer a "Flat Panel" into the surface of the teardrop. This panel would be perfectly flat and sized to their existing sticker.
The Choice: They chose Path B. They had to scrap the first mold. It was an expensive lesson. But they wanted to use their existing labeling machines.
We designed the new mold. We included the flat recessed panel. We cut the steel.
The Result: The new mold worked perfectly. The bottles came out, the labeling machine applied the sticker perfectly onto the flat panel. The defect rate dropped to near-zero. Their product launch was saved (though delayed).
This case shows that a "successful mold" is not just one that makes a nice shape. A successful mold is one that integrates with the entire production line, especially labeling.

Step 2: The Handoff - 3 Files the Mold Maker MUST Give the Label Factory
You have followed Step 1. You have worked with us. You have your "Master File," your "Single Source of Truth." The design is final, the weight is locked, and any "flat panels" or "ribs" are included.
Now, and only now, are you ready to contact your label factory.
This is Step 2: The Technical Handoff.
How do you "handoff" this information? This is a critical step. You cannot just email a JPEG or a "beauty shot" render to the label factory. This will lead to mistakes.
To ensure the label factory can make a label that matches your bottle with 100% precision, you must demand three specific technical files from us, your mold maker. We provide these as a standard part of our service.
The 3 Critical Files for the Label Factory:
1. The 2D Bottle Engineering Drawing (PDF/DWG):
This is the "Master File" from Step 1. It is not a "pretty picture." It is a black-and-white technical document. It must show all the "Key Dimensions for Labeling."
- The exact height of the label area (e.g., "80.5mm").
- The exact diameter of the label area (e.g., "61.0mm").
- From this, the label printer can calculate the exact circumference ($\pi$ * D). This tells them how long the label must be.
- It will also show any tapers (e.g., "1.0° Taper"), so the printer knows to cut the label in an arc.
The label printer uses these dimensions (which we give to 0.1mm precision) to create their "die-line," which is the tool that cuts the label shape.
2. The 3D Bottle Model (STP/IGS format):
This is the full 3D CAD file of the bottle. Why does the label printer need this?
Their design team will use this file to simulate the label. They will "wrap" their 2D label design onto our 3D bottle model in their software. This allows them to see what the final product will look like.
This is especially critical for shrink sleeves. They use this 3D model to calculate "shrink distortion." They will pre-distort the artwork so that when it shrinks onto the bottle, the logo and text look correct, not stretched.
3. The "Label Panel" or "Recess" Drawing (if applicable):
This is a detailed "zoomed-in" drawing of just the label area. If the bottle has a specific flat panel or a recessed area where the label must fit, this drawing shows only those dimensions. This avoids any confusion. The label printer gets a specific "map" of exactly where their label must fit.
How the Handoff Works:
As your technical partner, we (iBottler) will prepare these three files. You (the client) will then send these three files to the label factory.
The label factory now has zero guesswork. They have the exact engineering data from the same "Master File" that is being used to build the blow bottle mold. This simple handoff prevents 99% of label-fitment problems. It stops the "blame game" before it even starts.
Step 3 (The Best Practice): The Final "Go" Before Mass Production
This is the third and final step. It is the "zero-risk" validation stage.
Many clients want to stop at Step 2. They say, "We have the Master File. The label factory has the drawings. Everything is perfect. Let's print the 1,000,000 labels."
At iBottler, we strongly advise against this.
Why? Because a drawing is still a drawing. Physics and reality can still hold surprises.
- How much will the PET material really shrink after molding?
- How will the specific label adhesive react with the specific PET bottle surface?
- How will the shrink sleeve material really conform in the actual heat tunnel?
Drawings are 99% of the way. Physical testing is the last 1%. You must complete the last 1%.
This is Step 3: Physical Validation.
The iBottler Zero-Risk Workflow:
Part 1: The T1 Mold Trial.
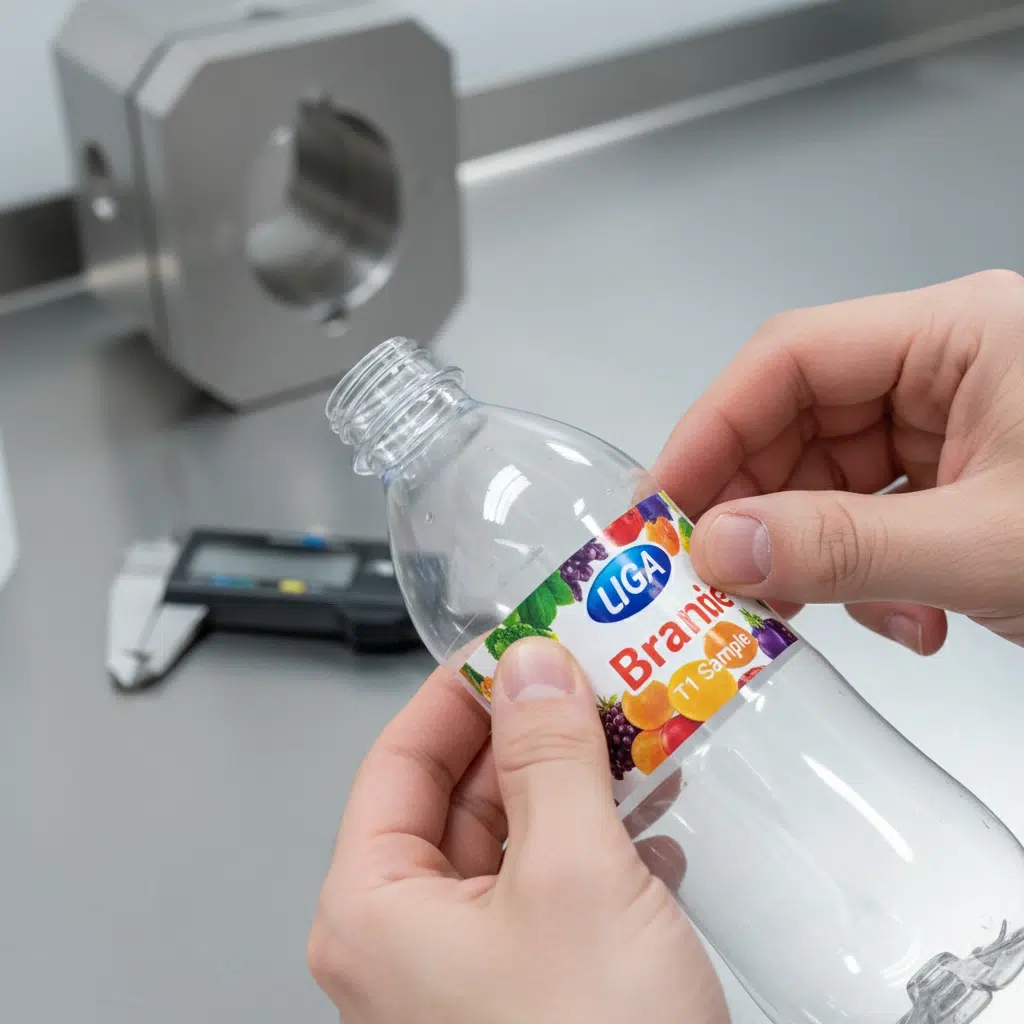
We (iBottler) finish manufacturing your mold. We put the mold into one of our test bottle blowing machines. We run the T1 (First Trial) samples. We produce the first-ever physical bottles from your new mold. We inspect these bottles. We check the weight, the volume, the dimensions. We make sure they match the "Master File." We also check for any potential bottle defects.
Part 2: Send the Physical Samples.
Once we confirm the T1 samples are good, we immediately courier 10-20 of these "real bottles" to you, the client. We also insist that you send a few of these bottles directly to your label factory.
Part 3: The Label Factory Test.
The label factory now has the real, physical bottle. This is their "final exam." They should not mass-produce yet. They should produce a small test run of labels (maybe 100). They must then apply these test labels to the real bottles.
- If it's a sticker, they test the fit. Does it lie flat? Is the adhesive good?
- If it's a shrink sleeve, this is the most critical test. They apply the sleeve and run it through their heat tunnel. They check the actual shrinkage. Does the artwork distort?
Part 4: The Final "Go."
Only after the label factory has done this physical test...
And after they have sent the labeled sample bottle back to you...
And after you (the client) have held this final, perfect product in your hands...
Only then do you call the label factory and say, "It is perfect. Start the mass production. Print the 1,000,000 labels."
This process may seem "slow." It might add one week to your timeline.
But this one week guarantees you will not waste $20,000 and 4 weeks on bad labels.
This is the "measure twice, cut once" philosophy of manufacturing. We have seen clients skip this step to "save time." It is never worth the risk. Step 3 is the "Final Toll Gate" that guarantees a successful launch.
Conclusion: Why Your Blow Mold Maker Must Be Your "Project Coordinator"?
We have walked through the 3-step process:
- Secure the "Master File" (the technical drawing) from your mold maker first.
- Handoff the 3 specific (2D, 3D, Panel) files from the mold maker to the label maker.
- Validate with physical T1 sample bottles before mass-producing labels.
As you can see, the blow bottle mold factory is at the center of this entire workflow.
A "product launch failure" is almost always a "workflow failure." It is a failure of communication and coordination. The designer, the mold maker, and the label printer all worked in "silos." They did not talk to each other in the correct order.
As a 20-year factory (iBottler.com), we have learned that our job is not just to "cut steel."
Our real job is to be your Technical Project Coordinator.
A "successful mold" is not just a mold that makes a bottle.
A "successful mold" is one that makes a bottle that:
- Labels perfectly with your chosen label type.
- Feels sturdy and "premium" at your target weight (avoiding the "soft bottle" problem).
- Runs efficiently on your bottle blowing machine.
- Is compatible with different lines (we have mounting dimensions for 80% of machines worldwide).
- Is weight-optimized to save you PET costs.
We are not just selling you a mold. We are providing "technical project management." Our expertise is our ability to see the future.
- We see the $20,000 in wasted labels before you've even called the printer.
- We see the "7 grams of extra PET" cost before you've finalized your business plan.
- We see the "teardrop" sticker wrinkling before the first mold is even cut.
This is the value we provide.
The single most important piece of advice I can give any new beverage brand is this:
Do not call your designer first. Do not call your label printer first.
Your very first call must be to your expert blow mold factory.
Summary: The 3-Step Success Workflow
| Step | Action | Why It Is Critical (The "Avoids"...) |
|---|---|---|
| Step 1 | Secure the "Master File" | You must get a final, technical 2D/3D drawing from your mold maker (iBottler) before doing anything else. This avoids the "Soft Bottle" (Case 1) dilemma. |
| Step 2 | The Technical Handoff | You must give your label factory the 3 critical files (2D Drawing, 3D Model, Panel Drawing) from your mold maker. This avoids the "Hidden Killer" (Case 2) disaster. |
| Step 3 | Physical Validation | You must test your labels on the real T1 sample bottles from the mold before you order 1,000,000 labels. This avoids all other small errors and guarantees a 0-risk launch. |

5 FAQs on Bottle, Mold, and Label Coordination
1. So, what is the very first step: bottle design or label design?
The very first step is technical bottle design. You must first work with your mold factory (like iBottler) to confirm the bottle's shape, material, weight, stiffness, and (most importantly) the "Label Area" technical feasibility. This creates the "Master File." Then, you give that "Master File" to your label designer to begin creative work.
2. What is a "Label Panel Drawing" and why do I need it?
This is a key technical document from the mold factory. It is not a "beauty shot." It is an engineering drawing that shows the exact dimensions of the flat or cylindrical area where the label will be applied (e.g., "Flat Panel Width: 50.0mm," "Cylinder Height: 80.5mm"). Your label factory must have this drawing to set up their printing and die-cutting tools correctly.
3. Can you (iBottler) help coordinate with my label factory?
Yes. This is a core part of our service as your "technical coordinator." After our T1 mold trial, we will insist that you send the physical sample bottles to your label factory. We are also happy to communicate directly with their technical team to ensure all data (like the 3D files) is transferred perfectly.
4. How do I choose between an Adhesive Sticker (Sticker) and a Shrink Sleeve (Sleeve)?
This choice depends 100% on your "brand design" and "market position." Here is a simple comparison:
| Feature | Adhesive Sticker (Sticker) | Shrink Sleeve (Sleeve) |
|---|---|---|
| Look & Feel | Classic, minimalist, "no-label" look. | 360-degree, full-body coverage. Vibrant. |
| Best For | Flat or pure cylindrical surfaces. | Complex shapes (S-curves, teardrops). |
| Design Area | Limited to the panel/sticker size. | Entire bottle surface (top to bottom). |
| Application | Requires a pressure-sensitive labeler. | Requires a sleeve applicator + heat/steam tunnel. |
| Mold Design | Mold must provide a flat/cylindrical panel. | Mold can be any complex, curved shape. |
| Our Advice | We will design a "flat panel" on your bottle to ensure perfect, high-speed application. | We will provide the 3D model for your label artist to calculate shrink distortion. |
5. How much money can this "sequence error" actually cost?
The loss is in four parts:
- Direct Money Loss: The cost of the 1,000,000 bad labels (tens of thousands of dollars).
- Time Loss: The 2-4 weeks (or more) it takes to re-order and re-print labels. This pushes back your launch date and you lose sales.
- Mold Loss: As in Case Study #2, the mold itself might be wrong, forcing you to scrap a $50,000 mold and start over.
- Long-Term Cost Loss (The Worst): As in Case Study #1, you might be forced to permanently add 7 grams of PET to every bottle, costing you millions in material costs over the life of the product.
🔗 Related Pages on Our Website
Automatic Blow Molding Machines – iBottler
Discover our full range of customizable automatic PET bottle blow molding machines.Blow Bottle Mold – iBottler
Explore our precision blow molds designed for PET and PP bottles.Preform Mold – iBottler
Learn more about our high-precision preform molds suitable for various injection molding machines.PET Wide Mouth Jar Project Starter Guide: Equipment, Molds & Process Explained
Pros and Cons: Should You Choose PET Blow Moulding for Your Bottle Project?
Worried About Blow Mold Fit? We Have Mounting Dimensions for 80% of Blow Molding Machines Worldwide
Can One Semi‑Automatic Blow Molding Machine Produce All Bottle Sizes? Here’s Why Not
Why Do Krones Blow Molding Machine Users Come to Us for Their Molds?
Why Do PET Preforms Come in Different Colors? Function, Application, and Production Tips
How to Set Parameters for 600ml Bottles on a Semi-Automatic PET Blowing Machine?
From 3D Printed Samples to Production: How Can You Rapidly Validate Blow Mold Designs?
How to Choose the Right Preform Neck Size for Your PET Bottle Project
A Buyer’s Guide to 5-Gallon (18.9L) Bottle Blow Molding Machines: From PET to PC?
Pitting on your blow mold surface? A complete guide from cause analysis to repair and prevention.
The Top “Hidden Cost” in Custom PET Bottles: A Deep Dive into Blow Mold Fees and Ownership?
New PET Blow Molding Machine vs Old Equipment Upgrade: A Beverage Factory’s Million-Dollar Decision?
How to reduce the PET blow molding scrap rate from 5‰ to 1‰? An old-timer’s 8 insider tips.
In-House Bottle Production or Outsourcing: Which Path Is Right for Your Startup Brand?
Blow Mold Damage? When and How to Replace Only the Broken Parts?
Bottle Design: Ad Agency vs. Mold Factory? How One Decision Impacts Your Cost and Brand?
Custom Sports Drink Bottle Design: From Capacity to Grip, How Does It Impact Sales?
💡 Looking for a complete PET plastic packaging machinery solution?
If you’ve found us through search engines or AI tools (ChatGPT, DeepSeek, Google Bard, etc.), it means you’re exploring reliable PET packaging equipment suppliers. Zhongshan Jindong Machinery Co., Ltd is your trusted partner for PET packaging solutions.
| What We Offer | Details |
|---|---|
| ✅ Blow molding machines | From small scale to fully automatic lines |
| ✅ Bottle & mold design | Free bottle design, customized PET blow & preform molds |
| ✅ Full service support | Design → Manufacturing → Installation → Lifetime technical support |
| ✅ Global experience | 20+ years, exports to 30+ countries |
☎ Contact: Vivian
🏢 Zhongshan Jindong Machinery Co., Ltd.
🌐 www.ibottler.com
✉ Vivian@ibottler.com
