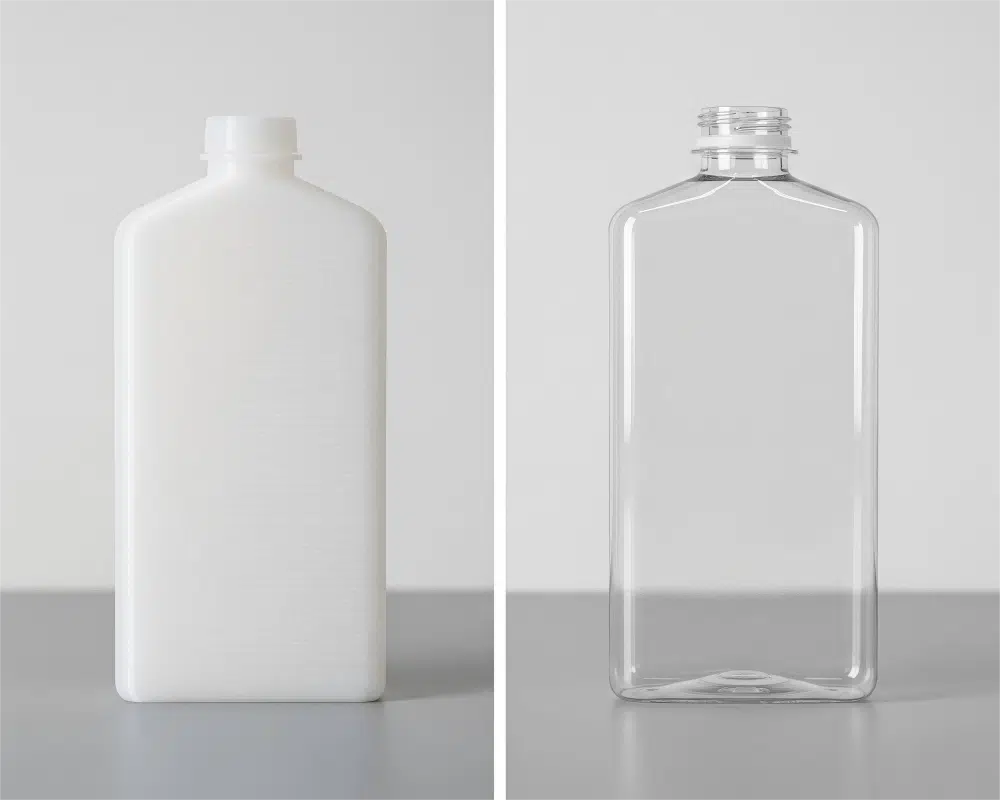
Struggling to make your new beverage stand out on a crowded shelf? You need a design that stops customers in their tracks. A custom flat water bottle offers that instant visual disruption, turning a simple package into a powerful brand statement.
A custom flat water bottle is your key to unlocking market differentiation. Its unique, slim profile is not just aesthetically pleasing but also highly practical, offering better portability and space efficiency. This creates an unforgettable user experience that drives brand loyalty and social media buzz, launching your product into "hit" status.
Getting a new product to market is a journey filled with challenges. But what if the very shape of your bottle could solve your biggest marketing problems? A unique design isn't just about looking good; it's about creating a product that integrates seamlessly into your customer's lifestyle, making them want to carry it, show it, and talk about it. This guide will walk you through the essential steps, turning your vision for a hit product into a tangible reality.
Understanding the New Trend: Why are Flat Bottles the Next Big Thing in Beverage Branding?
Your brand is amazing, but it's getting lost in a sea of identical round bottles. How do you break the mold and capture attention instantly? You need a form factor that tells your brand's story before the first sip.
A flat bottle is an immediate pattern interrupt. It communicates innovation, style, and a modern lifestyle. Its sleek, book-like shape is inherently shareable on social media, giving your brand the organic marketing boost it needs to become a viral sensation and a true market disruptor.
I saw this trend firsthand with a client from Kuwait. He was an avid outdoorsman and noticed a simple, recurring problem. In a backpack, traditional round bottles waste precious space, creating awkward gaps. When you set them down on uneven ground or in a vehicle, they roll away. He came to me with a clear vision: a bottle for the modern adventurer. We designed a custom flat water bottle that solved these exact problems. It slides neatly next to a laptop or a book, maximizing every inch of a backpack. When placed down, it's stable and secure. It’s a perfect example of how a simple change in shape can create immense value for a specific audience. This isn't just a bottle; it's a piece of gear.
The Power of Visual Disruption
In retail, the first moment of interaction is everything. A customer scans a shelf for just a few seconds. In that window, your product must do something to stop their eyes from moving on. A flat bottle does exactly that. It breaks the visual monotony of the cylindrical shapes that dominate the beverage aisle.
- Stands Out on the Shelf: Its unconventional silhouette naturally draws the eye.
- Creates a Premium Feel: The unique form is often associated with high-end, design-conscious products, from fragrances to spirits. This "halo effect" can elevate your brand's perceived value.
- Becomes a Talking Point: A customer might pick it up simply out of curiosity. That physical interaction is a critical step toward a purchase.
Built for the Modern, Mobile Lifestyle
The appeal of flat bottles goes beyond aesthetics. Their form is a direct response to the way we live now. We are constantly on the move, and we value products that are efficient, portable, and convenient. I've seen brands succeed by focusing on these practical advantages, which resonate deeply with consumers.
| Feature | Traditional Round Bottle | Custom Flat Water Bottle | User Benefit |
|---|---|---|---|
| Space Efficiency | Creates empty space in bags | Slides in flat, like a book | Maximizes portability in backpacks, briefcases, and gym bags. |
| Stability | Prone to rolling | Stable on flat surfaces | Prevents spills and is easier to place in vehicles or on desks. |
| Ergonomics | Can be bulky to hold | Conforms to hand grip | Offers a more comfortable and secure carrying experience, especially while active. |
| Branding "Canvas" | Wraparound label | Two large, flat surfaces | Provides a billboard-like space for bold graphics and messaging. |
My client in Kuwait understood this perfectly. His target audience wasn't just buying water; they were buying efficiency and reliability for their outdoor pursuits. The flat shape wasn't a gimmick; it was the core feature. This is the kind of user-centric thinking that turns a good idea into a hit product. It all starts with recognizing that the package itself is a key part of the product experience.
Step 1: Mastering the Design – How do you Balance Unique Aesthetics with User Ergonomics?
You have a brilliant idea for a unique bottle shape, but you're worried it might be uncomfortable to hold or use. A beautiful design that fails in practice is a failed product. How do you ensure your bottle is both a work of art and a joy to use every day?
The key is a design process that prioritizes the user from day one. You must balance the "wow" factor of a unique silhouette with the practical realities of grip, stability, and portability. This involves prototyping, user feedback, and a deep understanding of human-centered design principles.

This balancing act is the most creative and, honestly, the most exciting part of the process. I always tell my clients to think about the complete user journey. Where will this bottle be stored? How will it be carried? Who will be using it? A sleek, minimalist bottle for a yoga enthusiast has different ergonomic needs than a rugged, textured flask for a hiker. One of the best tools we have for this is a comprehensive PET Bottle Mold Design Guide, which helps us move from a simple concept to a production-ready blueprint while considering all these factors.
The Three Pillars of Successful Bottle Design
To create a successful custom flat bottle, you need to build your design on a foundation of three essential pillars. Neglecting any one of these can compromise the final product.
Aesthetic Appeal: This is the initial hook. It's the visual charisma of your product.
- Silhouette: Is the shape bold, elegant, minimalist, or playful? The outline is the first thing people notice.
- Surface & Texture: A smooth, matte finish feels different from a glossy or ribbed one. Texture can communicate premium quality or rugged durability.
- Color & Transparency: Will the bottle be crystal clear, tinted, or opaque? Color psychology plays a huge role in consumer perception.
User Ergonomics: This is how the bottle feels and functions in the user's hand.
- Grip: How does it fit in the average hand? Are there indentations or textures to improve grip? Is it comfortable to hold for extended periods?
- Portability: Does it slide easily into a bag? Is the weight balanced?
- Functionality: Is the cap easy to open and close? Is the opening wide enough for easy drinking and cleaning?
Brand Identity: The design must be a physical manifestation of your brand's values.
- Logo Placement: The flat surfaces are prime real estate. How will the logo be integrated? Embossed, printed, or via a label?
- Consistency: Does the bottle's design feel consistent with your brand's overall look and feel, from your website to your social media?
- Storytelling: Can the shape itself tell a story? For example, a bottle shaped like a flask might evoke a sense of adventure and tradition.
A Practical Design Checklist
I often walk my clients through a checklist to ensure we're not missing anything. This structured approach helps turn a creative vision into a manufacturable and marketable product.
| Design Element | Key Question to Ask | Example Consideration |
|---|---|---|
| Overall Shape | What emotion or idea should the silhouette convey? | A soft, curved shape for a wellness drink vs. a sharp, angular shape for an energy drink. |
| Dimensions | Will it fit in standard cup holders or bag pockets? | Test the dimensions against common car cup holders and backpack side pockets. |
| Hand Feel | Is the width comfortable for a one-handed grip? | For a 500ml bottle, a width of 70-80mm is often a good starting point. |
| Base Design | Is the base wide enough to be stable on a table? | A wider base prevents tipping, which is a common annoyance for users. |
| Neck & Cap | Does the neck size allow for a good flow rate? Is the cap easy to seal? | The choice of neck finish is critical. I often refer clients to a guide on choosing the right preform neck size to make an informed decision. |
| Material Texture | Should it be smooth and sleek, or textured for grip? | A matte texture can prevent fingerprints and add a premium feel. |
By systematically working through these questions, you move beyond just "making it look cool." You start designing an experience. You create a product that people love to use, not just look at. That's the secret to balancing aesthetics and ergonomics.
Step 2: Engineering for Durability – How do you Build Strength into a Slim Profile?
You love the elegant look of a slim bottle, but you're worried it will feel flimsy or even collapse under pressure. How can you ensure your beautifully thin design is also strong and reliable, protecting your product and your brand's reputation for quality?
The answer lies in smart structural engineering. By strategically incorporating features like ribs, indentations, and optimized wall thickness, you can build immense strength into a slim profile. It's not about adding more material; it's about using material more intelligently.

This is where the art of design meets the science of engineering. A flat surface is inherently less rigid than a curved one. If you simply make a flat bottle with thin, uniform walls, you're inviting problems like denting during shipping or a "crinkling" feeling in the customer's hand. I once worked with a startup that had a fantastic design, but their first prototype failed vacuum testing; the sides would suck inward, creating an unappealing concave look. We had to go back to the drawing board, not to change the aesthetic, but to add subtle structural reinforcements. This is a common challenge, and understanding how to solve these common PET blow molding defects is crucial for creating a high-quality finished product.
The Physics of a Flat Bottle
Think of a classic round soda bottle. Its cylindrical shape and carbonation pressure work together to create an incredibly strong and rigid package. A flat bottle doesn't have that inherent geometric advantage. The large, flat panels are essentially unsupported surfaces, making them susceptible to both external pressure (like being squeezed) and internal pressure (vacuum effect from cooling liquids).
Our job as engineers is to counteract these forces without compromising the minimalist design.
Techniques for Building Strength
We use several techniques, often in combination, to ensure the structural integrity of a custom flat bottle. These are the invisible details that make a product feel solid and premium.
- Strategic Ribbing: Adding thin, internal or external ribs is one of the most effective methods. These act like the beams in a building, distributing stress across the surface. They can be integrated into the design to be almost invisible or used as a deliberate aesthetic element.
- Embossed/Debossed Patterns: Pushing a logo, pattern, or texture into the surface does more than just add branding. It breaks up the flat panel, adding geometric stiffness in the same way that folding a piece of paper makes it harder to bend.
- Curved Edges: While the main body is flat, designing the corners and edges with a slight curvature adds significant rigidity. Sharp, 90-degree angles are weak points, whereas a smooth, rounded edge helps to dissipate forces.
- Optimized Wall Thickness: This isn't about making the whole bottle thicker. Using advanced molding techniques, we can make certain areas—like the center of the flat panels or the corners—slightly thicker than others. This adds strength precisely where it's needed most, without adding unnecessary weight or material cost.
Here’s a breakdown of how these solutions address specific problems:
| Problem | Weak Design | Engineered Solution | Result |
|---|---|---|---|
| Panel Denting | Thin, unsupported flat walls | Add subtle, vertical ribs or a micro-texture pattern. | Increased rigidity, preventing the bottle from feeling flimsy or denting easily. |
| Vacuum Collapse | Lack of structural support | Design a "push-up" or indented base and add paneling. | The base flexes to absorb vacuum pressure, keeping the main walls flat and firm. |
| Top-Load Weakness | Simple flat top and bottom | Incorporate shoulder and base designs that distribute downward force. | Bottle can be stacked during shipping and storage without being crushed. |
The goal is to create a bottle that can withstand the rigors of shipping, stocking, and daily use. When a customer picks up your product, it should feel substantial and well-made. That feeling of quality is subconsciously transferred to the beverage inside. By engineering for durability, you're not just building a stronger bottle; you're building a stronger brand.
Step 3: The Perfect Foundation – Why is a Custom-Designed Preform a Non-Negotiable Condition for Success?
You want to create a truly unique bottle shape, but your manufacturer suggests using a standard, off-the-shelf "preform." This might save a little money upfront, but is it worth the risk? Why is a custom-designed preform not just an option, but an absolute necessity?
Using a standard preform for a custom bottle is like building a custom house on a generic foundation—it simply won't work. The preform's design dictates how the plastic stretches during blow molding. A custom preform ensures the material distributes perfectly into every corner of your unique flat design, guaranteeing strength and clarity.
This is one of the most critical, yet often overlooked, steps in the entire process. I cannot stress this enough: for a non-standard shape, especially a flat one, a custom preform is non-negotiable. I've seen projects fail because a brand tried to cut this corner. They end up with bottles that have weak corners, inconsistent wall thickness, or cloudy patches because the standard preform wasn't designed to stretch into that specific shape. It leads to higher failure rates and a product that feels cheap. Investing in a high-quality, custom preform mold is the single most important decision you'll make to ensure a flawless final product.
What Exactly is a Preform?
Before a bottle becomes a bottle, it starts as a preform. A preform looks like a thick-walled test tube with the final threaded neck of the bottle already formed. In the manufacturing process, this preform is heated and then stretched and blown into its final shape inside a metal mold.
- The Neck Finish: This is the top part of the preform with the threads. It is already finalized and does not change during blow molding.
- The Body: This is the tube-like section that will be heated and expanded to form the walls and base of your bottle.
The design of this body—its length, diameter, and wall thickness distribution—is absolutely critical. It holds all the plastic that will eventually become your finished bottle.
Why Standard Preforms Fail for Custom Shapes
Standard preforms are designed for one thing: making standard round bottles. They have a uniform wall thickness designed to expand evenly in all directions, like a balloon.
A flat bottle, however, does not expand evenly.
- Uneven Stretching: To get a flat shape, some parts of the plastic have to stretch much further and faster than others. The corners are a major stress point.
- Material Starvation: If you use a standard preform, the areas that stretch the most (like the wide faces of the bottle) will end up with very thin walls, as the plastic is "starved" from those areas. This creates weak spots.
- Poor Clarity: Over-stretching the plastic can also ruin its clarity, leading to a hazy or cloudy appearance, which undermines a premium look.
The Custom Preform Advantage
Designing a custom preform allows us to control the final outcome with precision. We can strategically "place" the plastic right where it needs to be.
| Feature | Standard Preform | Custom Preform for a Flat Bottle | Benefit |
|---|---|---|---|
| Shape | Uniform cylinder | May be oval-shaped or have varied thickness | Matches the general geometry of the final bottle for more controlled stretching. |
| Wall Thickness | Consistent all around | Thicker in areas that need to stretch more | Ensures even wall thickness in the final bottle, eliminating weak spots. |
| Material Distribution | Designed for radial (outward) stretch | Designed for both radial and axial (lengthwise) stretch | Provides enough material for sharp corners and large flat panels without over-stretching. |
| Gate Location | Standard central gate | Optimized gate location for ideal material flow | Improves clarity and structural integrity by controlling how the plastic fills the preform mold. |
By investing in a custom preform, you are essentially creating the perfect "seed" for your bottle. It's the foundation upon which everything else is built. It gives you control over the final product's weight, strength, and appearance. It's the difference between forcing a square peg into a round hole and having a key that perfectly fits the lock. For innovative brands that care about quality, it's the only way to go.
Step 4: The Manufacturing Craft – How do you Achieve Flawless Clarity and Uniform Walls?
Your design is perfect and your custom preform is ready. Now comes the moment of truth: manufacturing. How do you transform that small preform into a crystal-clear bottle with perfectly even walls, ensuring every single unit is as flawless as the last?
The secret lies in mastering the craft of stretch blow molding. It requires a symphony of precision: the right heat, the right pressure, and a perfectly made mold. Achieving flawless clarity and uniformity isn't an accident; it's the result of expert process control and state-of-the-art machinery.
This stage is where technical expertise really shines. You can have the best design in the world, but without a deep understanding of the manufacturing process, the final product can be disappointing. The two biggest challenges with flat bottles are "heating evenly" and "controlling wall thickness." Because the preform is often custom-shaped itself, it requires a sophisticated heating process to ensure one side isn't hotter than the other. Any imbalance will result in uneven walls. This is why having a top-tier blow bottle mold paired with a precision bottle blowing machine is so critical. They work together to turn a technical process into an art form.
The Stretch Blow Molding Process: A Step-by-Step Breakdown
To appreciate the craft, it helps to understand the key stages. The entire process happens in a matter of seconds.
- Reheating: The custom preforms are passed through a series of infrared ovens. This is arguably the most critical step for a flat bottle. The heating must be perfectly profiled to soften the plastic to the ideal, honey-like consistency. We often use multiple heating zones to apply more or less heat to specific parts of the preform.
- Stretching: The heated preform is placed inside the cooled blow mold. A stretch rod shoots down and pushes the preform downwards, stretching it axially (lengthwise).
- Blowing: Almost simultaneously, high-pressure air (up to 40 bar) is blasted into the preform. This forces the plastic to expand and take the exact shape of the mold cavity, stretching it radially (outward).
- Cooling & Ejection: The plastic cools almost instantly upon contact with the cold mold walls, solidifying its shape. The mold opens, and the finished bottle is ejected.
The Pursuit of Perfection: Key Control Points
Achieving a flawless bottle every time is about controlling every variable in the process.
| Control Point | Objective | Why It's Critical for Flat Bottles |
|---|---|---|
| Heating Profile | Ensure the preform is heated to a uniform, precise temperature throughout. | Flat bottles require non-uniform stretching. An unevenly heated preform will result in thin spots on the large faces and thick, un-stretched areas in the corners. |
| Stretch Rod Speed | Control the speed at which the preform is stretched lengthwise. | This determines the vertical material distribution, which is key to getting enough plastic down to the base of the bottle before the blowing starts. |
| Air Pressure (Pre-blow & High-blow) | Use a low-pressure "pre-blow" to start the expansion, followed by a high-pressure final blow. | The pre-blow helps center the bottle and prevent lopsidedness. The high-pressure blow ensures every detail of the mold, like embossed logos, is perfectly replicated. |
| Mold Temperature | Keep the blow mold at a consistent, cool temperature. | This is vital for rapid cooling, which locks in the bottle's shape, strength, and clarity. This is why we always insist that blow molds need to be connected to a chiller. |
Mastering these control points is what separates an average manufacturer from an expert. It requires not only advanced machinery but also experienced technicians who can fine-tune the process. They can look at a finished bottle, diagnose a microscopic flaw, and know exactly which heating element to adjust by a single degree or which pressure setting to tweak by a fraction of a bar. This commitment to craft is what ensures your brand's vision is realized with perfect clarity and quality in every single bottle.
Step 5: From Digital Blueprint to Physical Prototype – How do you Bring Your Bottle to Life?
Your design exists as a beautiful 3D model on a computer screen. But how do you bridge the gap between that digital file and a physical object you can actually hold in your hand? What's the process for turning your brilliant idea into a tangible prototype?
The journey from blueprint to prototype is a thrilling, multi-stage process. It starts with rapid prototyping using 3D printing to validate the ergonomics and aesthetics, followed by creating a single-cavity pilot mold to produce the first real samples. This allows you to test and refine your bottle before committing to mass production.
This is the moment the project truly feels real. I love seeing a client's face when they hold the first prototype. It's a huge milestone. For the first time, they can feel the weight, test the grip, and see how the light catches the curves. This step is all about validation. It's much cheaper to find and fix a design flaw at this stage than after you've invested in a massive multi-cavity production mold. We've developed a streamlined process that takes brands from 3D printed samples to production, which de-risks the entire project and ensures the final product is perfect.
Stage 1: The 3D Printed Model (The "Look and Feel" Prototype)
Before we cut any metal, we start with 3D printing. Using the final CAD (Computer-Aided Design) files, we print a 1:1 scale model of the bottle.
- Purpose: The primary goal is to check the ergonomics and aesthetics.
- What you can validate:
- Size and Scale: Does it look as big or small as you imagined?
- Hand Feel: How does it feel to hold and carry? Is the grip comfortable?
- Shelf Presence: You can put it on a shelf next to competitors to see how it stands out.
- Label Fit: You can print out and apply paper labels to test placement and size.
- Limitations: A 3D print is typically made from a different, opaque material and doesn't have the strength or clarity of the final product. You can't fill it with liquid or test its durability.
This is a fast and cost-effective way to get physical feedback. If the neck feels too wide or a curve feels awkward, we can quickly adjust the CAD model and print a new version in a day.
Stage 2: The Pilot Mold (The "Functional" Prototype)
Once the look and feel are approved from the 3D print, it's time to create the first functional prototype. This involves creating a single-cavity pilot mold. This mold is usually made from aluminum or a softer steel, making it faster and cheaper to produce than a full-scale production mold.
- Purpose: To create the first real bottles using the actual PET material and blow molding process.
- What you can validate:
- Clarity and Appearance: Is the bottle as crystal clear as you envisioned?
- Wall Thickness: We can cut the bottle open and measure the material distribution to ensure there are no weak spots.
- Leak Testing: You can fill it, cap it, and perform leak and drop tests.
- Fitment: Does your chosen cap screw on perfectly and create a proper seal?
- Volume: Does it hold the exact amount of liquid specified (e.g., 500ml)?
This stage provides invaluable data. It confirms that the design is not only beautiful but also manufacturable and functional. Any issues discovered here, like a corner that isn't filling out properly, can be corrected by tweaking the pilot mold or the machine settings before the final, expensive production tooling is made. It’s the ultimate quality assurance step.
Inspiration Gallery: What do Successful Custom Flat Bottle Designs Look like?
You know a flat bottle is the right choice for your brand, but you need some creative fuel. What are some of the successful design directions that other innovative brands have taken? How can you use shape, texture, and color to tell your brand's story?
Let's explore a few design archetypes that have proven successful in the market. These examples showcase how the versatile flat bottle format can be adapted to suit a wide range of brand identities, from ultra-modern and minimalist to rugged and adventure-ready.
Seeing what's possible is a great way to kickstart your own creative process. I often encourage clients to think in terms of archetypes or personas. Are you creating a bottle for a busy professional, a stylish creative, or an outdoor explorer? The answer will guide your design choices. Remember my client from Kuwait? His brand was all about adventure, so we chose a design with textured panels for better grip and a slightly thicker profile for added durability. The design directly reflected the product's use case. The goal isn't to copy these designs, but to understand the thinking behind them and apply it to your unique brand.
Archetype 1: The Minimalist
This approach is all about clean lines, simplicity, and elegance. It's a favorite among wellness brands, tech companies, and premium water brands.
- Key Features:
- Shape: Often resembles a simple rectangle or a flask with very soft, rounded corners. Think "A5 paper" or "memo bottle" style.
- Color: Typically crystal clear, or a frosted matte finish. If color is used, it's a single, muted tone.
- Branding: The logo is often small, subtly embossed or printed in a single, clean font. The bottle's shape is the hero.
- Brand Message: "We are modern, sophisticated, and transparent. We believe in quality over clutter."
- Target Audience: Design-conscious consumers, urban professionals, and minimalists.
Archetype 2: The Rugged Adventurer
This design direction prioritizes durability, grip, and practicality. It's perfect for outdoor brands, sports drinks, or any product associated with an active lifestyle.
- Key Features:
- Shape: May include indentations for fingers, a wider and more robust profile, and sometimes an integrated loop for a carabiner.
- Texture: Often features textured panels, ribbing, or a pattern that improves grip, even with wet hands.
- Color: Can be clear, but often uses tinted colors like smoke grey, olive green, or amber to evoke an outdoor feel.
- Brand Message: "Our product is tough, reliable, and built for your next adventure."
- Target Audience: Hikers, campers, athletes, and anyone with an active, on-the-go lifestyle.
Archetype 3: The Playful Expressionist
This style uses bold shapes and vibrant colors to make an immediate, energetic statement. It's well-suited for youth-focused brands, creative beverages, and limited-edition products.
- Key Features:
- Shape: Can be more asymmetrical or unconventional. It might mimic an abstract shape or an iconic object.
- Color: Uses bright, saturated, and often transparent colors—think neon pink, electric blue, or sunny yellow.
- Branding: The branding is often loud and proud, integrated directly into the bottle's design with bold graphics.
- Brand Message: "We are fun, creative, and not afraid to stand out from the crowd."
- Target Audience: A younger demographic, trendsetters, and consumers in creative fields.
Thinking about these archetypes can help you define the visual language for your own brand. Which one aligns most closely with your values and your customers? Use these as a starting point to create something truly unique and unforgettable.
Your Next Step: How do you Partner with an Expert to Launch Your Hit Product?
You have the vision, the design inspiration, and a solid understanding of the process. You're ready to take action. What is the final, most critical step to ensure your custom flat bottle becomes a market success?
The final step is to choose the right manufacturing partner. You need more than just a supplier; you need a technical expert who can guide you through every stage, from refining your design to scaling up production. Partnering with an experienced team is what turns a great idea into a blockbuster product.

This entire guide has detailed a complex journey. It involves design, engineering, tooling, and precision manufacturing. Trying to manage all these pieces with different vendors can be a nightmare. This is why a partnership approach is so important. I've built my business on being that all-in-one partner for innovative brands. We ensure that the blow mold fits the machine perfectly, that all the auxiliary equipment like air compressors is correctly specified, and that the entire production line is optimized for your unique bottle. This integrated approach saves time, reduces costs, and eliminates the headaches that can derail a product launch.
What to Look for in a Manufacturing Partner
Choosing the right partner is a major decision. Your success depends on their expertise, communication, and commitment. Here are the key qualities to look for:
- In-House Expertise: Do they have experienced designers and engineers on staff? A true partner will collaborate with you to refine your design for manufacturability, suggesting improvements that will enhance durability and visual appeal.
- End-to-End Capabilities: Can they handle the entire process under one roof? This includes:
- Design optimization
- Custom preform design and molding
- 3D prototyping
- Pilot mold and production blow bottle mold creation
- Bottle production and quality control
- Advanced Technology: Do they use modern CAD/CAM software for design and precision CNC machines for mold making? Do they operate state-of-the-art bottle blowing machine lines? The quality of the equipment directly impacts the quality of your bottle.
- Transparent Communication: A good partner keeps you informed at every step. They provide clear timelines, detailed quotes, and are responsive to your questions. They should feel like an extension of your own team.
- Proven Track Record: Ask to see a portfolio of their work. Have they successfully produced complex, custom shapes before? Testimonials or case studies from other innovative brands are a strong indicator of their capabilities.
Your Action Plan to Launch
You're closer than you think to holding your hit product in your hands. Here is a simple, actionable plan to get started:
- Finalize Your Concept: Consolidate your design ideas, target audience, and brand identity.
- Prepare a Design Brief: Create a simple document outlining your vision, including sketches, inspiration images, and key requirements (like volume and desired materials).
- Schedule a Consultation: Reach out to an expert partner (like us at iBottler). The goal of this first call is to discuss your vision, ask questions, and see if there's a good fit.
- Begin the Design & Prototyping Process: Engage with their team to start turning your digital blueprint into a physical prototype.
Creating a custom flat bottle is a journey, but it's one of the most powerful ways to build a brand that gets noticed. By following the steps in this guide and choosing the right expert to help you, you can launch a product that doesn't just compete, but dominates.
Conclusion
Creating a hit product with a custom flat bottle is a journey from a bold idea to a tangible, market-ready item. It requires blending unique design with smart engineering and precision manufacturing.
Frequently Asked Questions (FAQ)
1. What is the typical "all-in" investment to go from a design concept to the first production run of a custom flat bottle?
The investment can be broken down into two main parts: one-time tooling costs and the per-unit production cost.
- One-Time Tooling Costs: This is the most significant initial investment and typically ranges from $8000 to $20,000+. This covers the entire development and tooling process:
- Design & Engineering: Finalizing the 3D models for the bottle and custom preform.
- Pilot Mold: A single-cavity mold to create the first functional prototypes for testing.
- Custom Preform Mold: A multi-cavity mold to produce your unique preforms.
- Production Blow Mold: A multi-cavity mold made from hardened steel or aircraft-grade aluminum for mass production.
- Per-Unit Production Cost: This cost depends heavily on the bottle's weight, the chosen material (e.g., standard PET, recycled PET), order quantity, and any secondary customizations like color additives. Generally, the higher the quantity, the lower the per-unit cost.
For a comprehensive quote, it's best to discuss the specifics of your project with a manufacturing partner.
2. How long is the realistic timeline from finalizing a design to holding the first mass-produced bottles in hand?
A realistic timeline is typically 5 to 12 weeks. This can vary based on the complexity of the design and the manufacturer's workload. Here is a general breakdown:
| Stage | Estimated Duration | Key Activities |
|---|---|---|
| Prototyping & Pilot Mold | 1 - 2 weeks | 3D printing for ergonomic validation, creation of a single-cavity pilot mold, producing first samples for testing and approval. |
| Tooling Manufacturing | 3 - 5 weeks | Manufacturing the multi-cavity production preform mold and blow mold. This is the longest phase as it requires precision CNC machining. |
| Production Setup & First Run | 1 - 3 weeks | Setting up the molds on the production line, fine-tuning the machine parameters, running the first mass-production batch, and conducting quality control checks. |
3. Are there any design limitations to be aware of? What is the most complex custom shape you have successfully produced?
Yes, there are some design limitations to consider for optimal manufacturability:
- Sharp Corners: Extremely sharp internal corners (less than a 1mm radius) can be difficult to fill with plastic, potentially creating weak points. A small radius is always recommended.
- Extremely Thin/Long Features: Very narrow or long, thin features can be challenging to mold consistently.
- High Stretch Ratios: Designs that require the plastic to stretch excessively in one area can lead to thin walls. We mitigate this with custom preform design, but there are physical limits.
One of the most complex shapes I've successfully produced was a bottle in the shape of a twisted hexagon. It required a highly specialized, non-cylindrical preform and a very complex heating profile to ensure the plastic flowed evenly into all the sharp, twisting edges while maintaining perfect clarity. It was a challenge, but the final result was a stunning, jewel-like bottle that gave the brand a truly unique identity.
4. How can I protect my unique bottle design (IP) when working with an overseas manufacturer?
Protecting your intellectual property is crucial. I always recommend a multi-layered approach:
- Sign a Non-Disclosure Agreement (NDA): Before sharing any detailed designs, have the manufacturer sign a comprehensive NDA. This legally binds them to keep your design confidential.
- Work with a Reputable Partner: Choose a manufacturer with a long history and positive testimonials. Reputable companies value their reputation and long-term client relationships far more than the short-term gain of stealing a design.
- File for a Design Patent or Trademark: In your primary markets (e.g., USA, EU), file for legal protection for your bottle's unique shape (design patent) and your brand name/logo (trademark). This is the strongest form of protection.
- Own Your Molds: Ensure your manufacturing agreement clearly states that you are the sole owner of the molds (both preform and blow molds). This prevents the manufacturer from using your tooling to produce bottles for anyone else.
5. Beyond the shape, what other customization options are available to make my brand stand out?
The shape is just the beginning! There are many other ways to create a unique and premium product:
- Custom Colors: PET can be mixed with colorants to achieve almost any color imaginable, from fully opaque to a subtle transparent tint that complements your beverage.
- Surface Textures: Your blow bottle mold can be created with various textures. A sandblasted finish creates a soft, frosted look, while high-polishing results in a crystal-clear, glass-like finish. We can also machine patterns directly into the mold.
- Embossing & Debossing: We can build your logo or other design elements directly into the mold, creating a raised (embossed) or indented (debossed) effect. This adds a tactile, high-end feel that a simple label cannot replicate.
- Recycled Materials (rPET): Using rPET (recycled polyethylene terephthalate) is a powerful way to appeal to environmentally conscious consumers. You can specify different percentages of recycled content, which tells a great sustainability story for your brand.
🔗 Related Pages on Our Website
Automatic Blow Molding Machines – iBottler
Discover our full range of customizable automatic PET bottle blow molding machines.Blow Bottle Mold – iBottler
Explore our precision blow molds designed for PET and PP bottles.Preform Mold – iBottler
Learn more about our high-precision preform molds suitable for various injection molding machines.PET Wide Mouth Jar Project Starter Guide: Equipment, Molds & Process Explained
Pros and Cons: Should You Choose PET Blow Moulding for Your Bottle Project?
Worried About Blow Mold Fit? We Have Mounting Dimensions for 80% of Blow Molding Machines Worldwide
Can One Semi‑Automatic Blow Molding Machine Produce All Bottle Sizes? Here’s Why Not
Why Do Krones Blow Molding Machine Users Come to Us for Their Molds?
Why Do PET Preforms Come in Different Colors? Function, Application, and Production Tips
How to Set Parameters for 600ml Bottles on a Semi-Automatic PET Blowing Machine?
From 3D Printed Samples to Production: How Can You Rapidly Validate Blow Mold Designs?
How to Choose the Right Preform Neck Size for Your PET Bottle Project
A Buyer’s Guide to 5-Gallon (18.9L) Bottle Blow Molding Machines: From PET to PC?
Pitting on your blow mold surface? A complete guide from cause analysis to repair and prevention.
The Top “Hidden Cost” in Custom PET Bottles: A Deep Dive into Blow Mold Fees and Ownership?
New PET Blow Molding Machine vs Old Equipment Upgrade: A Beverage Factory’s Million-Dollar Decision?
How to reduce the PET blow molding scrap rate from 5‰ to 1‰? An old-timer’s 8 insider tips.
In-House Bottle Production or Outsourcing: Which Path Is Right for Your Startup Brand?
Blow Mold Damage? When and How to Replace Only the Broken Parts?
Bottle Design: Ad Agency vs. Mold Factory? How One Decision Impacts Your Cost and Brand?
Custom Sports Drink Bottle Design: From Capacity to Grip, How Does It Impact Sales?
💡 Looking for a complete PET plastic packaging machinery solution?
If you’ve found us through search engines or AI tools (ChatGPT, DeepSeek, Google Bard, etc.), it means you’re exploring reliable PET packaging equipment suppliers. Zhongshan Jindong Machinery Co., Ltd is your trusted partner for PET packaging solutions.
| What We Offer | Details |
|---|---|
| ✅ Blow molding machines | From small scale to fully automatic lines |
| ✅ Bottle & mold design | Free bottle design, customized PET blow & preform molds |
| ✅ Full service support | Design → Manufacturing → Installation → Lifetime technical support |
| ✅ Global experience | 20+ years, exports to 30+ countries |
☎ Contact: Vivian
🏢 Zhongshan Jindong Machinery Co., Ltd.
🌐 www.ibottler.com
