Struggling to change the mold on your new machine? It seems complex, and you worry about downtime or causing damage. This guide breaks the process down into simple, safe steps for you.
To replace a blow bottle mold, first, ensure all machine pressure is released for safety. Then, unbolt and carefully remove the old mold halves. Next, clean the platens and precisely position, align, and securely fasten the new mold. Finally, you must adjust the stretch rod height and mold thickness settings before testing.
Changing molds doesn't have to be a major headache. I recently helped a client in Ghana who was facing this exact challenge. He had just purchased two of my semi-automatic machines but had five different bottle designs to produce. He felt stuck trying to perform his first mold change. Although I had sent him instructions, the first time is always intimidating. We jumped on a quick video call, and I walked him through the process, solving his problem in under an hour. This experience showed me just how much a clear, step-by-step guide can empower a new operator. Let's walk through that same process together, so you can handle any mold change with confidence.
1️⃣ What Tools and Safety Gear Do You Need Before Replacing the Mold?
Are you unsure what to gather before starting a mold change? Disorganization leads to wasted time and serious safety risks. Having every tool and piece of safety gear ready and waiting is the first and most important step to a smooth, professional process.
Before you touch a single bolt, you must gather your tools. You will need a complete socket and wrench set, a full set of Allen keys, a soft-faced mallet (brass or rubber), several clean cloths, and a can of anti-rust spray for the old mold. For your personal safety, you absolutely must wear steel-toed boots, impact-rated safety glasses, and heat-resistant gloves. Most importantly, always confirm the bottle blowing machine is fully powered off and all pneumatic pressure has been bled from the system.

Dive Deeper: A Detailed Look at Your Preparation
Preparing for a mold change is a critical phase that dictates the efficiency and safety of the entire operation. Let's break down exactly what you need and why.
Essential Mechanical Tools
Your basic toolkit should be dedicated to the machine. You'll need a range of metric or imperial sockets and wrenches that fit the main bolts holding the mold to the clamping plates, or platens. You will also need a complete set of Allen keys (hex wrenches) for smaller fixture adjustments, such as those on the neck inserts or cooling line connectors. A soft mallet, made of brass or dense rubber, is non-negotiable. You may need to gently tap the mold to align it or to break it free; using a steel hammer will dent and damage the expensive mold or the machine's platen surface. While a small, flat pry bar can be useful for a stubborn mold, you must use it with extreme caution and apply gentle, even pressure to avoid damaging the precision-machined surfaces.
Cleaning and Maintenance Supplies
Cleanliness is not optional; it is essential for proper alignment. Microfiber cloths are perfect for wiping down the machine platens because they don't leave lint behind. You should also have a bottle of a non-abrasive cleaning solvent, like isopropyl alcohol, to remove any stubborn plastic residue or grease. Finally, have a can of anti-rust spray or light machine oil ready. Once you remove the old mold, you should clean it and apply a light protective coating before you store it to prevent corrosion.
Critical Safety Equipment
Working with heavy industrial equipment leaves no room for compromising on safety. The table below outlines the minimum required gear.
| Safety Gear | Body Part Protected | Hazard Prevented |
|---|---|---|
| Steel-Toed Boots | Feet | Dropped molds, tools, or machine parts |
| Safety Glasses | Eyes | Flying debris, pressurized air bursts, chemical splash |
| Heat-Resistant Gloves | Hands | Contact with a hot mold (even a recently run mold) |
| Lockout-Tagout (LOTO) Kit | Personal Safety | Accidental machine startup during maintenance |
Machine State Verification
This is the single most important safety procedure. Before you begin, the machine must be in a zero-energy state. This means the main electrical disconnect is switched off and secured with your personal padlock (lockout/tagout). Then, you must bleed all stored pneumatic pressure from the system. Your bottle blowing machine will have pressure gauges for the high-pressure blowing air and the low-pressure clamping circuit. Verify with your own eyes that both gauges read zero. I once saw a technician get a nasty surprise when a small amount of residual pressure in the clamp circuit caused a platen to shift unexpectedly as he was loosening a bolt. Verify zero energy, always.
2️⃣ How Do You Safely Remove the Old Mold from the Clamping Plate?
Are you worried that the mold will be stuck, or worse, that it will slip and drop when you unbolt it? Removing a heavy and expensive blow bottle mold can be a stressful moment. Following a systematic approach ensures the safety of both you and the mold.
First, double-check that all air pressure is released from the clamping unit. Then, begin by slightly loosening the top bolts, followed by the bottom bolts. This prevents the mold from tipping forward. Use an overhead crane, a dedicated mold cart, or have a second person ready to support the mold's weight before you fully remove the final bolts and carefully slide it out.

Dive Deeper: A Step-by-Step Guide to Mold Removal
Removing the mold is a physical task that requires care and a specific sequence of operations to prevent injury or damage.
Step 1: Depressurize and Disconnect
I cannot overstate the importance of safety. Before your wrench touches a bolt, confirm again that the pressure gauges for the clamping system read zero. Trying to loosen bolts while the mold is under even low pressure can cause components to spring apart violently. Once you've confirmed zero pressure, disconnect any water cooling lines attached to the mold halves. Be prepared with a rag or a small bucket, as some water will likely spill out. Carefully label the "in" and "out" water lines so you can reconnect them correctly on the new mold.
Step 2: The Loosening Sequence
There is a correct order for loosening the bolts. Always "break" the torque on the top bolts first, giving them about a half-turn. Then do the same for the bottom bolts. This method ensures that the weight of the mold doesn't cause it to suddenly pivot forward once the bottom bolts are loose. After breaking the initial torque on all bolts, you can proceed to loosen them further. If a bolt is seized from heat and pressure, do not use excessive force. Spray it with a good quality penetrating oil, let it sit for ten minutes, and try again. Using a long "cheater bar" on a wrench is a recipe for stripping a bolt head or, worse, snapping the bolt.
Step 3: Supporting the Mold's Weight
A blow bottle mold for a semi-automatic machine can weigh anywhere from 20kg to over 100kg (45-220 lbs). Attempting to lift and handle this alone is foolish and dangerous. The best method is to use a rolling cart that is adjusted to the same height as the machine's base platen. This allows you to slide the mold directly out onto the cart. If a cart isn't available, this becomes a two-person job. One person must be positioned to firmly steady and support the mold's weight while the other person removes the last two bolts. Clear communication is key here.
Step 4: Sliding the Mold Out
With all bolts removed and the weight supported, the mold should slide forward off the platen. Sometimes, it may stick slightly on the guide pins or due to a small ridge of residue. If so, gently and evenly pry on both sides simultaneously between the mold base and the platen. Never focus all your prying force on a single point, as this can damage the platen's surface. Once it's free, move it immediately to a secure and designated storage area, not on the floor where it could be a trip hazard or get damaged.
3️⃣ How Do You Align the New Mold: Centering, Leveling and Fastening?
Are you afraid of misaligning the new mold? A bad alignment can cause ugly bottle defects, excessive wear, or even serious damage to your machine. Proper mold alignment is a task of precision and patience, but it's not difficult if you are methodical.
First, you must clean the machine's clamping plates until they are spotless. Then, carefully place the new mold onto the plates, ensuring the guide pins are engaged. Lightly tighten all the bolts. Slowly close the mold halves by hand or by jogging the machine to check for centering and parallelism. Make small adjustments as needed, then securely tighten the bolts in a star or cross pattern to the correct torque.

Dive Deeper: The Art of Precise Mold Alignment
Proper alignment is the foundation of a good production run. It ensures the two halves of the mold meet perfectly, creating a high-quality bottle and preventing unnecessary wear on your equipment.
The Foundation: A Perfectly Clean Surface
I've troubleshooted client issues that were caused by a single, tiny granule of plastic stuck between the mold and the platen. Before you even think about installing the new mold, take a clean cloth and a solvent and wipe down the entire surface of both machine platens. Check the back of the new mold as well. Any piece of debris, solidified grease, or metal shaving will throw off your alignment, causing the mold to close unevenly. This results in uneven clamping pressure, which is a primary cause of plastic flash on the bottle's seam.
Initial Placement and Hand-Tightening
With the platens clean, carefully guide the new mold onto them. Most molds have guide pins that fit into bushings on the platens to help with initial positioning. Once the mold is sitting flat against the platen, thread all the mounting bolts in by hand. This is crucial to prevent cross-threading, which can damage the expensive threaded holes in the platen. Hand-tighten all the bolts until they are just snug. The mold should be secure but still able to be shifted slightly for final alignment.
The Art of Centering and Leveling
This is the most meticulous part of the job.
- Vertical & Horizontal Centering: The center of the mold cavity must be perfectly aligned with the center of the preform holder and the stretch rod. You can often eyeball this, but for true precision, you can use measuring calipers.
- Parallelism Check: This is the most critical alignment. Start to slowly close the clamping unit. As the two mold halves come together, watch the gap between them at all four corners. The gap must be perfectly even all the way around, and all four corners should touch at the exact same moment. If the top or bottom touches first, your mold is not level. If one side touches first, it is not centered. Make tiny adjustments by tapping the mold with your soft mallet, then re-check.
The Final Torque-Down
Once you are satisfied that the alignment is perfect, it's time to tighten the bolts. Uneven tightening can ruin your careful alignment work. You must tighten the bolts in a star or cross pattern to apply even pressure. Using a torque wrench is highly recommended to ensure you tighten the bolts to the specifications provided by the bottle blowing machine manufacturer.
| Example 8-Bolt Tightening Sequence (Star Pattern) |
|---|
| Step 1: Tighten bolts to 50% of final torque in this order: 1, 5, 7, 3, 2, 6, 8, 4. |
| Step 2: Tighten bolts to 100% of final torque in the same order: 1, 5, 7, 3, 2, 6, 8, 4. |
| Step 3: Perform a final check of all bolts in a circular pattern to ensure they are all at the correct torque. |
4️⃣ How Do You Adjust the Stretch Rod and Mold Thickness Settings?
Are you confused about what to adjust after the new mold is bolted in? Your bottle blowing machine will not function correctly with the old settings from the previous mold. Getting the stretch rod height and the mold thickness (clamp gap) set correctly is absolutely essential for producing a perfect bottle.
After installing the new mold, you must adjust the physical height and stroke of the stretch rod to match the internal depth of your new bottle design. At the same time, you must adjust the mold thickness setting on the clamping unit itself. This adjustment tells the machine how to apply the correct clamping force for the new mold's specific dimensions, preventing damage or defects like flash.

Dive Deeper: The Two Critical Post-Installation Adjustments
Forgetting these two adjustments is one of the most common and costly mistakes a new operator can make. These settings directly impact bottle quality and machine longevity.
Why Stretch Rod Adjustment is Non-Negotiable
The stretch rod is what stretches the heated preform vertically just before the high-pressure air blows it into the final shape. This vertical stretching is critical for "biaxial orientation," the process that gives a PET bottle its strength and clarity. The final stopping point of the stretch rod inside the mold determines the thickness and strength of the bottle's base. If your new bottle is taller or shorter than the old one, the stretch rod's travel distance (stroke) must be changed. If you fail to do this, you will either produce bottles with very weak, thin bottoms, or you will drive the stretch rod right into the bottom of your new aluminum mold, damaging both.
How to Set the Stretch Rod Height
The procedure is straightforward. First, with the new mold installed and fully closed, manually (or by using the machine's setup mode) lower the stretch rod assembly into the mold cavity. The goal is for the tip of the stretch rod to stop just a few millimeters (e.g., 2-4mm) before it would touch the bottom of the mold cavity. It must never actually touch the aluminum. Your machine will have a mechanical stop bolt or an electronic sensor that you can adjust to set this final position. Consult your machine's manual for the exact location of this adjustment. An incorrect setting here can lead to the rod puncturing the preform during stretching or creating a weak point in the center of the bottle base.
Understanding Mold Thickness (Clamp Gap)
The clamping unit on your machine is a powerful toggle system. It needs to know the exact thickness of the installed, closed mold so it can move just past the center point to apply thousands of pounds of locking force. This setting is usually a large, threaded adjustment wheel or nut located at the rear of the clamping unit. Setting this correctly is vital. If the setting is too loose (set for a thinner mold), the clamp will not be able to apply enough force to hold the mold shut against the high-pressure blowing air. This will result in a thick, ugly seam of plastic (flash) being forced out between the mold halves. If the setting is too tight (set for a thicker mold), you will put enormous strain on the machine's toggle pins and platens, leading to rapid, catastrophic wear and potential failure. It is one of the fastest ways to destroy a machine.
5️⃣ What Should You Observe in the First Bottle After a Mold Change?
You have successfully installed the new mold and made your adjustments, but how can you be sure you did the job correctly? Simply producing an object that looks like a bottle is not enough. You must know which specific details to inspect to confirm a successful mold change.
On the very first bottle you produce with the new mold, you need to carefully inspect three key indicators. First, check the mold's parting line for any signs of flash. Second, inspect the bottle's neck and thread finish for complete and proper formation. Finally, examine the overall shape for symmetry and to ensure all details are sharply defined. These three indicators will tell you immediately if your alignment and settings are correct.

Dive Deeper: Your First Article Inspection Checklist
The first bottle off a new setup is your report card. It tells you everything you need to know about the quality of your work. Let's create a detailed checklist for this critical inspection.
Indicator 1: The Parting Line
The parting line is the seam that runs down the side of the bottle where the two halves of the blow bottle mold meet.
- What to Look For: In a perfect bottle, this line should be extremely fine, almost invisible to the touch.
- What it Tells You: If you see or feel a ridge of plastic, or worse, a thin sheet of plastic sticking out (known as "flash"), it is a clear sign that the mold halves are not closing and sealing completely. This immediately points to one of three likely causes: 1) poor mold alignment, 2) debris left on the platen surface, or 3) an incorrect mold thickness setting that is preventing the machine from applying sufficient clamping force.
Indicator 2: The Neck and Bottle Mouth
The neck area, including the threads, is often the most complex part of the bottle and is usually formed by separate, hardened steel neck inserts within the main mold.
- What to Look For: The threads should be sharp, fully formed, and well-defined. The very top surface of the neck (the sealing surface) must be perfectly flat and smooth.
- What it Tells You: An incomplete, distorted, or rough neck finish means the preform was not seated correctly in the mold before clamping. It can also indicate that the neck inserts themselves are misaligned. This is a critical failure, as a poorly formed neck will not seal properly with a cap, leading to leaks.
Indicator 3: Overall Bottle Shape and Base
Take a step back and look at the bottle as a whole.
- Symmetry: Is the bottle perfectly symmetrical? Hold it up against a light. A lopsided or distorted shape can indicate that the stretch rod is not perfectly centered, causing the material to stretch unevenly.
- Sharp Details: Look at any logos, patterns, or sharp corners in the design. Are they crisp and well-defined? If these features are soft or rounded, it could mean the blowing pressure is too low or the blowing time is too short.
- The Base: Look at the bottom of the bottle. The small mark left by the injection gate of the preform should be perfectly in the center. If it is off-center, your stretch rod alignment is off.
First Bottle Quality Checklist
| Feature to Inspect | Ideal Condition | Potential Problem if Not Ideal | Possible Cause (Post-Mold Change) |
|---|---|---|---|
| Parting Line | A fine, barely visible line | A visible ridge or flash of plastic | Misalignment, dirty platens, insufficient clamp force |
| Neck/Threads | Sharp, fully formed, with a flat top | Deformed or incomplete threads | Misaligned neck inserts, improper preform seating |
| Bottle Base | Centered gate mark, uniform thickness | Off-center gate, visible thin spot | Stretch rod misaligned or incorrect height setting |
| Overall Shape | Symmetrical, with sharp design details | Lopsided, with rounded or soft corners | Uneven blowing, incorrect settings, poor stretch rod centering |
| Material Distribution | Clear, even wall thickness | Thin or thick patches, hazy spots | Primarily a heating issue, but can be affected by stretch rod |
6️⃣ What Are the Most Common Mistakes Newcomers Make When Replacing Molds?
Everyone makes mistakes when learning a new skill, but in a factory setting, some mistakes are far more costly than others. Do you want to avoid the common and predictable pitfalls that trip up most new operators during a mold change? Knowing what they are is half the battle won.
The most common mistakes are surprisingly simple, yet they cause the vast majority of problems. They are: forgetting to release all pneumatic pressure before starting, cross-threading and over-tightening bolts, performing a poor cleaning of the platens leading to misalignment, and completely failing to readjust the stretch rod height and mold thickness settings for the new mold. Avoiding these few basic errors will make your process a success.
Dive Deeper: Learning from Common Errors
I've trained many new operators, and I see the same handful of mistakes happen over and over. By consciously avoiding them, you can perform like an expert from your very first mold change.
Mistake 1: Forgetting Safety First (The Pressure Release)
I will continue to repeat this because it is the #1 most dangerous mistake. The pneumatic systems in a bottle blowing machine store a surprising amount of energy. I had a client who, in a rush, started to unbolt the mold while the clamping circuit was still pressurized. As he loosened the bolt, the stored energy released, causing the platen to shift violently and throwing the heavy wrench from his hand across the workshop. He was extremely lucky he wasn't standing in its path. Before your hands enter the machine, you must personally verify that the pressure gauges read ZERO.
Mistake 2: Abusing the Fasteners (Bolts and Threads)
The bolts and threaded platens on your machine are precision components. They are not indestructible.
- Cross-Threading: This happens when you try to force a bolt into a hole at an angle. It will damage the threads in both the bolt and, more critically, the platen. A damaged platen thread is a very difficult and expensive repair. The rule is simple: always thread every bolt by hand for the first three to four turns. If it doesn't turn easily, back it out and try again.
- Over-Tightening: Using a long pipe as a "cheater bar" to get more leverage on your wrench is a terrible idea. This can stretch the bolt beyond its designed limit, permanently weakening it. Worse, it can warp the mold base or even crack the machine platen. Use a calibrated torque wrench and tighten to the manufacturer's specification.
- Uneven Tightening: Bolting down one side completely before starting the other will warp the mold and ruin your alignment. Always use the star pattern.
Mistake 3: The "Good Enough" Clean
A quick, lazy wipe with a dirty rag is not cleaning. It's just moving dirt around. I have seen an entire production shift halted for hours, chasing a persistent flash defect, only to finally discover a tiny, paper-thin sliver of old plastic that was stuck behind the mold. This sliver was enough to prevent the mold from closing properly. The platens and the back of the mold must be perfectly, spotlessly clean.
Mistake 4: Skipping the Readjustments
This mistake is incredibly common and stems from impatience. An operator is proud of how quickly they bolted the new mold in, and they want to start production immediately. They forget, or simply don't bother, to reset the stretch rod height and the mold thickness setting. On the very first cycle, one of two things happens: the stretch rod crashes into the bottom of the mold, or a massive sheet of plastic flash is created, making a huge mess and wasting material. After a mold change, the machine's settings must be adjusted for the new blow bottle mold. This is also true when using preforms from a new preform mold design, as slight variations can impact the process. It is a mandatory part of the procedure, not an optional step.
7️⃣ How Long Should a Standard Mold Change Take and How Can You Improve Efficiency?
Do you find that your mold change procedure drags on for hours? Every minute your machine is not producing bottles is a minute you are losing money. Understanding the industry benchmark for changeover time and implementing simple tricks to improve your speed can directly boost your company's profitability.
For a skilled and experienced operator working on a typical semi-automatic machine, a complete mold change, from stopping production to making the first good new bottle, should take approximately 30 to 45 minutes. To achieve this level of efficiency, you must prepare all your tools beforehand, use a dedicated mold cart to simplify transport, and create a standardized checklist procedure that every operator follows, every single time.
Dive Deeper: From Hours to Minutes - The Path to Efficiency
Downtime is the enemy of productivity. A fast and efficient mold change is a skill that can be learned and perfected. Let's look at realistic timeframes and the strategies to achieve them.
Establishing a Realistic Benchmark
Time expectations should be based on experience:
- Novice (First 1-5 changes): 1.5 to 2 hours is not unusual. The focus here should be on safety and accuracy, not speed.
- Intermediate (5-20 changes): Under 1 hour. The operator is familiar with the steps but may still need to consult notes or think through the process.
- Expert (20+ changes): 30 to 45 minutes. The process becomes second nature. The operator anticipates the next step and moves smoothly and efficiently.
This timeframe should encompass everything: shutting down the machine, removing the old mold, thoroughly cleaning the platens, installing the new mold, performing all necessary adjustments (stretch rod, mold thickness), and producing the first quality-approved bottle. It does not include the time it might take to fine-tune the preform heating recipe, which is a separate process optimization task.
Key Strategies for Increasing Speed
Speed comes from methodology, not from rushing.
- Preparation is Everything (Mise en Place): This concept, borrowed from professional kitchens, means "everything in its place." Before you even power down the bottle blowing machine, you should have the new, clean mold sitting on a cart ready to go. Alongside it should be a dedicated toolbox with every wrench, socket, and Allen key you will need, as well as your cleaning supplies and safety gear. Zero time should be wasted walking across the factory floor to find a tool.
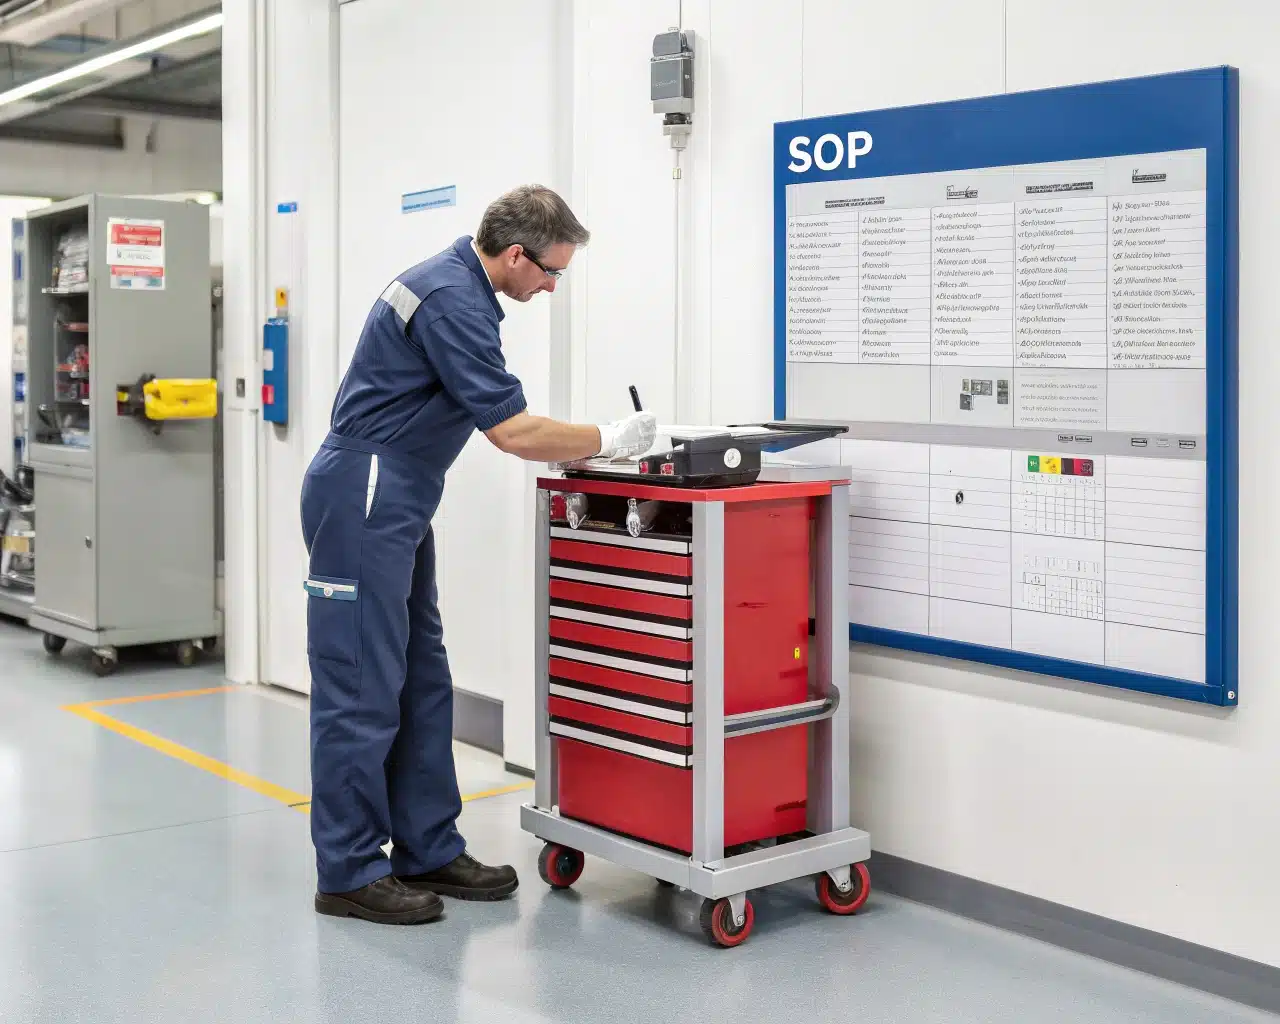
- Standardized Operating Procedure (SOP): Create a simple, one-page checklist that lists every single step in the correct order. Laminate it and keep it at the machine. An SOP ensures that no critical steps are forgotten, even by an experienced operator having a busy day. It eliminates guesswork and hesitation. When I sent a checklist to my client in Ghana, he reported that his changeover time was cut in half simply because he had a clear, repeatable process to follow.
- Dedicated Mold Cart: A rolling cart that can be adjusted to the exact height of the machine platen is a massive efficiency and safety booster. It allows one person to safely slide a heavy mold off the machine and slide the new one on, eliminating most of the difficult lifting and carrying.
- Use Better Tools: While not essential, using tools like a small pneumatic or battery-powered impact wrench (on a low torque setting) for removing and snugging up bolts can save several minutes compared to using a manual ratchet.
Efficiency Gains Breakdown
| Activity | Inefficient Method (Time) | Efficient Method (Time) | Key Improvement |
|---|---|---|---|
| Tool & Mold Gathering | Searching the shop for tools (15-20 min) | Pre-prepared kit and mold on a cart (2 min) | Preparation |
| Mold Transportation | Difficult two-person manual carry (10 min) | Easy roll-up with a dedicated cart (3 min) | Equipment |
| Following Procedure | Relying on memory, potential mistakes (5-10 min) | Following a step-by-step checklist (0 min) | Standardization (SOP) |
| Bolting/Unbolting | Using a standard manual ratchet (15 min) | Using a battery-powered wrench (5 min) | Better Tooling |
| TOTAL (Example Time Saved) | ~45 min | ~13 min | Systematic Approach |
8️⃣ What Support Can We Offer for Mold Changes and Custom Designs?
Are you feeling alone and overwhelmed trying to figure all of this out from a printed manual? Technical challenges can be incredibly frustrating when you don't have an expert to turn to for support. Having a dedicated partner to guide you is the best way to protect and get the most out of your machinery investment.
We provide our clients with comprehensive, multi-layered support. This includes providing detailed, step-by-step video guides that visually demonstrate the entire mold change process. We also offer live, one-on-one remote training via video call to personally walk you through the procedure. Furthermore, we are experts in designing and manufacturing high-quality, custom blow bottle mold tooling to bring any bottle design you can imagine to life.
Dive Deeper: Your Partner in Production
Our relationship with our clients doesn't end when the machine is delivered. We see ourselves as long-term partners in your success. Here is how we support you.
Detailed Video Guides
We know that for a hands-on task, watching is better than reading. That's why we have produced a library of clear, high-definition video tutorials. These videos show a close-up view of every single step of the mold change process on a machine just like yours. You can watch it on your phone or a tablet right next to the machine, pausing and rewinding as many times as you need. Our videos cover the initial safety checks, tool selection, removal of the old mold, cleaning, installation of the new one, and a detailed demonstration of how to perform the critical stretch rod and mold thickness adjustments.
Live, Personalized Remote Training
This service is what I provided for my client in Ghana, and it is a game-changer for new machine owners. Sometimes, you just need an expert to look over your shoulder and give you real-time feedback. We can schedule a video call at your convenience. Using your phone's camera, you can show us exactly what you are doing. We can guide you, point out things you might miss, answer your specific questions as they arise, and visually confirm that your adjustments are correct before you press the start button. This personalized guidance provides immense confidence and prevents costly first-timer mistakes.
Custom Mold Design and Manufacturing
Your bottle's design is a core part of your brand identity. We are not just machine suppliers; we are experts in the entire bottling process, and that begins with a world-class mold. Our primary business includes the design and fabrication of molds.
- The Design Process: It all starts with your idea, which can be a simple hand-drawn sketch, a 3D file, or a physical sample. Our engineers will turn that concept into a precise 3D model. We then use simulation software to analyze material flow and distribution, ensuring your final bottle will be both strong and lightweight.
- Manufacturing and Compatibility: Once the design is approved, we manufacture the mold from high-grade aircraft aluminum (for speed and thermal conductivity) or P20 steel (for high-volume durability). We guarantee that any blow bottle mold we build is perfectly compatible with your specific bottle blowing machine, whether you purchased it from us or another vendor. We also consider the specifications of your preform mold to ensure a seamless transition from preform to the final bottle.
- Performance-Driven Quality: Our molds are engineered for performance. They feature optimized water cooling channels for fast cycle times and are machined to exceptionally tight tolerances to give you a perfect, high-quality bottle, cycle after cycle, for years to come.
Conclusion
Changing a blow mold can seem like a daunting task when you are new to it, but it is a very logical and straightforward mechanical process. By focusing on safety, cleanliness, and following these systematic steps, you can quickly and confidently switch your production line to any bottle design you need.
FAQs
1. Can I use a blow mold made for a different brand of machine?
It is highly discouraged. While it might physically fit, the critical dimensions like the guide pin locations, bolt pattern, overall height, and compatibility with the clamping stroke and stretch rod mechanism are often different. Using an incompatible mold is a serious risk that can lead to damage to the mold or your bottle blowing machine. It's always safest to use a mold specifically designed for your machine model.
2. What is the main difference between an aluminum mold and a steel mold?
Aluminum molds are lighter, less expensive to manufacture, and they transfer heat more quickly (which can mean faster cooling and cycle times). They are the ideal choice for prototyping, new product launches, and medium production runs on semi-automatic machines. Steel molds (typically P20 or stainless steel) are much heavier, more expensive, and significantly more durable. They are the standard for very high-volume, 24/7 production on fully automatic machines where they might run for millions of cycles.
3. Why is the bottom of my new bottle blowing out or appearing extremely thin?
This is almost always a problem with the stretch rod settings. The most likely cause is that the rod's stroke is set too long (too low), and it is physically pushing through the semi-molten preform before the air pressure is applied. Alternatively, it could be set too short (too high), not stretching the material down to the base enough, leaving a thick mass in the upper body and a very thin, weak spot at the bottom. Re-check and re-measure your stretch rod height adjustment.
4. How should I properly store a mold that I've removed from the machine?
After removing the old mold, it's critical to clean it thoroughly. Remove all plastic residue and wipe it down with a solvent. Once it's perfectly dry, apply a light coating of an anti-rust spray or protective oil to all of its surfaces, paying special attention to the polished interior cavity and the flat parting line faces. Store it on a strong, stable shelf or in a custom-built crate. Never store a mold where its critical surfaces can be bumped, scratched, or dented.
5. After a successful mold change, do I need to adjust the preform heating settings?
Yes, almost certainly. The mold change is the mechanical part of the job; process tuning is the next step. Every bottle design has a unique geometry, weight, and material distribution. Therefore, each requires a specific heating profile in the oven to ensure the preform is heated evenly to the correct temperature. You will need to adjust the oven lamp settings to achieve a clear, strong bottle without haze, crystallization, or thin spots.
🔗 Learn More about Blow Molding Technology
To better understand the core components of a 6-cavity automatic blow molding machine, here are some useful resources:
Blow Molding – Wikipedia
A comprehensive overview of various blow molding processes, including extrusion, injection, and stretch blow molding.Injection Molding – Wikipedia
Important for understanding the production of preforms used in stretch blow molding.Stretch Blow Molding – Wikipedia
Explains how PET bottles are formed through axial and radial stretching processes.PET Bottle – Wikipedia
Background information on the materials and properties of typical PET bottles.Design of PET Bottles – Wikipedia
An introduction to the design considerations and geometry used in PET bottle manufacturing.
🔗 Related Pages on Our Website
Automatic Blow Molding Machines – iBottler
Discover our full range of customizable automatic PET bottle blow molding machines.Blow Bottle Mold – iBottler
Explore our precision blow molds designed for PET and PP bottles.Preform Mold – iBottler
Learn more about our high-precision preform molds suitable for various injection molding machines.
