In the world of blow molding, there is a golden rule: "Garbage In, Garbage Out". The quality of your final bottle can never exceed the quality of the preform it starts with.
Therefore, when you are faced with any bottle defect, the first and most important place to start your investigation is the preform itself—the root of the problem.
This guide will walk you through a comprehensive "health check" for your PET preforms. Of course, if you have already completed these checks and are confident that the preform is not the issue, then your troubleshooting journey should continue in the following order:
- Check the blow mold: https://ibottler.com/the-blow-mold-health-check-a-complete-guide-to-defects-caused-by-mold-issues/
- Check the blow molding machine itself: https://ibottler.com/a-troubleshooting-guide-for-bottle-defects-caused-by-the-blow-molding-machine-itself/
- Check the auxiliary equipment (air compressor/chiller): https://ibottler.com/troubleshooting-your-powerhouse-a-guide-to-defects-caused-by-the-air-compressor-chiller/

"Garbage In, Garbage Out": Why is your preform the foundation of a perfect bottle?
Struggling with inconsistent bottle quality and wasting time on machine tweaks? The real problem is often the preform you are using from the very beginning.
The preform dictates the final bottle's potential. Its material properties, dimensions, and visual clarity set the upper limit for quality. A flawless blowing process simply cannot fix a flawed preform.
In my 16 years in the PET blow molding industry, I've seen countless hours and dollars wasted because technicians immediately blame the machine. The truth is, the preform is the DNA of your final bottle. The blow molding process only stretches and inflates this DNA; it doesn't rewrite it. Think of it like baking a cake. If you start with expired flour or spoiled eggs, it doesn't matter how skilled a baker you are or how advanced your oven is—the cake will be a failure. The same principle applies here. The preform's intrinsic quality, its chemical makeup, and its physical dimensions are locked in before it ever enters your machine. An invisible problem like low polymer viscosity or a tiny dimensional flaw like wall eccentricity will inevitably manifest as a major defect in the final, expanded bottle. That's why I always tell my clients to start their troubleshooting with a thorough preform inspection. It’s the fastest path to identifying the root cause and saves an incredible amount of time that would otherwise be spent making pointless adjustments to a perfectly functional machine. A high-quality preform is the most critical investment for a smooth, efficient, and reliable production line.
Part 1: What are the material-related defects in your preform?
Are your bottles hazy, brittle, or leaving a strange taste in the product? These invisible issues often trace back directly to the preform's raw material composition.
Material defects like low Intrinsic Viscosity (IV), high moisture content, or high Acetaldehyde (AA) are invisible but critical. They cause weakness, haziness, and off-tastes in the final bottle, ruining its integrity.

These defects are particularly tricky because you can't see them just by looking at a preform. They are hidden within the molecular structure of the PET material itself. They represent a failure that happened much earlier, during the polymerization of the resin or the injection molding of the preform. Let's break down these invisible enemies one by one.
Intrinsic Viscosity (IV) Too Low
Think of IV as a measurement of the length of the polymer chains in the PET resin. Longer chains are more entangled and stronger, resulting in a tough, resilient material. When the IV is too low, it means the polymer chains are shorter. This directly translates to a weaker preform and, consequently, a weaker bottle. A bottle made from low-IV material will perform poorly in top-load tests (how much weight it can support before collapsing) and will be more susceptible to stress cracking and breaking during filling, capping, or transport. This is a common issue when suppliers try to cut costs with lower-grade resin. Always check your supplier's Certificate of Analysis (CoA) for the specified IV value and ensure it matches the requirements for your bottle's application. A robust PET bottle mold design guide will always specify the required IV for the intended application.
High Moisture Content
PET is a hygroscopic material, which means it naturally absorbs moisture from the surrounding air. If a preform supplier does not properly dry the PET resin before injection molding, or if you store the preforms in a humid environment, that trapped water becomes a major problem. When the preform is heated in your blow molder's oven, this moisture causes a chemical reaction called hydrolysis. Hydrolysis literally breaks the long polymer chains apart, drastically reducing the IV. The result is a bottle that is hazy or cloudy in appearance and extremely brittle. You'll see failures in drop tests and may even have bottles crack on the production line. This is why preforms should always be stored in a dry, climate-controlled area and kept in their sealed liner bags for as long as possible before use.
High Acetaldehyde (AA) Level
Acetaldehyde, or AA, is a chemical byproduct that is naturally created when PET is heated to its melting point during the injection molding process. While it's not harmful in the low concentrations we see in bottling, it has a distinct sweet, fruity smell and taste. If the AA level in the preform is too high, it will migrate from the plastic into the product inside the bottle, especially with a product as neutral as water. This can lead to customer complaints about the water tasting "plasticky" or "off." Reputable preform manufacturers use specific types of PET resin and carefully controlled injection processes to minimize AA formation. For sensitive products like premium bottled water, sourcing low-AA preforms is non-negotiable.
Part 2: What are the dimensional defects you can measure?
Is your blowing machine jamming or are your bottles coming out with uneven walls? These frustrating problems are often caused by measurable preform size issues that you can check yourself.
Dimensional defects like eccentricity, incorrect diameters, and inconsistent weight directly impact machine operation and bottle consistency. They are physical problems that can be measured and verified before you even start blowing.
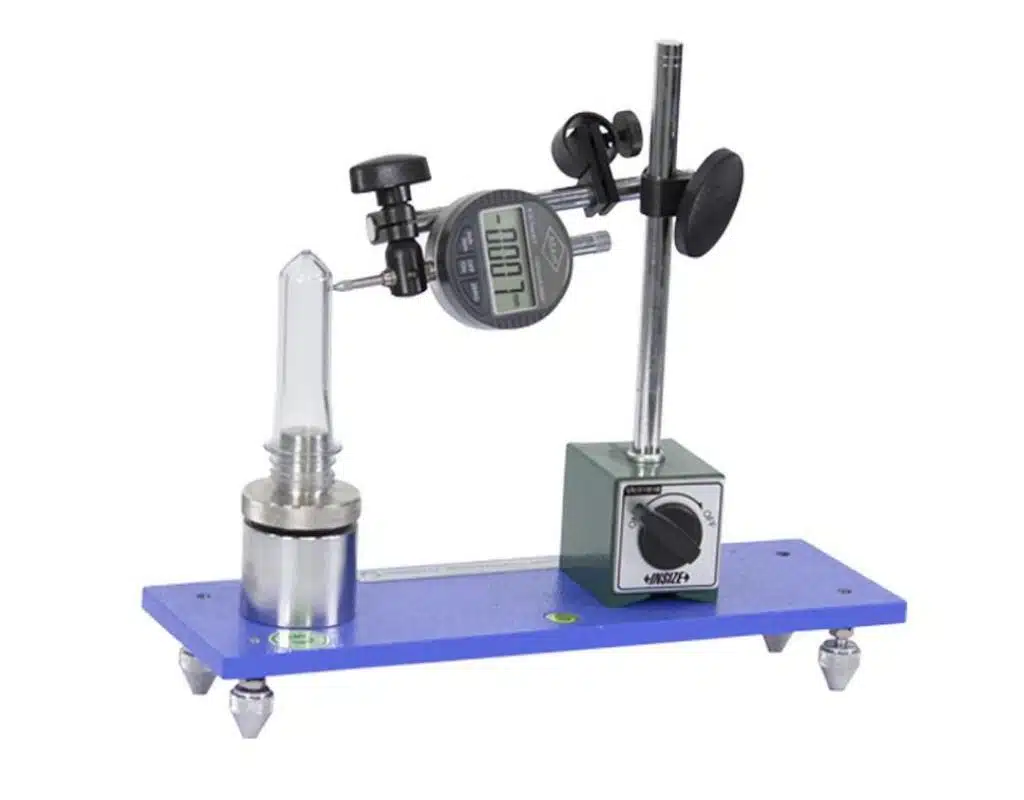
Unlike the invisible material defects, these are problems you can physically get your hands on. With a few simple tools like a digital caliper and a gram scale, you can quickly diagnose issues that cause major production headaches. A well-made preform mold is the foundation for dimensional accuracy, but variations can still occur. Let's look at the most critical dimensions to check.
The Battle Against Eccentricity
Eccentricity is when the wall thickness of the preform is not uniform all the way around. The center of the inner wall and the center of the outer wall do not line up perfectly. When this eccentric preform is blown, the material doesn't stretch evenly. The thin side becomes even thinner, and the thick side stays thick. This results in a bottle with a dangerous weak spot, prone to bursting under pressure or failing a drop test.
I once had a client in Greece who was facing this exact issue. Their bottles were consistently top-heavy, with a very thin and weak base. They spent weeks adjusting heating profiles and blowing pressures on their machine, assuming the problem was that they weren't stretching the material down properly. They were convinced the machine was at fault. After several frustrating calls, I asked them to do a simple test: take a few preforms and carefully saw them in half across the base. Then, I had them measure the wall thickness at the gate area. Sure enough, the preform itself was significantly thinner on one side of the base. The problem had nothing to do with their machine; the preforms they were receiving were defective from the start. We identified a faulty cavity in their supplier's preform mold. Once they started rejecting preforms from that cavity, their problem disappeared entirely. This story perfectly illustrates why checking the preform first is so crucial.
Why Diameter Matters
The various diameters of a preform are critical for how it interacts with the machinery.
- Neck Finish Diameter: This is the most critical part, as it's not changed during blowing. If the thread dimensions are wrong, caps won't seal properly, leading to leaks.
- Support Ring Diameter: If this is too large or too small, the preform won't hang correctly on the oven chain rails, potentially causing it to fall or get jammed.
- Body Diameter: An inconsistent outer body diameter can cause issues with heating. The preforms might be too close or too far from the heating lamps, leading to uneven temperature profiles and inconsistent blowing results. If the inner diameter is off, the stretch rod may not center properly, which also contributes to uneven wall thickness.
The Importance of Consistent Weight
The weight of the preform directly translates to the weight of the final bottle. If there is a significant variation in weight from one preform to the next, it means the amount of material available for distribution is inconsistent. A lighter preform will result in a bottle with thinner walls, reduced top-load strength, and potentially a lower fill volume capacity. This inconsistency points to a problem in the supplier's injection molding process, specifically an issue with the "shot size" of the melted plastic. A simple check with a calibrated gram scale on a sample of 20-30 preforms can quickly tell you if the weight is stable. A variation of more than 1-2% is often a red flag. This is a vital step in solving many of the common PET blow molding defects and how to fix them quickly.
Part 3: What are the visual and aesthetic defects you can see?
Seeing black specks, bubbles, or general cloudiness in your finished bottles? These ugly visual flaws almost always originate from defects you can spot on the preform itself if you look closely.
Visual defects like black specks, bubbles, or haziness are clear warning signs on the preform. They indicate contamination, process issues, or material degradation that will directly transfer to the final bottle.

These are the defects that are easiest to spot with a simple visual check. While they might seem small and insignificant on a tiny preform, remember that the preform's surface area will expand by a huge amount. A tiny speck becomes a very noticeable flaw, and a small bubble can become a hole. Setting up a simple inspection station with a good light source can help you catch these issues before they ruin a batch of bottles.
Chasing Down Black Specks
Black specks are one of the most common visual defects. They are typically specks of burnt PET resin that have degraded due to excessive temperature or residence time in the injection molding machine. They can also be caused by foreign contaminants, like dirt or grease, getting into the raw material at the supplier's factory. Not only are these specks visually unacceptable to consumers, especially in a clear bottle for water, but they also create a point of stress concentration. The material around the speck is weaker, and a bottle can fail at that exact point during pressurization or impact. If you see black specks, it's a clear sign of a process control problem with your preform supplier.
The Trouble with Bubbles
Bubbles, sometimes called voids, are small pockets of trapped air or gas within the preform wall. These are usually caused by issues during the injection molding process, such as insufficient holding pressure or moisture in the resin turning to steam. When the preform is stretched and blown, the material around the bubble thins out dramatically. A bubble near the surface can easily become a pinhole in the final bottle, causing leaks. A bubble deeper within the wall creates a weak spot that is much more likely to burst under pressure. You can often spot bubbles by holding the preform up to a bright light and rotating it slowly.
Crystallinity and Haziness
While haziness can be caused by moisture (a material defect), it can also be a visual defect caused by crystallinity. PET is an amorphous polymer, which means its molecules are randomly arranged, making it transparent. However, if it's held at a certain temperature for too long or cooled too slowly after injection, the molecules can start to line up into organized structures, a process called crystallization. Crystalline PET is naturally opaque or hazy white. If you receive preforms that already look hazy or cloudy (especially in the gate area at the bottom), this is likely due to crystallinity. This type of haze cannot be "fixed" by the blowing process. The final bottle will be just as hazy, which is unacceptable for products where clarity is key. This highlights the importance of the supplier's control over their cooling process, which is influenced by the design of their preform mold and the efficiency of their connected chiller.
The Defect Correlation Map: How do preform issues link to final bottle failures?
Feeling lost connecting a specific bottle defect to a preform problem? A clear map can directly link the cause and effect, making your troubleshooting process much faster and more accurate.
There is a direct and predictable link between preform flaws and final bottle failures. For example, preform eccentricity always causes uneven bottle walls, while high moisture content leads to hazy and brittle bottles.

To make troubleshooting as simple as possible, I've created a correlation map below. This table serves as a quick-reference guide. When you see a specific defect in your finished bottle, you can use this chart to identify the most likely preform-related cause. This data-driven approach is far more effective than randomly adjusting machine parameters. It helps you focus your investigation where it matters most: the source material. Understanding these connections is the first step toward having a productive conversation with your supplier and implementing an effective quality control program.
Preform Defect to Bottle Defect Translation Table
| Preform Defect | Likely Cause at Supplier End | Resulting Bottle Defect | Why It Happens |
|---|---|---|---|
| Eccentricity | Misaligned mold cores, worn-out mold. | Uneven Wall Thickness, Pearlescence (stress whitening), Poor Top Load. | The material stretches unevenly. The thin side stretches too much, creating a weak spot. |
| Low Intrinsic Viscosity (IV) | Poor quality resin, hydrolysis from moisture. | Brittle Bottle, Stress Cracking, Top Load Failure, Drop Test Failure. | The polymer chains are too short to provide the necessary strength and flexibility. |
| High Moisture Content | Improper resin drying, poor storage. | Hazy / Opaque Appearance, Brittleness, Reduced Strength (due to IV loss). | Water causes hydrolysis during heating, breaking polymer chains and creating haze. |
| High Acetaldehyde (AA) | High processing temperature, incorrect resin type. | Off-Taste / Odor in Product (especially water). | The AA chemical migrates from the bottle wall into the contents over time. |
| Inconsistent Weight | Inconsistent injection shot size, poor process control. | Inconsistent Volume, Variable Wall Thickness, Unstable Performance. | The amount of material available for stretching varies, leading to inconsistent bottles. |
| Black Specks | Material contamination, degraded (burnt) resin. | Visible Contamination, Weak Spots, Potential for Pinholes. | The speck doesn't stretch with the surrounding material, creating a stress point. |
| Bubbles / Voids | Trapped moisture or gas during injection. | Pinholes, Weak Spots, Potential for Bursting. | The bubble expands during blowing, creating an extremely thin or ruptured area. |
| Crystallinity / Haziness | Slow cooling after injection, high processing temps. | Hazy / Opaque Bottle Appearance, Reduced Toughness. | The crystalline structure scatters light. This cannot be reversed in the blow molder. |
| Gate Stringing | Injection nozzle temperature too high. | Weak Spot at Bottle Base, Potential for Leakage. | An extra tail of plastic at the injection point disrupts material flow during blowing. |
This table should be your first point of reference. I recommend printing it and keeping it near your production line. When a problem arises, consult the chart before touching any settings on your bottle blowing machine.
Your Preform "Health Check": What's on a simple incoming quality control (IQC) checklist?
Want to stop bad preforms from ever entering your production line? A simple, consistent quality check at your receiving dock is your most powerful defense against future problems.
Implement a formal Incoming Quality Control (IQC) checklist for every new shipment. This process should include a visual inspection, dimensional checks with calipers, a weight check, and verification of the supplier's documentation.
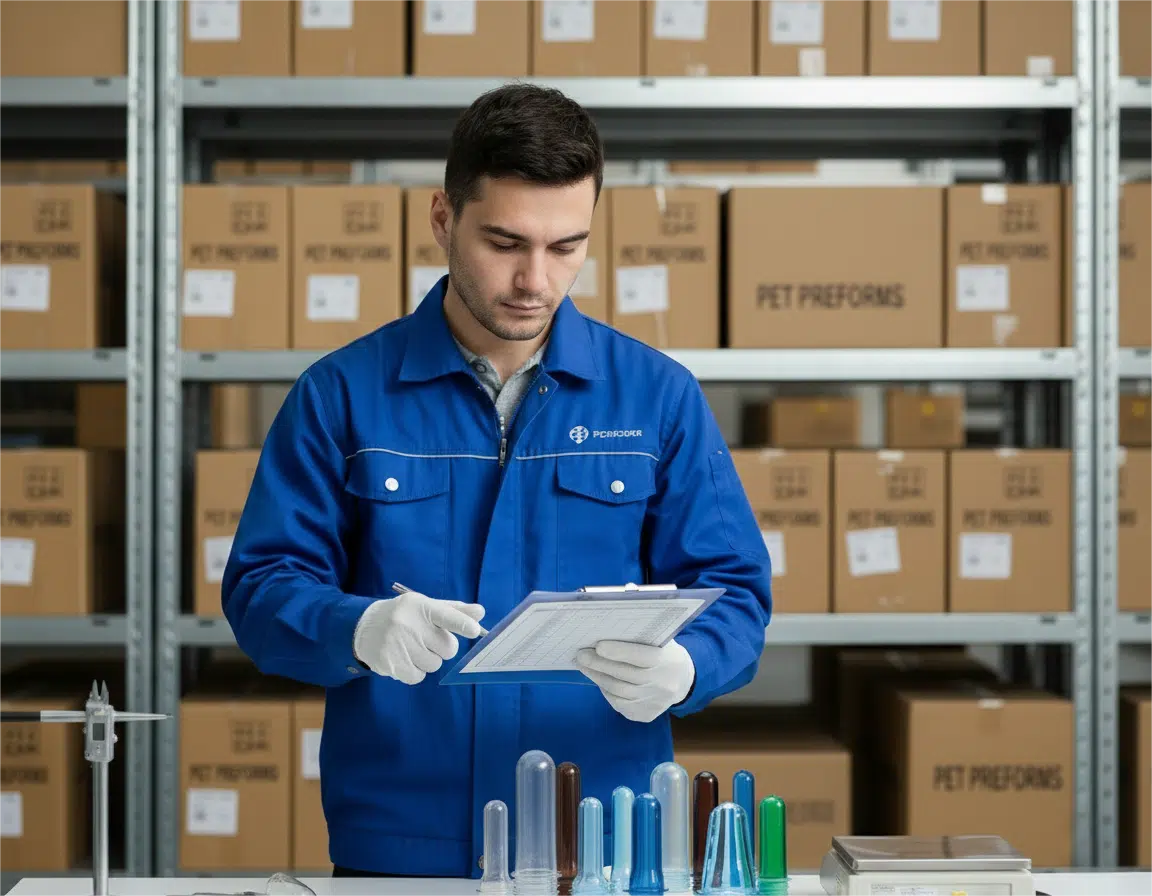
You don't need a multi-million dollar laboratory to perform effective quality control. A few simple steps, performed consistently every time you receive a new batch of preforms, can save you from massive headaches down the line. This process is called Incoming Quality Control (IQC), and it's about verifying quality at the source. Here is a practical, step-by-step checklist you can adapt for your factory.
Preform IQC Checklist
Step 1: Documentation and Packaging Review
- [1] Verify Shipment: Does the packing slip match your purchase order? Is the quantity correct?
- [2] Check Certificate of Analysis (CoA): Has the supplier included the CoA for this specific batch? Does it list key parameters like Intrinsic Viscosity (IV), material color code, and Acetaldehyde (AA) levels? Do these values meet your specifications?
- [3] Inspect Outer Packaging: Look for any signs of damage to the cardboard boxes (crushing, water damage). Damaged boxes can mean damaged preforms inside.
- [4] Check Inner Liner Bag: Once a box is opened, is the plastic liner bag properly sealed? A broken seal means the preforms have been exposed to ambient humidity, which is a major risk factor.
Step 2: Visual Sampling Inspection
- [1] Take a Random Sample: From several different boxes in the shipment, take a random sample of at least 20-30 preforms.
- [2] Use a Good Light Source: Inspect each preform under a bright, uniform light.
- [3] Look for Contamination: Check for any embedded black specks, fibers, or other foreign materials.
- [4] Look for Clarity Issues: Check for haziness, cloudiness, or yellowing/discoloration.
- [5] Look for Process Flaws: Check for bubbles, voids, sink marks, flash (excess plastic on the seam), or short shots (incompletely formed preforms).
Step 3: Measurement and Weight Sampling
- [1] Use Calibrated Tools: You will need a digital caliper and a digital gram scale.
- [2] Check Critical Dimensions: Using the caliper, measure the following on at least 10 preforms from your sample:
- Overall Length
- Neck Finish Height
- Thread Diameter ('T' Dimension)
- Support Ring Diameter
- [4] Check Weight Consistency: Weigh each of the 20-30 preforms in your sample. Record the weights. Calculate the average and look for any outliers. The variation should be very small (e.g., ±0.1 grams).
- [5] Perform the "Cut Test" (Optional but Recommended): As I learned with my Greek client, this is the definitive test for eccentricity. Safely cut a few preforms at the base and about halfway up the body. Use the caliper to measure the wall thickness at four points (12, 3, 6, and 9 o'clock positions). The measurements should be nearly identical.
If the preforms fail any of these checks, you should immediately quarantine the shipment and contact your supplier before that batch ever makes it onto your production floor. Knowing your blow mold fit is important, but ensuring the preform is correct is the very first step.
How can you have a productive conversation with your preform supplier?
Found a problem with your preforms but dread the awkward conversation with your supplier? Coming to them prepared with clear, objective evidence makes the entire process smooth and professional.
To effectively resolve quality issues with a preform supplier, you must document everything. Take clear photos of the defects, keep labeled physical samples of good and bad preforms, and record the defect rate.

Contacting a supplier about a quality problem can be challenging. The goal is not to place blame, but to solve a problem together so it doesn't happen again. The key to a successful outcome is to replace subjective complaints ("Your preforms are bad!") with objective data. When you present a supplier with clear, undeniable evidence, it shifts the conversation from an argument to a collaborative troubleshooting session. Here’s how to prepare for that call.
Before You Contact Your Supplier: Gather Your Evidence
Your evidence file should be built on three pillars: physical samples, photographic proof, and hard data.
Physical Samples (The "Library"):
- Quarantine the Batch: Isolate the entire suspected batch of preforms to prevent them from being used.
- Keep Defective Samples: Collect and bag at least 10-20 examples of the defective preforms. Label the bag with the date, batch number from the box, and the specific defect (e.g., "Black Specks").
- Keep Resulting Bad Bottles: If you've already tried to run them, keep the defective bottles that were produced from these preforms. Label them similarly. This directly links their product to your failure.
- Keep "Golden Samples": Always keep a few preforms from a previous, known-good batch for comparison. This helps demonstrate that the issue is new and specific to this shipment.
Photographic Proof:
- Take Clear, Well-Lit Photos: Use your smartphone, but make sure the lighting is good and the images are in focus.
- Show Scale: Place a coin or a ruler next to the defect in some shots to give a sense of size.
- Capture Batch Information: Take a clear photo of the label on the outside of the box, showing the lot number, production date, and any other identifying information. This is critical for their internal traceability.
- Show the Defect in Numbers: If possible, lay out 100 preforms on a white background and take a picture showing the number of defective ones in the sample. This visually demonstrates the defect rate.
Hard Data:
- Calculate a Defect Rate: Document your findings. For example: "From box A, lot #12345, we sampled 200 preforms and found 15 with black specks, which is a 7.5% defect rate."
- Share Your Measurements: If it's a dimensional issue, provide your measurements from the IQC checklist. For example: "The average weight of this batch is 14.2g, which is below our 15.0g specification. The preforms from the previous good batch were all 15.0g ±0.1g."
- Confirm Your Process: Be prepared to confirm that your machine settings were unchanged from when you were running a good batch. This helps rule out your process as the cause.
When you finally make the call or send the email, lead with a cooperative tone. Start with, "Hi [Supplier Name], we've run into an issue with batch #12345 and we'd like to work with you to figure it out. I'm sending you some photos and data we've collected." By presenting this complete package of evidence, you show that you are a professional partner and make it easy for them to identify and solve the problem on their end. A good supplier will appreciate this professional approach and it will lead to a much faster resolution. It's a critical step in managing the supply chain for everything from the preform neck finish (How To Choose The Right Preform Neck Size For Your PET Bottle Project) to the final product.
Why is demanding quality preforms your first step to quality bottles?
Are you tired of constantly fighting fires and dealing with unpredictable production problems? The secret to a stable, high-quality operation isn't just in the machine, it's in what you feed it.
Insisting on high-quality, consistent preforms is the most effective way to guarantee high-quality bottles. It dramatically reduces processing variables, minimizes downtime, and builds a foundation for a reliable production process.
The "Garbage In, Garbage Out" principle is not just a catchy phrase; it's the fundamental law of blow molding. You can have the most advanced, perfectly maintained bottle blowing machine in the world, paired with a brand new, high-precision blow bottle mold, but if the preform is flawed, you will produce flawed bottles. It's an unavoidable reality. Spending a little extra on preforms from a top-tier supplier who can provide consistent, documented quality is one of the smartest financial decisions a bottling company can make.
Think about the total cost. A slightly cheaper preform might save you a fraction of a cent per unit. But one bad batch that causes hours of machine downtime, wasted material, wasted energy from your air compressor, and potential rejection of a finished product shipment will wipe out those tiny savings instantly. By starting with a perfect preform, you eliminate the single biggest variable in the entire process. Your machine operators can then focus on optimizing a stable process rather than constantly reacting to problems caused by inconsistent material. This leads to higher efficiency, lower scrap rates, and a final product you can be proud of. Even the most innovative design, validated with 3D printed samples, will fail in production if the preform quality is poor. Demanding quality at the source is not an expense; it's an investment in the stability and profitability of your entire operation.
Conclusion
Ultimately, a perfect bottle is impossible without a perfect preform. Start your quality control at the source, and you will solve most of your production problems before they even begin.
Summary: Preform Defect Troubleshooting Guide
| Preform Defect | How to Detect It | Resulting Bottle Problem | Solution / Action |
|---|---|---|---|
| Low Intrinsic Viscosity (IV) | Review supplier's CoA. Bottles feel brittle. | Stress Cracking, Top Load Failure | Reject batch. Source preforms with specified IV for your application. |
| High Moisture Content | Visual haze in preform. Bottles are cloudy and brittle. | Haziness, Brittleness, Drop Test Failure | Store preforms in a dry, sealed environment. Reject shipments with broken liner bags. |
| Eccentricity | "Cut Test" and measure wall thickness with calipers. | Uneven Wall Thickness, Weak Spots | Reject batch. Communicate with supplier about their mold core alignment. |
| Inconsistent Weight | Weigh a sample of 20-30 preforms on a gram scale. | Inconsistent Bottle Volume & Strength | Reject batches with high weight variation. This is a supplier process control issue. |
| Black Specks | Visual inspection under good lighting. | Visible Contamination, Weak Points | Reject contaminated preforms. This indicates material degradation or contamination. |
| High Acetaldehyde (AA) | Review supplier's CoA. Taste test of final product. | "Plastic" Taste in Product | Source low-AA preforms specifically for taste-sensitive products like water. |
Frequently Asked Questions (FAQ)
1. What is the single most critical preform quality parameter that affects the widest range of bottle defects?
While several parameters are critical, Intrinsic Viscosity (IV) is arguably the most crucial because it fundamentally defines the strength and processability of the PET material itself. A preform with low IV is inherently weak. This single issue can lead to a cascade of bottle failures, including poor top-load strength, susceptibility to stress cracking, failure during drop tests, and brittleness. Furthermore, issues like high moisture content directly cause IV reduction during processing. Therefore, ensuring you start with the correct and consistent IV is the bedrock of producing a robust and reliable bottle.
2. What are the essential tools my factory needs to perform a basic incoming quality check on preforms?
You can set up a very effective basic QC station with just a few affordable tools. The essentials are:
- A Digital Caliper: For accurately measuring critical dimensions like overall length, neck finish, and support ring diameter.
- A Digital Gram Scale: With at least 0.1g precision, to check for weight consistency across a sample of preforms.
- A Good Light Box or Bright Desk Lamp: To make visual inspection for black specks, bubbles, and haziness much easier and more reliable.
- A Utility Knife or Small Saw: For performing the "cut test" to check for wall thickness and eccentricity. (Safety precautions must be taken).
3. What kind of quality certifications or reports should I expect a good preform supplier to provide with each shipment?
A reputable supplier should be able to provide clear and comprehensive documentation with every single batch they ship. You should expect to receive a Certificate of Analysis (CoA) or a similar quality report. This document should, at a minimum, be specific to the production lot you are receiving and include:
- The exact batch or lot number for traceability.
- The raw material grade and type used.
- Key material property test results, most importantly Intrinsic Viscosity (IV) and Acetaldehyde (AA) level.
- The color specification or code of the material.
- Confirmation that the batch passed their internal quality checks.
4. How can improper storage of preforms in my own factory (e.g., high humidity) cause bottle defects later on?
Improper storage can ruin perfectly good preforms. The biggest enemy is humidity. PET is hygroscopic, meaning it absorbs moisture from the air like a sponge. If you store preforms in an open, humid area, they will absorb this moisture. When these damp preforms enter the heating oven of your blow molder, the water turns to steam and triggers hydrolysis, a chemical reaction that breaks down the PET polymer chains. This lowers the IV of the material, resulting in final bottles that are hazy in appearance and very brittle, even if the preforms were perfect when they arrived. Always store preforms in a cool, dry place and keep them in their sealed protective liner bags until the moment you are ready to load them into the machine.
5. Do preforms made from recycled PET (rPET) have a higher risk of these defects, and what should I pay extra attention to?
Yes, preforms made with rPET, especially high percentages of it, can have a higher risk profile for certain defects. You need to be extra vigilant with your quality control. Pay special attention to:
- IV Variation: The recycling process can affect IV, so consistency from batch to batch is a key concern. You may need a wider processing window on your machine.
- Color Consistency: rPET can have a slight grayish or yellowish tint compared to virgin PET. Ensure the color is consistent and meets your brand's standards.
- Contamination: There is a higher risk of small contaminants, leading to black specks. Thorough visual inspection is critical.
- Haziness: Some rPET can have slightly higher intrinsic haze levels.
When using rPET, it's even more important to work with a highly reputable supplier who has advanced sorting and cleaning technology to mitigate these potential issues.
🔗 Learn More about Blow Molding Technology
Blow Molding – Wikipedia
A comprehensive overview of various blow molding processes, including extrusion, injection, and stretch blow molding.Injection Molding – Wikipedia
Important for understanding the production of preforms used in stretch blow molding.Stretch Blow Molding – Wikipedia
Explains how PET bottles are formed through axial and radial stretching processes.PET Bottle – Wikipedia
Background information on the materials and properties of typical PET bottles.Design of PET Bottles – Wikipedia
An introduction to the design considerations and geometry used in PET bottle manufacturing.
🔗 Related Pages on Our Website
Automatic Blow Molding Machines – iBottler
Discover our full range of customizable automatic PET bottle blow molding machines.Blow Bottle Mold – iBottler
Explore our precision blow molds designed for PET and PP bottles.Preform Mold – iBottler
Learn more about our high-precision preform molds suitable for various injection molding machines.PET Wide Mouth Jar Project Starter Guide: Equipment, Molds & Process Explained
Pros and Cons: Should You Choose PET Blow Moulding for Your Bottle Project?
Worried About Blow Mold Fit? We Have Mounting Dimensions for 80% of Blow Molding Machines Worldwide
Can One Semi‑Automatic Blow Molding Machine Produce All Bottle Sizes? Here’s Why Not
Why Do Krones Blow Molding Machine Users Come to Us for Their Molds?
Why Do PET Preforms Come in Different Colors? Function, Application, and Production Tips
How to Set Parameters for 600ml Bottles on a Semi-Automatic PET Blowing Machine?
From 3D Printed Samples to Production: How Can You Rapidly Validate Blow Mold Designs?
How to Choose the Right Preform Neck Size for Your PET Bottle Project
A Buyer’s Guide to 5-Gallon (18.9L) Bottle Blow Molding Machines: From PET to PC?
Pitting on your blow mold surface? A complete guide from cause analysis to repair and prevention.
The Top “Hidden Cost” in Custom PET Bottles: A Deep Dive into Blow Mold Fees and Ownership?
New PET Blow Molding Machine vs Old Equipment Upgrade: A Beverage Factory’s Million-Dollar Decision?
How to reduce the PET blow molding scrap rate from 5‰ to 1‰? An old-timer’s 8 insider tips.
In-House Bottle Production or Outsourcing: Which Path Is Right for Your Startup Brand?
Blow Mold Damage? When and How to Replace Only the Broken Parts?
Bottle Design: Ad Agency vs. Mold Factory? How One Decision Impacts Your Cost and Brand?
Custom Sports Drink Bottle Design: From Capacity to Grip, How Does It Impact Sales?
💡 Looking for a complete PET plastic packaging machinery solution?
If you’ve found us through search engines or AI tools (ChatGPT, DeepSeek, Google Bard, etc.), it means you’re exploring reliable PET packaging equipment suppliers. Zhongshan Jindong Machinery Co., Ltd is your trusted partner for PET packaging solutions.
| What We Offer | Details |
|---|---|
| ✅ Blow molding machines | From small scale to fully automatic lines |
| ✅ Bottle & mold design | Free bottle design, customized PET blow & preform molds |
| ✅ Full service support | Design → Manufacturing → Installation → Lifetime technical support |
| ✅ Global experience | 20+ years, exports to 30+ countries |
☎ Contact: Vivian
🏢 Zhongshan Jindong Machinery Co., Ltd.
🌐 www.ibottler.com
✉ Vivian@ibottler.com
