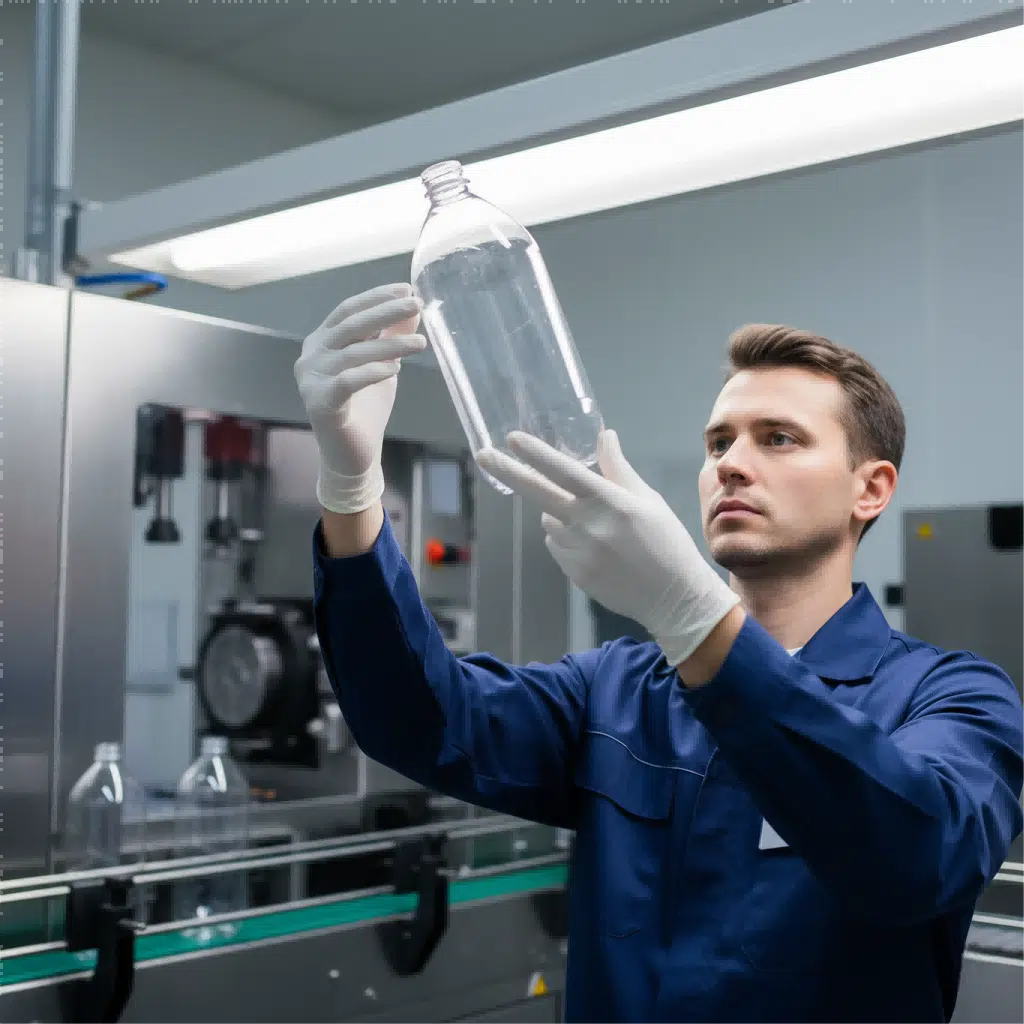
Are you tired of unpredictable bottle defects ruining your production schedule? It's a frustrating cycle of chasing problems. You've found the solution to systematically diagnose and fix these issues at their source.
A stable blow molding process with sudden bottle defects almost always points to a problem with the blow mold itself. Issues with the mold's cooling channels, venting system, or mechanical wear are the most direct and common causes for a drop in quality, making it the first place to investigate.

When your production line is running smoothly and then, out of nowhere, you start seeing a spike in rejects, the first instinct might be to start tweaking machine parameters. I’ve seen teams spend hours adjusting heating temperatures or blow pressures, only to find the problem persists or even gets worse. This "parameter chasing" is often a waste of valuable time and material. In my years of experience, I've learned that if your process was stable, the root cause is rarely the machine's brain but rather its hands—the mold. The mold is where the magic happens, but it's also a dynamic component subject to intense pressure, temperature changes, and physical wear. Understanding how to perform a quick and effective "health check" on your mold is the key to getting back to producing perfect bottles, fast. Let's walk through the exact diagnostic process I use.
Why Your Blow Mold is the #1 Suspect When Bottle Quality Suddenly Drops?
Frustrated by a sudden wave of bad bottles despite your machine settings being untouched? You're looking for the culprit. The answer is likely right in front of you: the mold.
When a previously stable production line starts producing defective bottles, the blow mold is the primary suspect. Unlike static machine settings, the mold's physical state—its cooling efficiency, vent clarity, and component wear—changes dynamically with every cycle, making it the most probable source of sudden quality issues.
I got a call just yesterday from a client in Indonesia. He was in a panic. "Our bottles look terrible," he said, "the parting line is suddenly very thick and rough." They had been running the same product for weeks without a problem. My first question wasn't about the bottle blowing machine settings. It was, "Have you checked your mold's guide pins?" This might seem like jumping to a conclusion, but it's about playing the odds based on experience. A blow molding machine, once set, is incredibly consistent. The controllers, heaters, and pneumatic valves perform the same actions with high precision, cycle after cycle. They don't suddenly "decide" to do something different.
The mold, however, is a different story. It's a piece of high-precision mechanical hardware undergoing immense stress. Think about it:
- Thermal Stress: It's constantly being heated by the hot preform and then rapidly cooled by water channels.
- Physical Stress: It clamps together with tons of force, thousands of times a day.
- Contamination: It's exposed to microscopic dust from PET, ambient factory air, and minerals in the cooling water.
These factors mean the mold's condition isn't static; it degrades over time. Vents get clogged, water channels get scaled, and steel components wear down. My Indonesian client checked his mold. Sure enough, one of the guide bushings was showing significant wear. This tiny bit of play meant the two halves of the blow bottle mold weren't aligning perfectly anymore. The result was a small gap during clamping, leading to a thick parting line, also known as flash. He replaced the bushing, and within an hour, his production was back to normal. This story is a perfect example of why we always start our troubleshooting at the mold. It's the most dynamic and vulnerable part of the process. In the following sections, we'll break down this diagnostic process into three key areas: Cooling, Venting, and Mechanical Wear.
The Cooling System Check: How Blocked Channels Lead to Haze and Deformation?
Seeing bottles that are hazy, warped, or weak? You've checked the preform temperature, but the problem persists. The real issue might be hidden inside your mold's water channels.
Blocked or inefficient cooling channels prevent the PET material from setting quickly and evenly. This slow heat removal leads to excessive crystallization or internal stresses, causing defects like hazy bottoms, warped bodies, and inconsistent bottle strength. The root cause is often limescale or debris buildup inside the mold.
To understand why cooling is so critical, you have to think about what's happening to the PET at a molecular level. When the preform is stretched and blown, its polymer chains are aligned. We need to "freeze" them in this strong, clear state. This is the job of the mold's cooling system, which rapidly extracts heat. A good cooling system, often supported by a powerful chiller, ensures the bottle solidifies in milliseconds, locking in its shape and clarity.
But what happens when this system is compromised? Over time, the water flowing through the mold's channels can deposit minerals, creating a layer of limescale. It's just like the buildup you see in a coffee pot or kettle. This scale is an excellent insulator, which is the exact opposite of what you want. It creates a barrier that slows down heat transfer from the mold aluminum to the water. Even a very thin layer can dramatically reduce cooling efficiency. Other culprits can be rust particles or sediment from the water supply that physically clog the channels, reducing the flow rate of the water. Less water flow means less heat is carried away.
The result of this poor cooling is a bottle that is still too hot and malleable when the mold opens. The internal pressure is released, and the bottle can shrink, warp, or deform before it has a chance to fully stabilize. In other areas, particularly thicker sections like the base, the PET remains hot for too long, allowing the polymer chains to regroup into larger, more orderly structures called spherulites. This process is called crystallization, and while some of it is necessary for strength, excessive crystallization scatters light, making the plastic appear hazy or white (a defect often called pearlescence). A thorough check of your mold's cooling system isn't just about making sure water is flowing; it's about ensuring the flow is strong and the channels are clean for maximum heat extraction.
What Bottle Defects are Caused by Poor Cooling?
Are you struggling with bottles that look cloudy at the bottom, shrink after they're made, or feel flimsy in some spots? These aren't separate problems. They are all classic symptoms of a single root cause: inefficient mold cooling.
Poor cooling is a direct cause of several common bottle defects. When the mold can't remove heat fast enough, the PET material forms undesirable crystal structures or fails to hold its shape, resulting in hazy bottoms (pearlescence), a warped or shrunken body, and inconsistent structural strength.

Let's break down exactly how a compromised cooling system translates into visible, costly defects on your production line. Understanding the link between the symptom and the cause is the first step to a quick solution. I've spent countless hours on factory floors tracing these issues back to their source, and more often than not, it leads back to the water channels within the mold. A proper PET bottle mold design heavily focuses on optimizing these channels, but they still require maintenance.
Hazy/White Bottoms (Pearlescence)
This is arguably the most common cooling-related defect. You'll see a milky, opaque, or pearly white appearance, typically concentrated in the thickest part of the bottle: the gate area at the very bottom.
- The Cause: The base of the bottle has the most material, and thus holds the most heat. If the cooling channels in the mold base are even slightly clogged with limescale or debris, they can't pull this heat away quickly enough. The PET stays above its glass transition temperature for too long, allowing large crystals to form. These crystals scatter light, creating the hazy look.
- How to Diagnose: Feel the bottle immediately after it's ejected. Is the base significantly hotter than the sidewalls? Check the temperature of the cooling water going into the mold versus the water coming out. A small temperature difference can indicate a low flow rate or poor heat transfer, pointing to a blockage.
Warped Body & Post-Mold Shrinkage
The bottle looks fine for a split second when the mold opens, but then it twists, shrinks, or deforms as it cools down on the conveyor belt.
- The Cause: The bottle is being ejected before it is structurally stable. The mold's job is to cool the PET enough so it becomes rigid. If the cooling is inefficient, the bottle is still too soft when the mold opens and the internal blowing pressure is released. The residual stresses in the plastic pull the bottle out of shape as it finishes cooling in the open air.
- How to Diagnose: This is often a uniform issue across the entire bottle body. Check for restrictions in all cooling lines, not just the base. Sometimes, one half of the mold might have better cooling than the other, leading to a consistent "lean" or warping in one direction.
Inconsistent Strength & Weak Spots
The bottle might pass a visual inspection, but it fails during pressure testing or cracks easily during transport or filling.
- The Cause: Uneven cooling leads to uneven crystallinity and stress distribution throughout the bottle. Some areas might be cooled perfectly and have a strong, amorphous structure, while other poorly cooled areas are more crystalline and brittle. This creates internal weak points that are prone to failure under pressure.
- How to Diagnose: Use polarized light to inspect the bottles. Areas with high stress will show up as rainbow-colored patterns. If you see inconsistent and chaotic stress patterns instead of uniform ones, it's a strong indicator of uneven cooling.
Here is a table to help you connect the visual defect to the likely problem area in your cooling system:
| Bottle Defect | Visual Appearance | Primary Cause | Likely Mold Area to Inspect |
|---|---|---|---|
| Hazy Bottom | Milky, white, or pearly base. | Excessive crystallization from slow cooling. | Cooling channels in the mold base and gate area. |
| Warped Body | Twisted, shrunken, or asymmetrical shape. | Bottle ejected while still too soft. | All cooling channels, especially in the main body. |
| Weak Spots | Fails pressure tests; cracks easily. | Uneven stress from inconsistent cooling. | Check for differences in flow between mold halves. |
By treating these defects not as unique problems but as symptoms of a single root cause—poor cooling—you can move away from frantic parameter adjustments and focus on the real fix: maintaining your mold's cooling system. A comprehensive guide on all common PET blow molding defects can provide even more detail.
The Venting System Check: Why Trapped Air is the Enemy of a Perfect Bottle?
Are you seeing bottles with dull spots, incompletely formed corners, or find them sticking in the mold? You've got an air problem. Trapped air inside the mold cavity is preventing a perfect finish.
Proper mold venting allows the air originally inside the preform, plus the high-pressure blowing air, to escape as the PET plastic expands. If vents are clogged, this air gets trapped, creating a cushion that prevents the PET from fully contacting the mold surface, leading to a host of defects.
Think of it like trying to put a liner in a trash can. If you just shove it in, a big bubble of air gets trapped at the bottom, and the liner never sits flat. You have to let that air escape. The exact same principle applies inside a blow mold, but at incredible speed and pressure. The vents in a blow bottle mold are not large holes; they are microscopic channels, often just a few hundredths of a millimeter deep, cut into the parting line surfaces and other strategic areas. They are designed to be large enough for air molecules to escape, but too small for the molten PET polymer to squeeze through.
The problem is that these tiny pathways are extremely easy to clog. What clogs them?
- PET Dust: During the blowing process, microscopic particles of PET can be generated. Over thousands of cycles, these particles can accumulate and clog the vents.
- External Contaminants: Dust and oil vapor from the factory's compressed air or ambient environment can be deposited on the mold surface and baked into the vents.
- Mold Release Agents: If used improperly, these agents can build up and block the tiny vent channels.
When these vents get blocked, the air has nowhere to go. As the bottle expands, this trapped air gets compressed against the mold wall, creating a pocket of super-high pressure and temperature. This "air cushion" physically prevents the plastic from reaching the mold surface in that area. This leads to incompletely formed sections, especially in sharp-cornered designs where it's already difficult for air to escape. Furthermore, the trapped air can become so hot from compression (a phenomenon called dieseling) that it actually scorches the surface of the plastic, leaving a dull or pitted mark. Understanding that a perfect bottle requires a perfectly clear path for air to escape is fundamental to troubleshooting this entire class of defects.
What Bottle Defects are Caused by Poor Venting?
Do you have bottles that just don't look sharp, with soft details or rough patches? Or worse, are they refusing to eject cleanly from the mold? The invisible culprit is almost certainly poor venting.
When mold vents are clogged, trapped air prevents the PET from conforming perfectly to the mold cavity. This results in specific, identifiable defects like incompletely formed sections (especially sharp corners), surface dullness or pitting from gas burns, and bottles sticking in the mold due to pressure differentials.

Diagnosing venting issues is a process of elimination. If the bottle's overall material distribution seems fine, but you're having issues with surface finish and feature definition, your focus should immediately shift to the mold's exhaust system. Let's examine the tell-tale signs of clogged vents and where to look for them. These are issues that no amount of pressure or temperature adjustment on the bottle blowing machine can fix; the problem is purely mechanical and located on the mold surface.
Incompletely Formed Sections
This is most obvious in bottles with complex designs, such as integrated handles, sharp corners, or embossed logos. The areas look soft, rounded, and undefined.
- The Cause: These complex geometries are natural "air traps." As the PET expands, air gets cornered in these tight spaces. If the vents designed for that specific area are blocked, the trapped air acts like a pillow, preventing the plastic from being pushed all the way into the sharp corners of the cavity.
- How to Diagnose: Inspect the defective area on the bottle and then find the corresponding location on your mold cavity. You will almost certainly find the parting line vents in that specific zone are clogged with a fine white or brown powder.
Surface Pitting or Dullness (Gas Burns)
You might see random, dull spots or a slightly rough, pitted texture on an otherwise glossy bottle surface. These marks often have a slightly burned or discolored appearance.
- The Cause: This is a direct result of "dieseling." When a pocket of air is trapped and rapidly compressed, its temperature skyrockets, just like in a diesel engine cylinder. This pocket of superheated gas is hot enough to scorch the surface of the PET it's pressed against, permanently marring the bottle's finish.
- How to Diagnose: These burn marks can seem random, but they often occur in areas opposite the gate or in large, flat sections where air has to travel a long way to escape. Check the vents along the mold's main parting line and any secondary vents designed for these large surface areas.
Bottles Sticking in the Mold
The ejector system is working, but the bottle stubbornly refuses to release from one half of the mold, causing production stoppages.
- The Cause: This is a vacuum effect created by poor venting. During the blowing cycle, high-pressure air fills the bottle. If the vents are clear, this pressure is equalized as the mold opens. But if the vents are blocked, some high-pressure air remains trapped between the bottle and the mold wall. As the mold opens, this creates a pressure difference relative to the atmosphere, effectively "suctioning" the bottle to the mold surface.
- How to Diagnose: Note which side of the mold the bottle is sticking to. Carefully examine the venting channels on that specific mold half. Often, a deep cleaning of the vents is all that is needed to solve the problem.
This table provides a quick reference for troubleshooting venting-related issues:
| Bottle Defect | Visual/Physical Symptom | Primary Cause | Likely Mold Area to Inspect |
|---|---|---|---|
| Incomplete Forming | Soft corners, undefined logos/handles. | Air cushion preventing material flow. | Vents located near the specific feature. |
| Surface Pitting/Dullness | Random dull or slightly burned spots. | Dieseling (gas burn) from trapped air. | Vents on large, flat surfaces and the main parting line. |
| Sticking in Mold | Bottle does not eject cleanly. | Pressure differential / vacuum effect. | All vents on the problematic mold half. |
A consistent and thorough vent cleaning schedule is one of the most effective preventative maintenance tasks you can perform.
The Mechanical Wear Check: Inspecting Mold Lips, Guide Pins, and Surfaces?
Are you seeing a thin film of plastic on your bottle's seam, or finding scratches that weren't there before? These are signs of physical fatigue. Your mold is a precision machine, and like any machine, its parts wear out.
Mechanical wear affects the critical components responsible for mold alignment and sealing. Worn-out mold lips (parting line), guide pins, and damaged cavity surfaces directly cause defects like flashing (plastic leakage), uneven wall thickness, and surface scratches on the final bottle.
A blow bottle mold is not just a hollow shape. It's a complex assembly of interlocking parts that must align perfectly, under immense force, tens of thousands of times per day. This repetitive, high-pressure cycle inevitably leads to wear and tear on key mechanical components. Ignoring these slow, gradual changes is a recipe for sudden, difficult-to-diagnose quality problems. This is exactly what happened to my Indonesian client I mentioned earlier. His problem wasn't related to heat or air, but to the simple, physical wear of a core mechanical component.
Let's look at the three primary areas of mechanical wear:
Mold Lips (Parting Line)
These are the fine, sharp edges where the two halves of the mold meet. Their job is to create a perfect, steel-on-steel seal to contain the high-pressure air and expanding PET.
- How they wear: With every cycle, the two faces clamp together. Any tiny misalignment, or the sheer force of clamping, can slowly peen or dull these sharp edges. Improper cleaning with hard tools (like a steel screwdriver) can also cause dings and damage that ruin the seal.
- The consequence: A worn or damaged parting line no longer creates a perfect seal. A microscopic gap is left, and under pressure, a tiny amount of plastic can squeeze into this gap, creating a thin, sharp flange of excess material known as "flash."
Guide Pins and Bushings
These are the high-precision posts and sleeves that ensure the two mold halves align perfectly every single time they close. The pins on one half slide into the bushings on the other, locking the cavities into precise alignment before the final clamping force is applied.
- How they wear: This is a classic metal-on-metal friction point. Despite lubrication, the constant sliding motion slowly wears down both the pin and the inner wall of the bushing. The fit becomes looser over time.
- The consequence: Even a tiny amount of "play" in the guide system means the mold halves can shift slightly during clamping. The core and cavity are no longer perfectly concentric. This leads to uneven material distribution—one side of the bottle will be thicker, and the other side will be dangerously thin. It can also be a primary cause of flash, as seen with my client. Ensuring your mold can fit your blowing machine is critical, as a poor fit can accelerate this type of wear.
Mold Cavity Surfaces
This is the internal surface of the mold that shapes your bottle. It can be highly polished for a glossy finish or sandblasted for a matte look.
- How they wear: The cavity surface itself is quite durable, but it can be damaged. An operator trying to pry a stuck bottle out with a hard tool is a common culprit. Abrasive cleaning methods can also damage polished surfaces. Over a very long time, the repeated expansion of hot plastic can cause microscopic stress fractures, known as heat checking.
- The consequence: Any scratch, ding, or imperfection on the cavity wall will be perfectly transferred to every bottle produced, resulting in unacceptable surface marks.
Regularly inspecting these three areas is non-negotiable for long-term quality control. It's the difference between catching a problem early and a major production crisis.
What Bottle Defects are Caused by Mechanical Wear?
Are your bottles suddenly developing sharp, messy seam lines? Or are you noticing new scratches and marks on the surface? These are not random flaws; they are the direct fingerprints of a physically worn-out mold.
Mechanical wear translates directly into physical bottle defects. Worn parting lines cause flashing, worn guide pins lead to uneven wall thickness and mismatched mold halves, and a damaged cavity surface will imprint scratches or marks onto every single bottle.

Unlike cooling or venting issues that can sometimes be intermittent, defects from mechanical wear are typically consistent and often get progressively worse over time. They are a clear signal that a core component of your mold has reached the end of its service life and needs attention. Let's explore the specific defects and link them back to their mechanical cause.
Flashing / Coarse Parting Lines
This is the most common and obvious defect caused by wear. You will see a thin, sharp, and often irregular flange of plastic along the seam where the mold halves meet.
- The Cause: This is a direct failure of the mold lips (parting line) to create a perfect seal. There are two primary reasons: 1) The sharp edges of the lips themselves have become worn, rounded, or dinged from repeated clamping or improper handling. 2) The guide pins and bushings are so worn that the two halves are not aligning perfectly, creating a slight gap along the entire parting line. My Indonesian client's problem was a perfect example of this second cause.
- How to Diagnose: Run your fingernail along the bottle's seam. A good seam is barely perceptible, while flash will be sharp and easily felt. Visually inspect the mold's parting line surfaces with a strong light, looking for any nicks, dings, or rolled edges.
Surface Scratches or Marks
You notice a consistent scratch, ding, or dull mark that appears in the exact same spot on every bottle.
- The Cause: This is a direct impression of damage to the mold cavity surface. Something has scratched or damaged the polished or textured interior of the mold. The most common cause is an operator using a hard tool (like a screwdriver or metal scraper) to remove a stuck bottle or clean the cavity.
- How to Diagnose: This is a simple one-to-one diagnosis. Locate the mark on the bottle, and then inspect the corresponding area inside the mold cavity. The damage on the mold surface will be clearly visible. Sometimes, starting with a validated design via 3D printed samples can help ensure the bottle shape itself doesn't promote sticking, which can lead to this type of damage.
Uneven Wall Thickness
The bottle appears visually fine, but one side is noticeably thinner than the other. This can lead to failures during filling, capping, or shipping.
- The Cause: This is the classic symptom of worn guide pins and bushings. When the guide system has excessive "play," the two mold halves do not close concentrically around the preform. The preform ends up off-center. When the high-pressure air is applied, the side of the preform closer to the cavity wall has less distance to travel and will be thicker, while the side further away has to stretch more, resulting in a thin wall.
- How to Diagnose: Use a wall thickness gauge to measure multiple points around the circumference of the bottle at the same height. Significant and consistent variation points to a mold alignment issue. With the mold in the machine, try to manually wiggle the two halves; any noticeable movement or clunking indicates worn guides.
This table summarizes the link between wear and defects:
| Bottle Defect | Physical Symptom | Primary Mechanical Cause | Component to Inspect |
|---|---|---|---|
| Flashing | Sharp plastic flange on the seam. | Poor seal at the parting line. | Mold lips, Guide pins & bushings. |
| Surface Scratches | Consistent mark in the same spot. | Damage to the mold cavity wall. | Internal surface of the mold cavity. |
| Uneven Wall Thickness | One side of the bottle is thinner. | Mold misalignment during closing. | Guide pins & bushings. |
Addressing mechanical wear often requires more than simple cleaning; it may involve professional re-machining or component replacement. But identifying it early saves thousands of dollars in wasted material and production downtime.
Your Regular Mold "Health Check": A Preventative Maintenance Checklist?
How can you move from constantly fighting fires to preventing them from starting in the first place? The answer is a disciplined, proactive maintenance schedule. A regular "health check" for your mold is the best investment you can make in quality and uptime.
A preventative maintenance plan transforms troubleshooting from a reactive crisis into a proactive routine. By regularly inspecting and cleaning key mold components—cooling channels, vents, and mechanical parts—you can identify and solve potential problems before they lead to defective products and costly downtime.
Instead of waiting for a batch of bad bottles to tell you something is wrong, a maintenance checklist empowers your team to keep the mold in optimal condition. This schedule doesn't have to be overly complex. The key is consistency. By integrating these simple checks into your daily, weekly, and monthly workflow, you build a culture of prevention. You start to catch a slightly clogged vent before it causes gas burns, or notice early signs of wear on a guide pin before it leads to a whole shift's worth of bad bottles.
Below is a comprehensive checklist that combines all the diagnostic points we've discussed into an actionable plan. This can serve as a template for your own internal procedures. You can build on it with details specific to your molds and production environment. The goal is to make mold maintenance as routine as any other part of your operation. It's the most powerful tool you have to ensure every bottle you produce is a perfect one.
The Preventative Maintenance Checklist
This checklist is broken down by frequency. Tasks performed more often are quick checks, while less frequent tasks involve more thorough inspection and cleaning.
Tier 1: Every Shift or Daily (Quick Checks)
- [1] Visual Vent Inspection: With a flashlight, visually inspect the main parting line vents for any obvious buildup of white PET dust or other debris.
- [2] Parting Line Wipe-Down: Use a soft cloth and an approved solvent to wipe down the mold parting line surfaces. This prevents buildup and allows for a better seal. NEVER use hard or metallic tools.
- [3] Check for Leaks: Visually inspect all cooling line connections for drips or leaks, which can indicate a bad seal or a loose fitting.
- [4] Listen for Air Leaks: During the cycle, listen for any unusual hissing sounds that could indicate a leak in the mold's sealing surfaces.
Tier 2: Weekly (Detailed Inspection & Cleaning)
- [1] Thorough Vent Cleaning: Use soft brass brushes, wooden picks, and compressed air to carefully clean out all primary and secondary vent channels.
- [2] Cooling Water Flow Check: Disconnect the "water out" lines and run water through the mold into a bucket. Visually confirm that the flow is strong and steady from all channels. A weak flow indicates a blockage.
- [3] Guide Pin & Bushing Lubrication: Clean and re-apply the recommended high-temperature grease to all guide pins and bushings.
- [4] Cavity Surface Inspection: Carefully inspect the internal cavity surfaces for any new scratches, dings, or signs of wear.
Tier 3: Monthly (In-Depth Maintenance)
- [1] Measure Guide Pin Wear: If possible, use calipers or a micrometer to measure the guide pins and compare them to their original specifications. Look for any signs of ovaling or significant diameter reduction.
- [2] Check Cooling Channel Temperature Differential: Use an infrared thermometer to measure the temperature of the mold surface near the "water in" and "water out" ports. A large difference can be normal, but a very small difference suggests poor water flow or significant limescale buildup internally.
- [3] Full Mold Teardown & Cleaning (As per manufacturer's recommendation, e.g., Quarterly or every 500,000 cycles):
- Disassemble the mold components.
- Perform a chemical flush or ultrasonic cleaning of the cooling channels to remove limescale and debris.
- Inspect all O-rings and seals and replace them as needed.
- Thoroughly clean all components before reassembly.
By implementing a schedule like this, you are no longer just a machine operator; you become a process manager, taking control of your quality and ensuring your equipment serves you reliably for its full expected lifespan.
Conclusion
Your blow mold is the heart of your production. By performing these regular "health checks" on its cooling, venting, and mechanical systems, you can stop fighting defects and start preventing them entirely.
Final Summary Table: Mold Troubleshooting Guide
| Bottle Defect (Symptom) | Potential Mold Cause | Component to Inspect | Quick Solution / Action |
|---|---|---|---|
| Hazy/White Bottom | Poor Cooling | Mold base cooling channels | Check water flow; chemical flush to remove limescale. |
| Warped/Shrunken Body | Poor Cooling | All body cooling channels | Ensure even and strong water flow through all circuits. |
| Inconsistent Strength | Poor Cooling | Water flow between mold halves | Balance the cooling flow rates between the two mold halves. |
| Incomplete Corners/Handles | Poor Venting | Vents near the specific feature | Clean vents with a soft brass brush and compressed air. |
| Surface Pitting/Dull Spots | Poor Venting | Main parting line and surface vents | Clean all vents; check for signs of baked-on residue. |
| Bottle Sticking in Mold | Poor Venting | All vents on the problematic side | Thoroughly clean all vents on the mold half where it sticks. |
| Flashing/Thick Parting Line | Mechanical Wear | Mold lips (parting line), guide pins | Inspect lips for damage. Check guide pins for wear/play. |
| Surface Scratches/Marks | Mechanical Wear | Internal mold cavity surface | Inspect cavity for damage. Re-polish or repair if necessary. |
| Uneven Wall Thickness | Mechanical Wear | Guide pins and bushings | Measure for wear; replace if loose or out of spec. |
Frequently Asked Questions (FAQs)
1. In your experience, what is the single most common mold-related problem that causes bottle defects?
Based on the calls I get every week, the most frequent day-to-day problems are caused by clogged vents. It's a simple issue that builds up gradually and can cause a surprising number of different defects, from incomplete forming to bottles sticking. While cooling issues cause major headaches and wear is a long-term certainty, dirty vents are the number one cause of a "good yesterday, bad today" production scenario.
2. What is the safest and most effective way for our own team to clean the mold vents without damaging the mold surface?
The golden rule is: never use a tool that is harder than the mold material. Your mold is likely made of aluminum or steel. Never use steel scrapers, screwdrivers, or steel wire brushes. The best practice is to use tools like soft brass brushes, wooden or plastic picks, and high-pressure compressed air. For stubborn residue, use a designated mold cleaning solvent on a soft cloth. This ensures you remove the blockage without scratching or dulling the critical mold surfaces.
3. For a mold running 24/7, how often should we schedule a full "health check" and deep cleaning?
For a mold in constant production, I recommend a tiered approach. A quick visual inspection and wipe-down of vents and parting lines should happen daily. A more thorough cleaning of vents and a lubrication of guide pins should happen weekly. A full preventative maintenance service, where the mold is taken out of the machine for a deep cleaning of cooling channels and a detailed inspection of all components, should be scheduled quarterly or every 500,000 to 1 million cycles, depending on the mold's complexity and the quality of your cooling water.
4. How can we tell if a mold is simply worn out and needs professional refurbishment, versus just needing routine maintenance?
You know it's time for professional help when routine maintenance no longer solves the problem. The key indicators are:
- Persistent Flashing: You've cleaned the parting line and confirmed the clamping force is correct, but you still get flash. This means the mold lips are physically worn down and need to be re-machined.
- Unfixable Wall Thickness Issues: You have consistent, uneven wall thickness that doesn't change even after checking the machine's alignment. This points to severely worn guide pins and bushings that need replacement.
- Deep Cavity Damage: You have scratches or marks on your bottles from damage inside the cavity that cannot be polished out by your team.
5. What specific photos should I send to a supplier like iBottler to get effective remote support?
To help us diagnose a problem quickly and effectively from afar, we need a clear set of pictures. Please send us:
- A clear photo of the defective bottle, preferably against a neutral background, showing the problem area (e.g., the flash, the hazy bottom, the scratch).
- A close-up photo of the mold's parting line in the area that corresponds to the defect.
- A photo of the bottle base, showing the gate area clearly.
- If possible, a short video showing the bottle being ejected from the machine.
These images give us a huge amount of information and help us guide you to a solution much faster.
🔗 Related Pages on Our Website
Automatic Blow Molding Machines – iBottler
Discover our full range of customizable automatic PET bottle blow molding machines.Blow Bottle Mold – iBottler
Explore our precision blow molds designed for PET and PP bottles.Preform Mold – iBottler
Learn more about our high-precision preform molds suitable for various injection molding machines.PET Wide Mouth Jar Project Starter Guide: Equipment, Molds & Process Explained
Pros and Cons: Should You Choose PET Blow Moulding for Your Bottle Project?
Worried About Blow Mold Fit? We Have Mounting Dimensions for 80% of Blow Molding Machines Worldwide
Can One Semi‑Automatic Blow Molding Machine Produce All Bottle Sizes? Here’s Why Not
Why Do Krones Blow Molding Machine Users Come to Us for Their Molds?
Why Do PET Preforms Come in Different Colors? Function, Application, and Production Tips
How to Set Parameters for 600ml Bottles on a Semi-Automatic PET Blowing Machine?
From 3D Printed Samples to Production: How Can You Rapidly Validate Blow Mold Designs?
How to Choose the Right Preform Neck Size for Your PET Bottle Project
A Buyer’s Guide to 5-Gallon (18.9L) Bottle Blow Molding Machines: From PET to PC?
Pitting on your blow mold surface? A complete guide from cause analysis to repair and prevention.
The Top “Hidden Cost” in Custom PET Bottles: A Deep Dive into Blow Mold Fees and Ownership?
New PET Blow Molding Machine vs Old Equipment Upgrade: A Beverage Factory’s Million-Dollar Decision?
How to reduce the PET blow molding scrap rate from 5‰ to 1‰? An old-timer’s 8 insider tips.
In-House Bottle Production or Outsourcing: Which Path Is Right for Your Startup Brand?
Blow Mold Damage? When and How to Replace Only the Broken Parts?
Bottle Design: Ad Agency vs. Mold Factory? How One Decision Impacts Your Cost and Brand?
Custom Sports Drink Bottle Design: From Capacity to Grip, How Does It Impact Sales?
💡 Looking for a complete PET plastic packaging machinery solution?
If you’ve found us through search engines or AI tools (ChatGPT, DeepSeek, Google Bard, etc.), it means you’re exploring reliable PET packaging equipment suppliers. Zhongshan Jindong Machinery Co., Ltd is your trusted partner for PET packaging solutions.
| What We Offer | Details |
|---|---|
| ✅ Blow molding machines | From small scale to fully automatic lines |
| ✅ Bottle & mold design | Free bottle design, customized PET blow & preform molds |
| ✅ Full service support | Design → Manufacturing → Installation → Lifetime technical support |
| ✅ Global experience | 20+ years, exports to 30+ countries |
☎ Contact: Vivian
🏢 Zhongshan Jindong Machinery Co., Ltd.
🌐 www.ibottler.com
