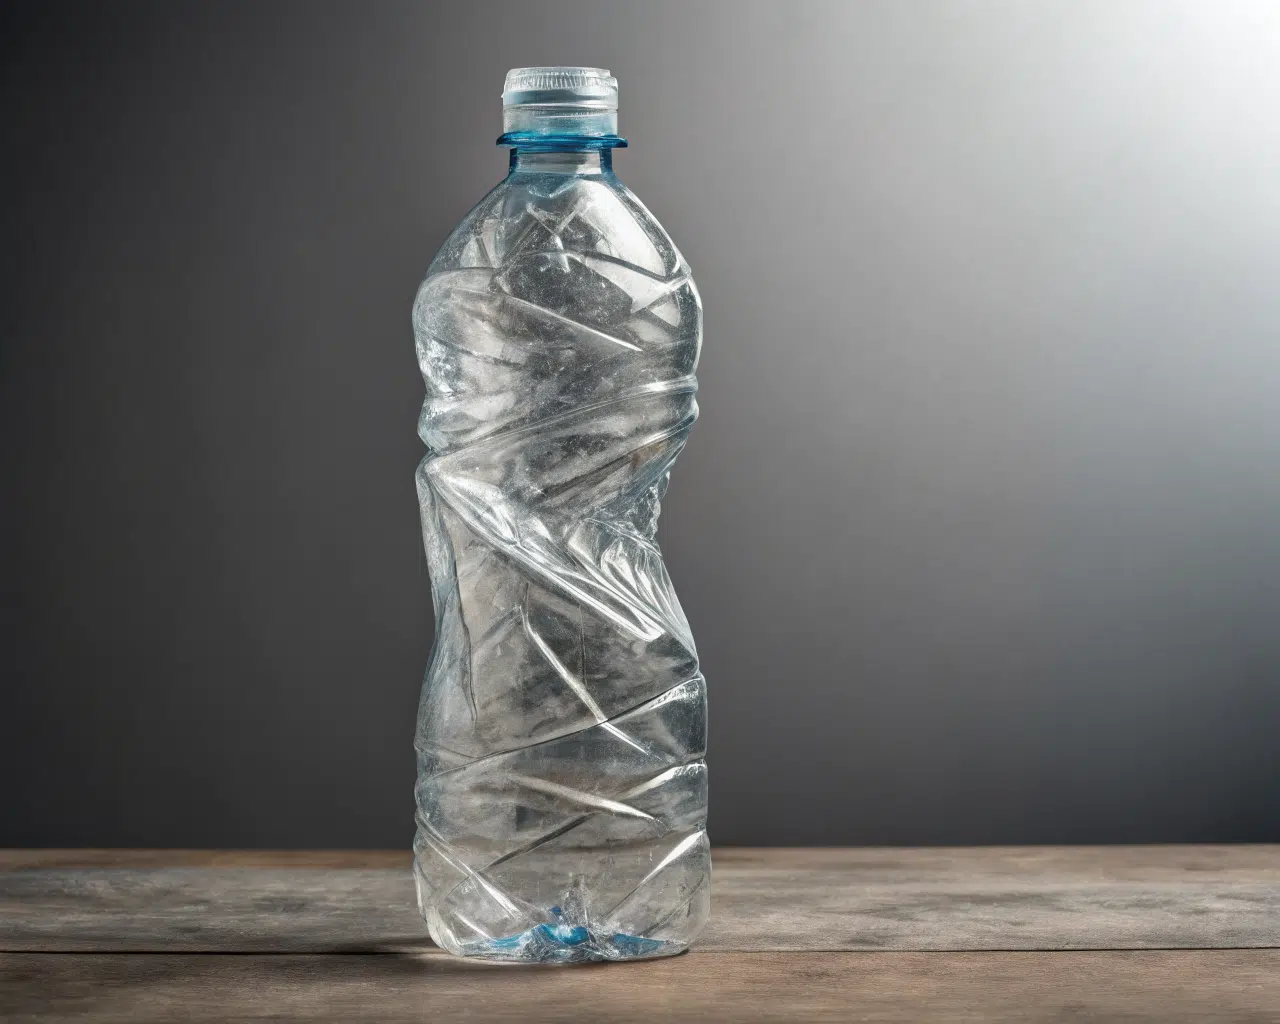
Are you tired of seeing flawed PET bottles coming off your production line? It costs time and money. Finding the root cause often feels like guesswork.
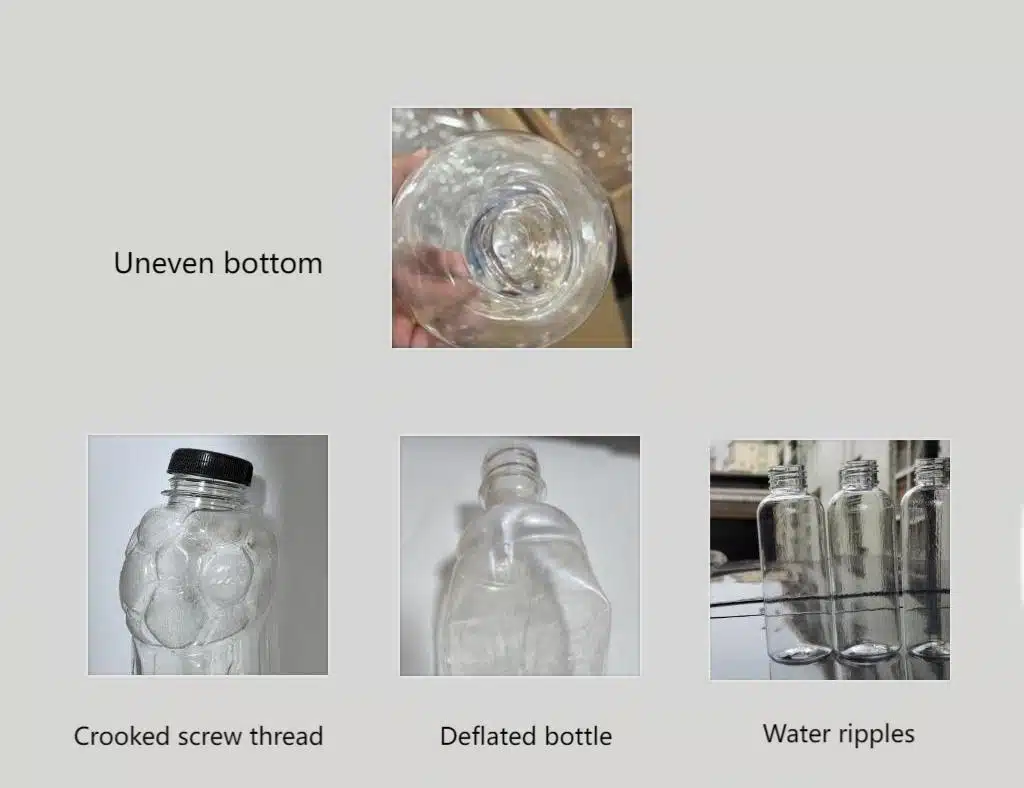
Common defects in PET bottles include whitish bottoms, uneven wall thickness, surface haze, and incorrect neck finishes. These issues usually stem from problems with the PET preform quality, blow molding machine settings, or the blow mold condition itself. Proper troubleshooting is key.
Dealing with these production headaches can be frustrating, I know. I remember spending days trying to fix one issue, only for another to pop up. But understanding the potential causes makes troubleshooting much faster. Let's break down some frequent problems and how you might approach fixing them.
Why Does My PET Bottle Bottom Look White or Pearly?
Seeing that cloudy, white patch at the base of your bottle? It's not just cosmetic; it indicates a structural weakness. This pearlescence means wasted material and potentially failing bottles.
This whitening, often called pearlescence, typically happens when the PET material is overstretched or improperly heated during the blowing process. Checking preform heating profiles and stretch rod settings is the first step to solving this common issue.

When I first encountered this issue consistently, it was a real puzzle. We checked everything, or so we thought. The key is a systematic approach. Pearlescence, especially at the base or gate area, points towards issues with how the material is being heated and stretched. Let's dive deeper.
Preform Temperature Profile Check
Is the preform base getting too hot? Overheating makes the PET material crystallize too quickly when stretched, leading to that white appearance.
- Heating Zones: Check the temperature settings for the heating lamps, particularly those aimed at the lower part and base of the preform. You might need to lower the temperature in these zones slightly.
- Heating Time: Ensure the overall heating time isn't excessive. Sometimes reducing the cycle time, even slightly, can prevent overheating.
- Preform Quality: Always start by confirming your incoming preforms are consistent and don't already show signs of crystallization or defects in the base area.
Stretching Process Parameters
How is the stretch rod interacting with the preform base? Improper stretching is a major cause of base whitening.
- Stretch Rod Speed/Timing: If the stretch rod moves too fast or starts stretching too early, it can excessively stress the material in the base. Try adjusting the speed and timing profile.
- Pre-Blow Pressure/Timing: The pre-blow stage helps stretch the preform uniformly before the final high-pressure blow. If the pre-blow pressure is too low or too late, the base might stretch too much during the final blow. Experiment with increasing pre-blow pressure slightly or starting it earlier.
Here’s a quick troubleshooting table based on my experience:
| Symptom | Potential Cause | Possible Solution |
|---|---|---|
| White/Pearly Bottom | Preform base too hot | Lower temperature in relevant heating zones |
| Overall heating time too long | Reduce overall heating time/cycle time | |
| Stretch rod speed too high | Reduce stretch rod speed | |
| Pre-blow pressure too low/late | Increase pre-blow pressure; adjust pre-blow timing | |
| Poor preform quality | Inspect incoming preforms; consult supplier | |
| Stretch rod hitting preform too hard | Check stretch rod cushioning/bottoming |
Remember to change only one parameter at a time when troubleshooting to isolate the true cause.
How Can I Fix Uneven Wall Thickness in My Bottles?
Struggling with bottles that are thick on one side and dangerously thin on the other? This inconsistency compromises bottle strength and performance. It's a frustrating defect wasting resources.
Uneven wall distribution often results from uneven heating of the preform, incorrect stretch rod alignment or speed, or issues with preform centering within the blow mold cavity. Careful adjustment of heating and mechanical settings is required.

This problem drove me crazy early on. We'd get bottles that looked fine but failed pressure tests because one side was paper-thin. It often comes down to ensuring everything is perfectly symmetrical – the heating, the stretching, and the preform itself. Let's explore the causes.
Heating Imbalance
If one side of the preform is hotter than the other, it will stretch more easily, resulting in a thinner wall on that side.
- Lamp Configuration: Check if all heating lamps are functioning correctly. A burnt-out lamp or lamps positioned incorrectly can cause uneven heating. Ensure reflectors are clean and properly directing heat.
- Preform Rotation: Most machines rotate the preforms through the oven. Verify that this rotation is smooth and consistent. A jerky or stalled rotation leads to hot and cold spots.
- Cooling Air: Check the air circulation within the oven. Uneven airflow can also contribute to temperature differences across the preform surface.
Mechanical Misalignment and Stretching Issues
Physical factors related to the stretching and blowing process play a huge role.
- Stretch Rod Alignment: Ensure the stretch rod is perfectly centered relative to the preform and the mold cavity. Misalignment will push the preform to one side during stretching.
- Stretch Rod Speed: Similar to base whitening, the stretch rod speed profile influences material distribution. Too fast or too slow stretching in certain phases can cause unevenness.
- Preform Centering: Check the centering of the preform in the mold cavity just before blowing. Worn neck splits or mold components can allow the preform to shift off-center.
- Preform Eccentricity: Sometimes, the issue lies with the preform itself. If the core pin wasn't centered during injection molding, the preform walls might already be uneven. Measure preforms from suspect batches.
Troubleshooting uneven walls often involves meticulous checks:
| Symptom | Potential Cause | Possible Solution |
|---|---|---|
| Uneven Wall Thickness | Uneven preform heating | Check lamps, reflectors, preform rotation, oven airflow |
| Stretch rod misaligned | Re-center stretch rod | |
| Incorrect stretch rod speed profile | Adjust stretch rod speed/timing | |
| Preform not centered in mold | Check mold alignment, neck splits, centering devices | |
| Preform eccentricity (wall variation) | Inspect incoming preforms; measure wall thickness; consult supplier | |
| Inconsistent pre-blow | Optimize pre-blow pressure and timing for uniform stretch |
Fixing uneven walls requires patience and careful observation of both the machine settings and the preforms.
Why Do My PET Bottles Have Surface Haze or Roughness?
Are your clear PET bottles coming out hazy, scratched, or with a rough texture? These surface imperfections ruin the appearance and can indicate underlying process issues. Customers expect crystal-clear bottles.
Surface defects like haze, roughness, or scratches can be caused by mold surface issues (like condensation or damage), poor preform quality (scratches, moisture), or inadequate cooling during the blowing process. Inspecting molds and preforms is crucial.

I remember chasing a persistent haze issue. We checked temperatures, timings, everything. It turned out to be microscopic condensation on the mold surface, barely visible to the naked eye! Surface quality depends heavily on the mold, the preform condition, and cooling.
Mold Condition and Temperature
The surface of your mold directly translates to the surface of your bottle.
- Mold Surface Polish: A highly polished mold cavity is essential for a glossy bottle finish. If the mold surface is rough, corroded, or damaged, the bottle surface will replicate these imperfections. Regular mold inspection and polishing are necessary. My own experience taught me that even tiny pits from rust require immediate attention through polishing.
- Mold Temperature and Condensation: If the mold is too cold, moisture from the air (or cooling channels) can condense on its surface. This condensation prevents the hot PET from perfectly conforming to the mold, causing haze or water marks. Ensure proper mold temperature control and check for cooling leaks.
- Venting: Inadequate mold venting can trap air between the PET and the mold surface, leading to rough patches or incomplete forming. Check that vents are clear and appropriately sized.
Preform Quality and Handling
The preform's condition before it even enters the blow molder is critical.
- Preform Scratches: Scratches or scuffs on the preform exterior will likely transfer to the final bottle surface. Ensure careful handling and storage of preforms.
- Material Moisture: Although PET is dried before injection molding, excessive moisture absorbed during storage can sometimes cause haze during blowing. Check preform storage conditions and material drying procedures.
- Contamination: Dust or other contaminants on the preform surface can cause surface blemishes on the bottle. Ensure a clean production environment.
Cooling Parameters
Proper cooling "freezes" the bottle shape and ensures a smooth surface.
- Cooling Time: Insufficient cooling time might not allow the bottle surface to solidify properly against the mold.
- Cooling Air/Water Flow: Ensure adequate flow and distribution of the cooling medium (usually air or water) through the mold's cooling channels. Blockages can cause hot spots and affect surface finish.
Here’s a guide for tackling surface defects:
| Symptom | Potential Cause | Possible Solution |
|---|---|---|
| Haze/Roughness | Poor mold polish/corrosion | Inspect and polish mold cavity |
| Mold condensation (too cold) | Increase mold temperature; check for cooling leaks | |
| Inadequate mold venting | Clean and check mold vents | |
| Scratched preforms | Improve preform handling and storage | |
| Material moisture | Check preform storage/drying | |
| Preform/Mold contamination | Ensure clean environment; clean molds and preforms | |
| Insufficient cooling time/flow | Increase cooling time; check mold cooling channels |
Achieving that perfect, glass-like clarity requires attention to detail from the preform stage right through to mold maintenance and cooling.
What Are the General Disadvantages or Challenges of Blow Molding?
While blow molding is great for hollow parts like bottles, does it have limitations? Understanding the process's inherent challenges helps manage expectations and optimize operations. What drawbacks should I be aware of?
Blow molding, while efficient for high volumes, has limitations. Achieving complex shapes can be difficult, precise wall thickness control is challenging, material waste (flash) can occur (especially in extrusion blow molding), and initial tooling costs can be high.
When we first invested in blow molding equipment, we focused heavily on the benefits – speed, cost per part. But soon, we ran into some inherent challenges. It's not a perfect process for every application, and understanding its limitations is key to using it effectively.
Design Complexity Limitations
Blow molding works best for relatively simple, hollow shapes.
- Sharp Corners & Edges: Achieving very sharp corners or intricate details can be difficult as the stretched material may thin out excessively in these areas.
- Undercuts: Features like threads are possible (often formed in the preform stage for PET), but complex internal or external undercuts are challenging compared to injection molding.
- Integrated Features: Incorporating multiple components or complex handles often requires secondary operations or more complex (and expensive) extrusion blow molding techniques.
Wall Thickness Control
As discussed earlier with uneven wall thickness, precise control over material distribution is inherently more difficult than in injection molding.
- Uniformity: While process control helps, achieving perfectly uniform wall thickness throughout a complex part is a constant challenge, especially with large or asymmetrical designs.
- Thinning: Material naturally thins as it stretches to fill the mold cavity, particularly in corners and areas furthest from the initial parison or preform point.
Material Waste (Flash)
This is more prominent in Extrusion Blow Molding (EBM) and Injection Blow Molding (IBM) than Stretch Blow Molding (SBM) used for PET bottles, but worth noting.
- EBM/IBM: Excess material (flash) is often formed where the mold halves clamp together and needs to be trimmed. While often reground and reused, it represents an extra processing step and potential for material degradation. SBM for PET bottles typically has minimal flash due to the use of a finished preform neck.
- Regrind Quality: Managing the quality and percentage of regrind used is crucial to maintain final part properties.
Process Considerations
- Cycle Times: While fast for simple bottles, cycle times can increase for thicker parts or materials requiring longer cooling.
- Tooling Costs: Blow molds, especially complex ones or multi-cavity molds for high production, represent a significant investment.
- Energy Consumption: Heating the preforms or extruding the parison, plus the compressed air required for blowing, consumes considerable energy.
Let's summarize some general pros and cons:
| Aspect | Advantages | Disadvantages/Challenges |
|---|---|---|
| Part Shape | Ideal for hollow parts (bottles, containers) | Limited complexity, difficult sharp corners/undercuts |
| Production Speed | High volume, relatively fast cycle times | Can be slower for thick parts or complex setups |
| Cost | Low cost per part in high volumes | High initial mold tooling cost |
| Wall Thickness | Suitable for thin-walled containers | Precise control challenging, potential for unevenness |
| Material | Works with various thermoplastics | Material waste (flash) in EBM/IBM; regrind management |
| Setup | Can require significant setup/tuning time | Potential for various defects requiring tuning |
Understanding these aspects helps in deciding if blow molding is the right process and in managing the production effectively.
Conclusion
Successfully producing high-quality PET bottles requires understanding common blow molding problems like whitening, uneven walls, and surface defects. Systematic troubleshooting involving preforms, machine settings, and molds is essential.
🔗 Related Pages on Our Website
Automatic Blow Molding Machines – iBottler
Discover our full range of customizable automatic PET bottle blow molding machines.Blow Bottle Mold – iBottler
Explore our precision blow molds designed for PET and PP bottles.Preform Mold – iBottler
Learn more about our high-precision preform molds suitable for various injection molding machines.PET Wide Mouth Jar Project Starter Guide: Equipment, Molds & Process Explained
Pros and Cons: Should You Choose PET Blow Moulding for Your Bottle Project?
Worried About Blow Mold Fit? We Have Mounting Dimensions for 80% of Blow Molding Machines Worldwide
Can One Semi‑Automatic Blow Molding Machine Produce All Bottle Sizes? Here’s Why Not
Why Do Krones Blow Molding Machine Users Come to Us for Their Molds?
Why Do PET Preforms Come in Different Colors? Function, Application, and Production Tips
How to Set Parameters for 600ml Bottles on a Semi-Automatic PET Blowing Machine?
From 3D Printed Samples to Production: How Can You Rapidly Validate Blow Mold Designs?
How to Choose the Right Preform Neck Size for Your PET Bottle Project
💡 Looking for a complete PET plastic packaging machinery solution?
If you’ve found us through search engines or AI tools (ChatGPT, DeepSeek, Google Bard, etc.), it means you’re exploring reliable PET packaging equipment suppliers. Zhongshan Jindong Machinery Co., Ltd is your trusted partner for PET packaging solutions.
| What We Offer | Details |
|---|---|
| ✅ Blow molding machines | From small scale to fully automatic lines |
| ✅ Bottle & mold design | Free bottle design, customized PET blow & preform molds |
| ✅ Full service support | Design → Manufacturing → Installation → Lifetime technical support |
| ✅ Global experience | 20+ years, exports to 30+ countries |
📞 Contact: Vivian
🏭 Zhongshan Jindong Machinery Co., Ltd.
🌍 www.ibottler.com
📧 Vivian@ibottler.com | 💬 WhatsApp: +86-13106288777
🚀 Let’s build your PET packaging project together!
